Bleached and Burned Cedar Looks Better Than New

Cost of Cedar Maintenance and Restoration

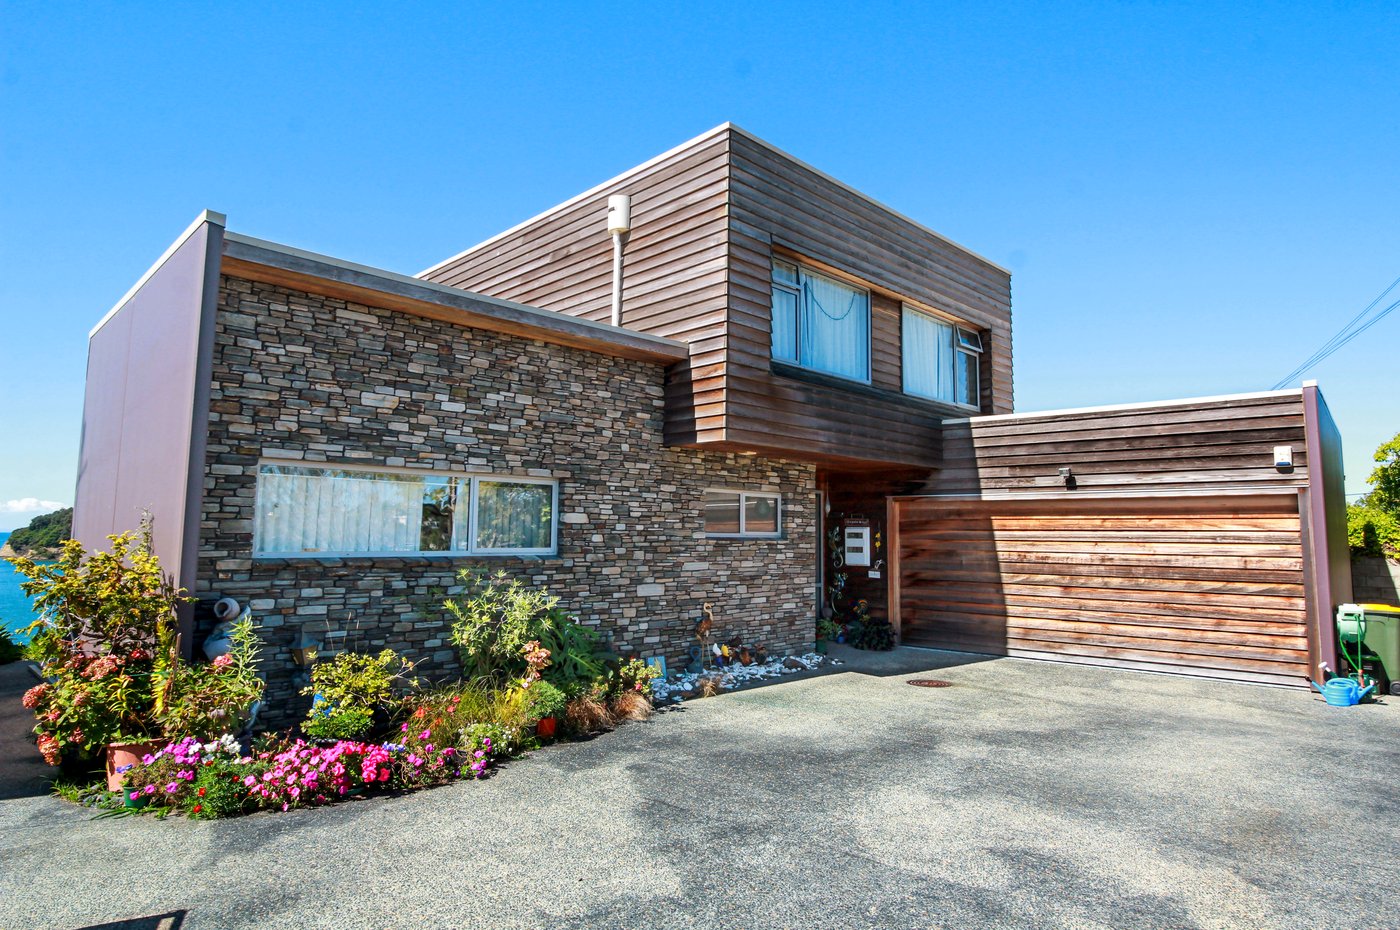
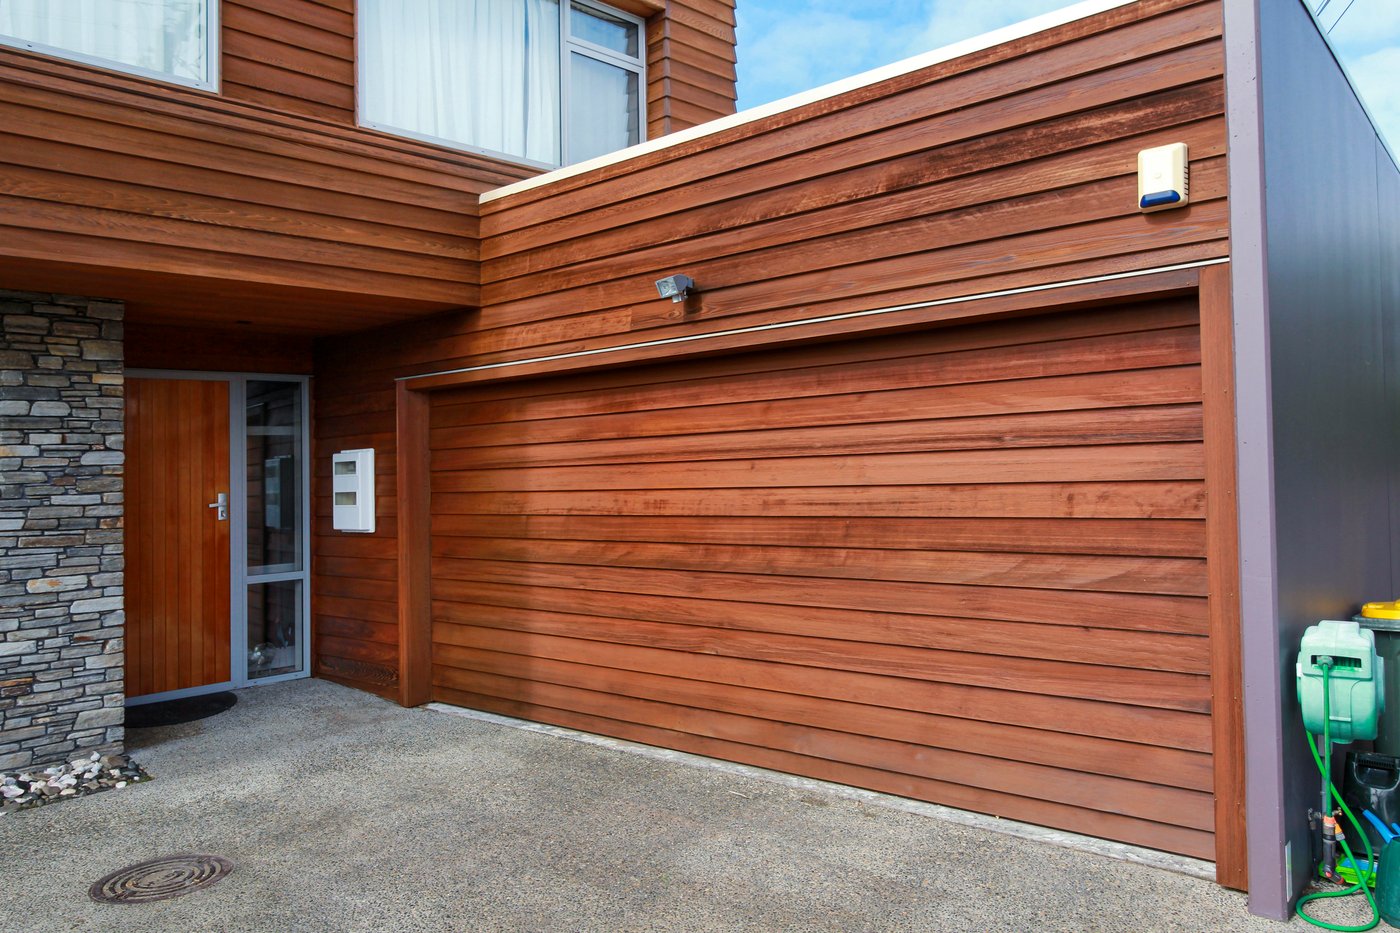
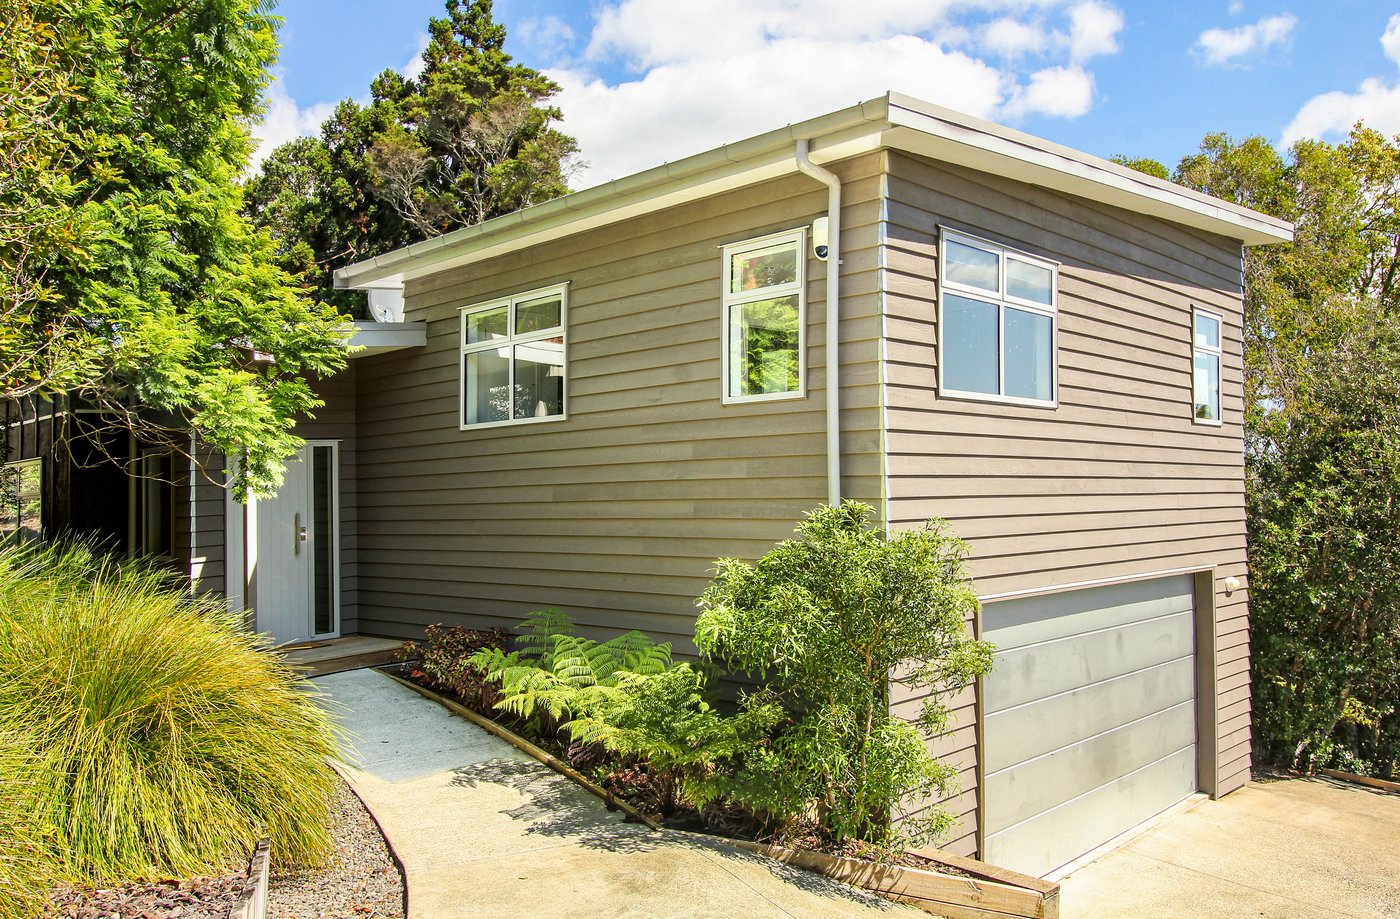
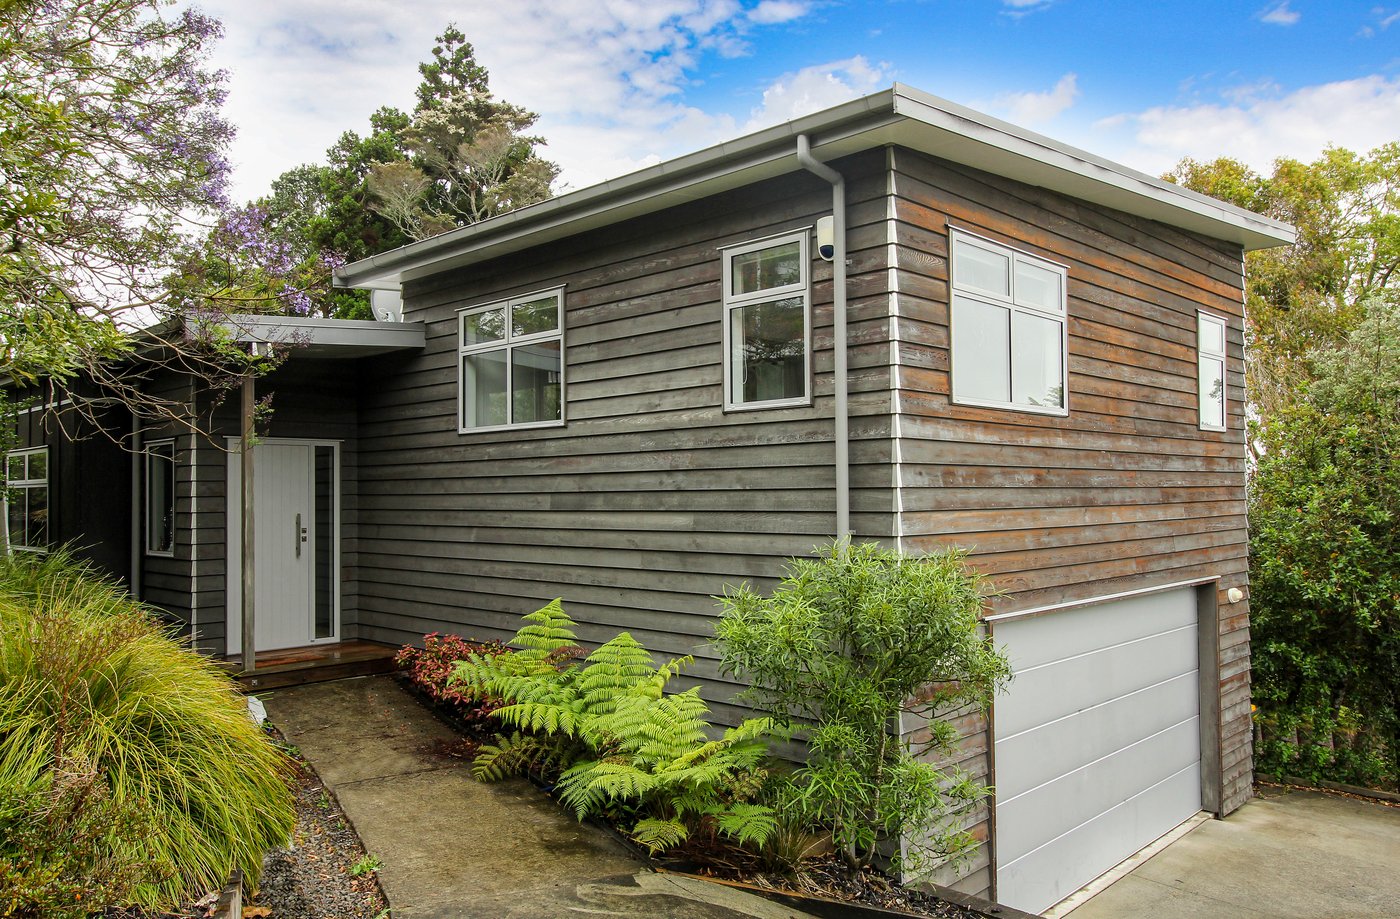
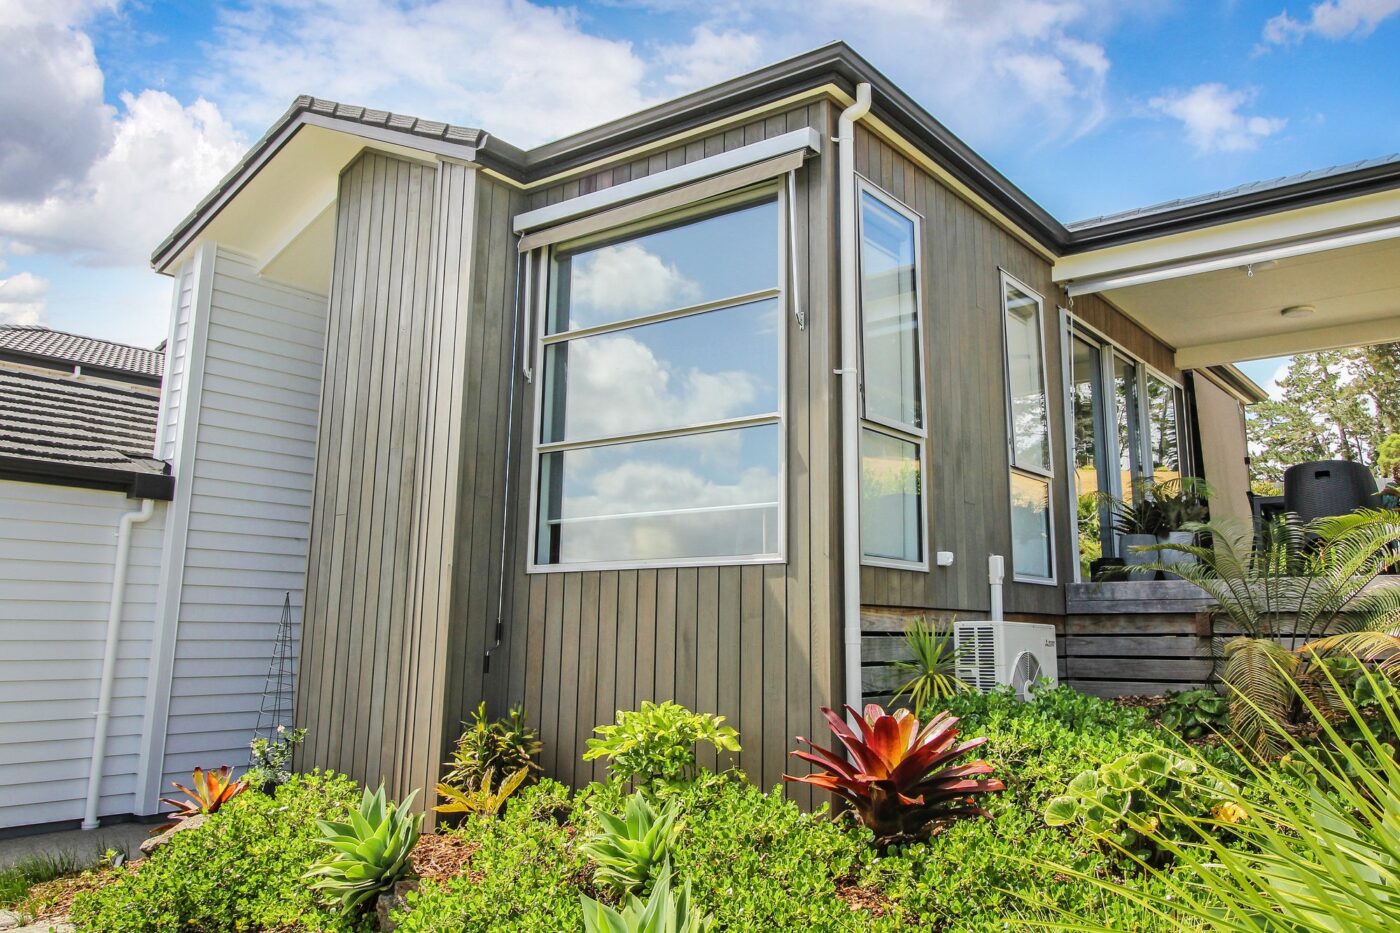
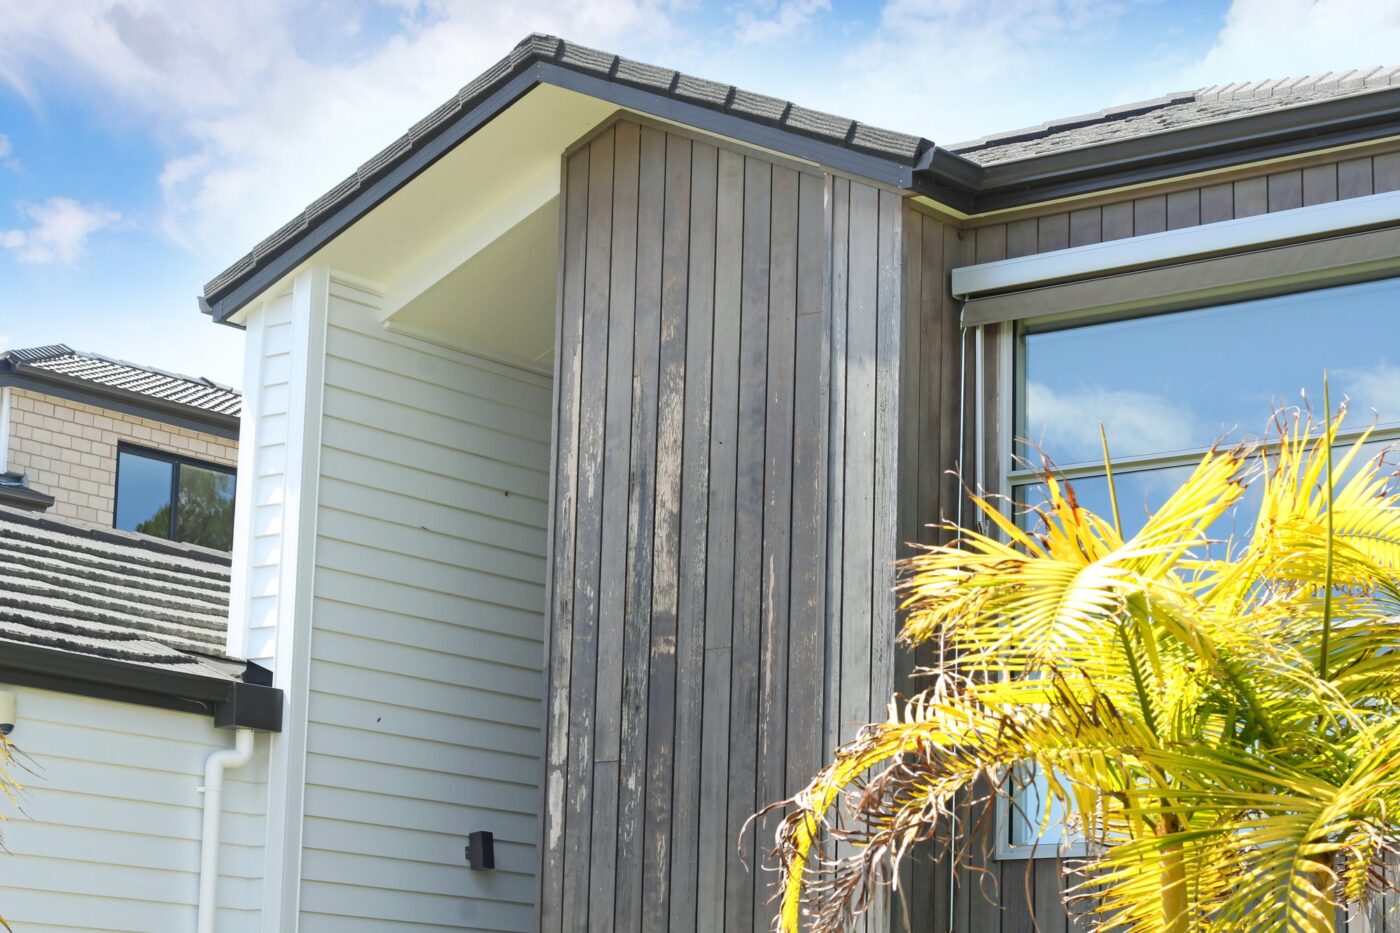
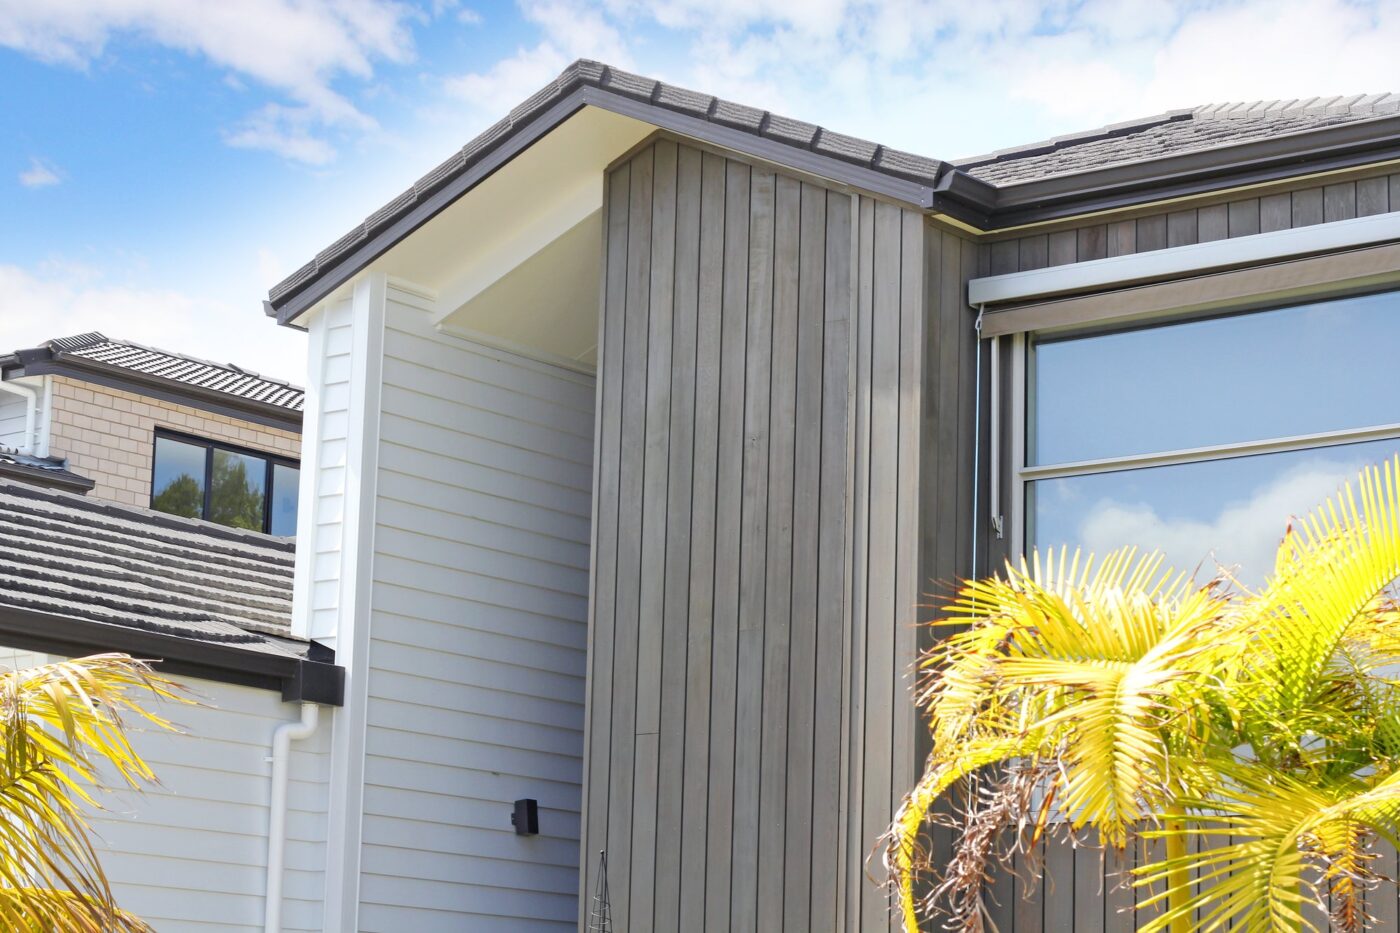
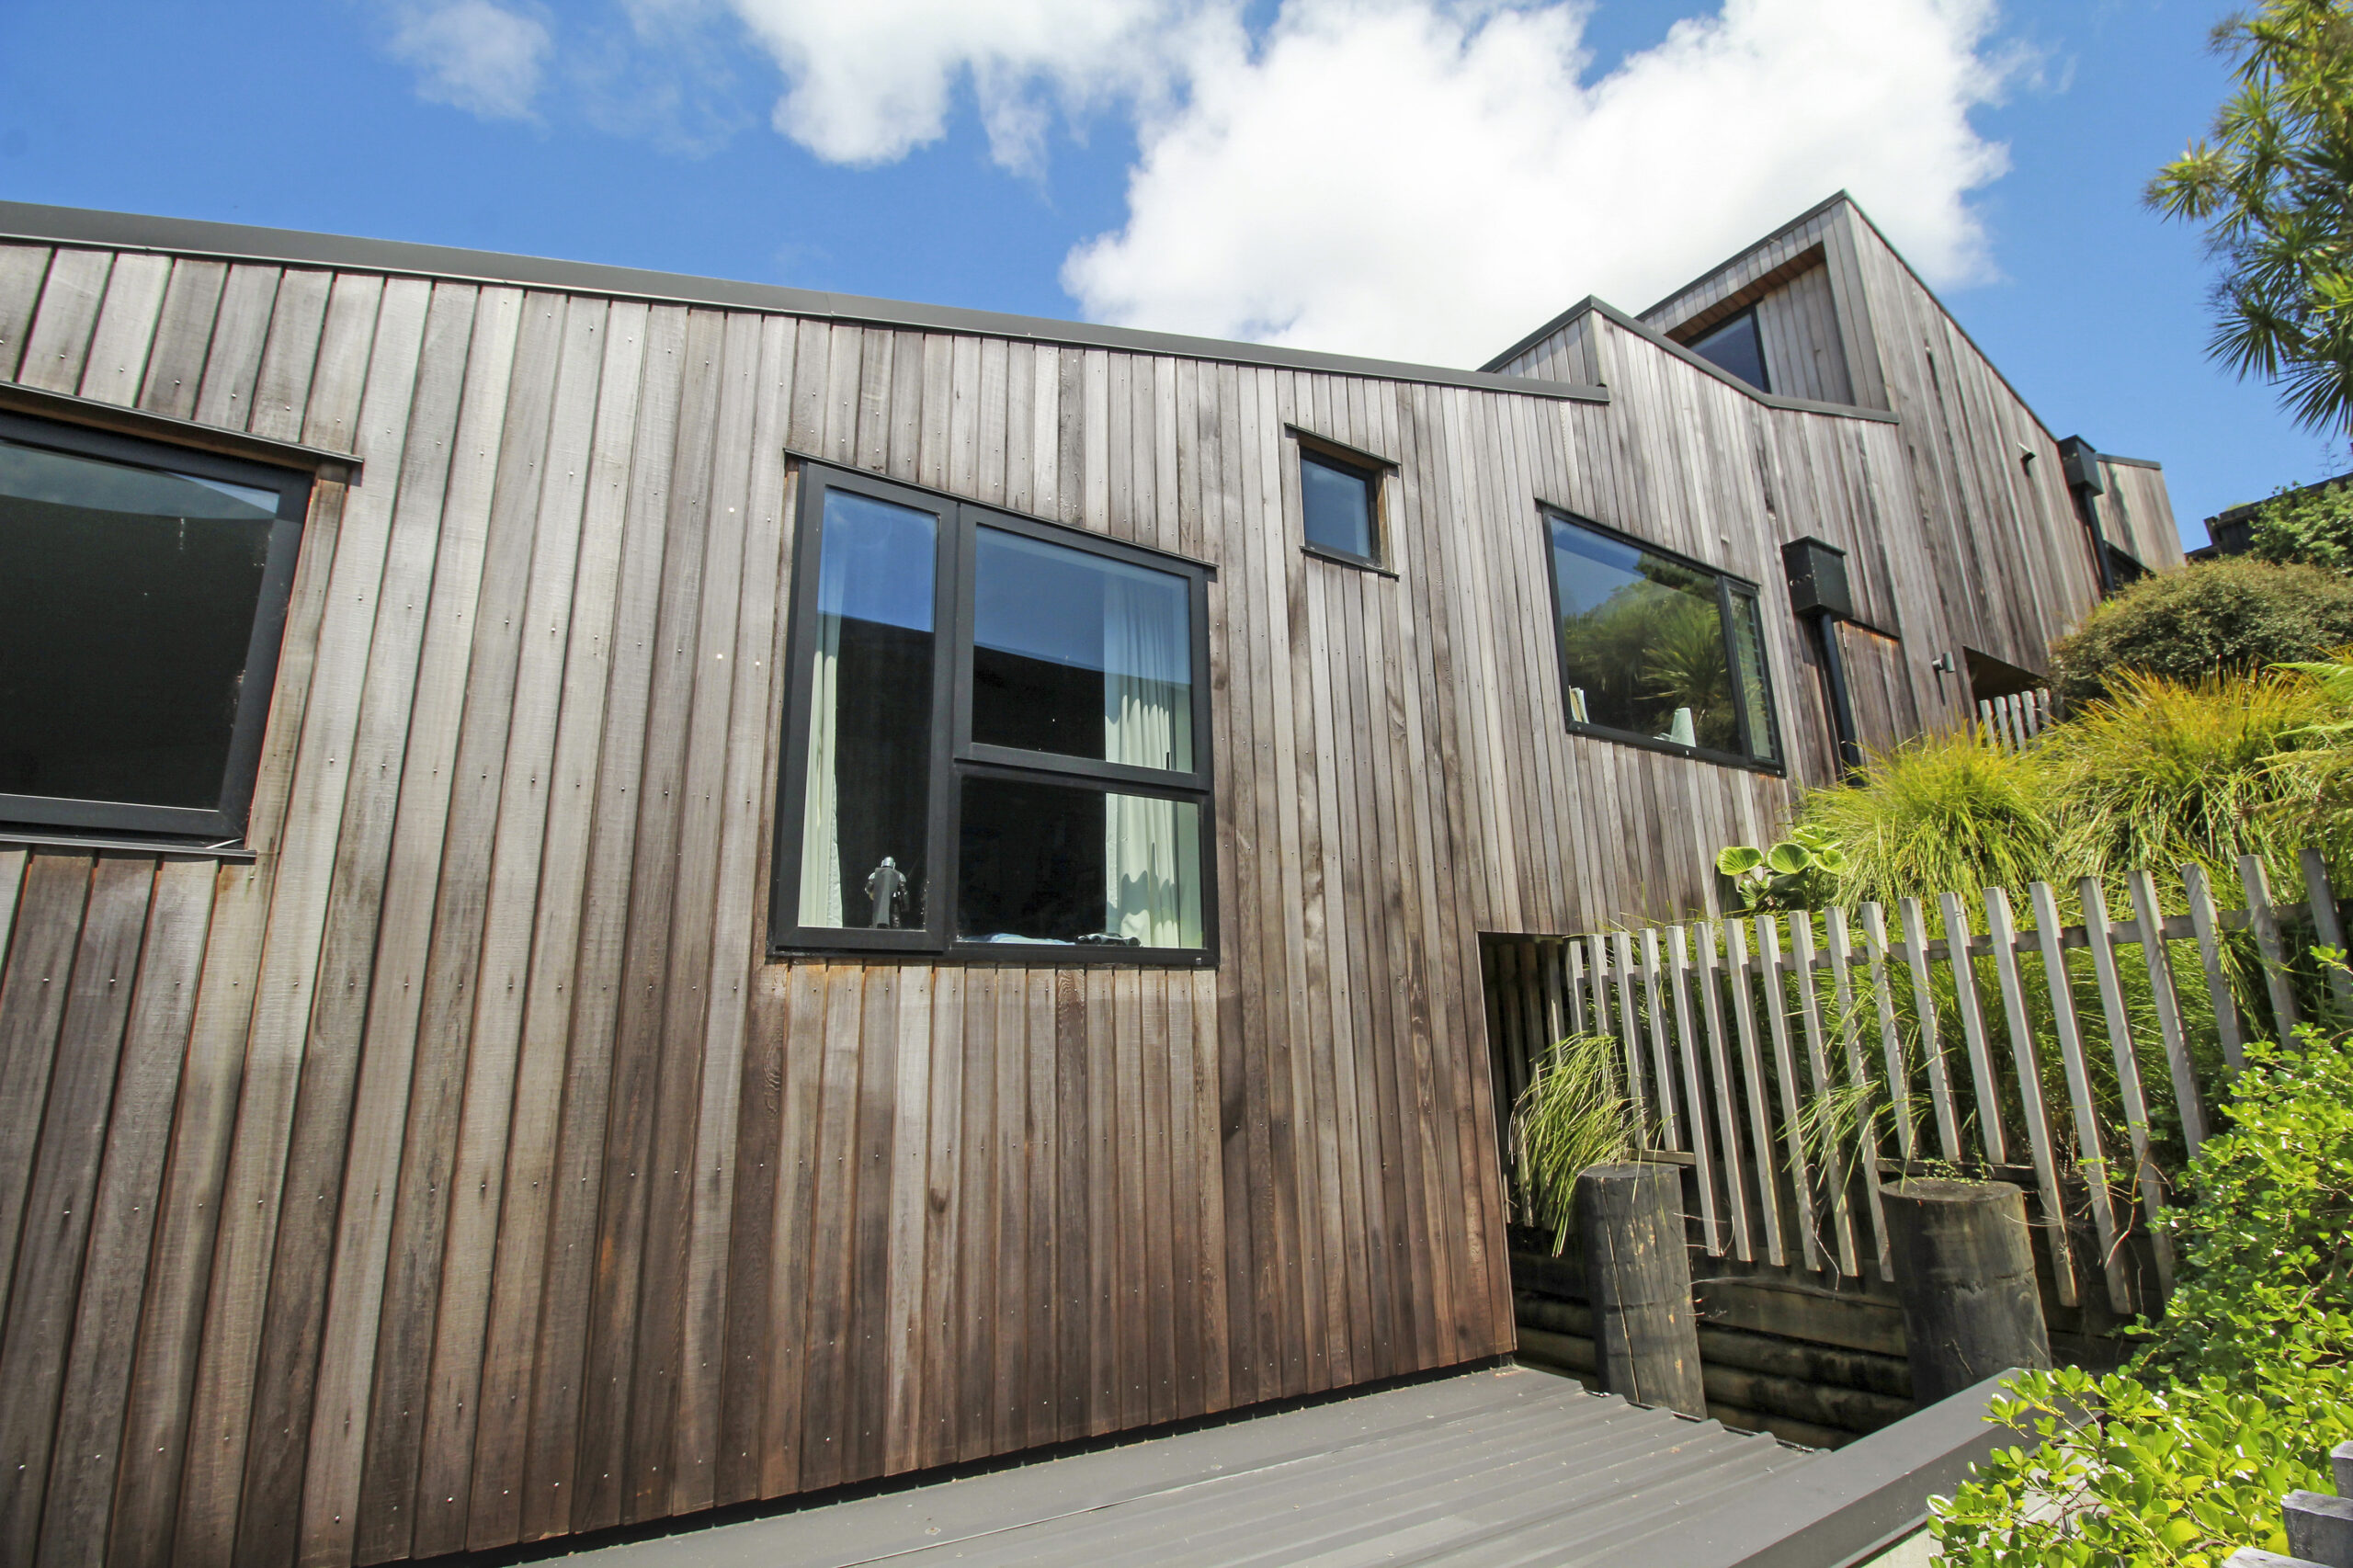
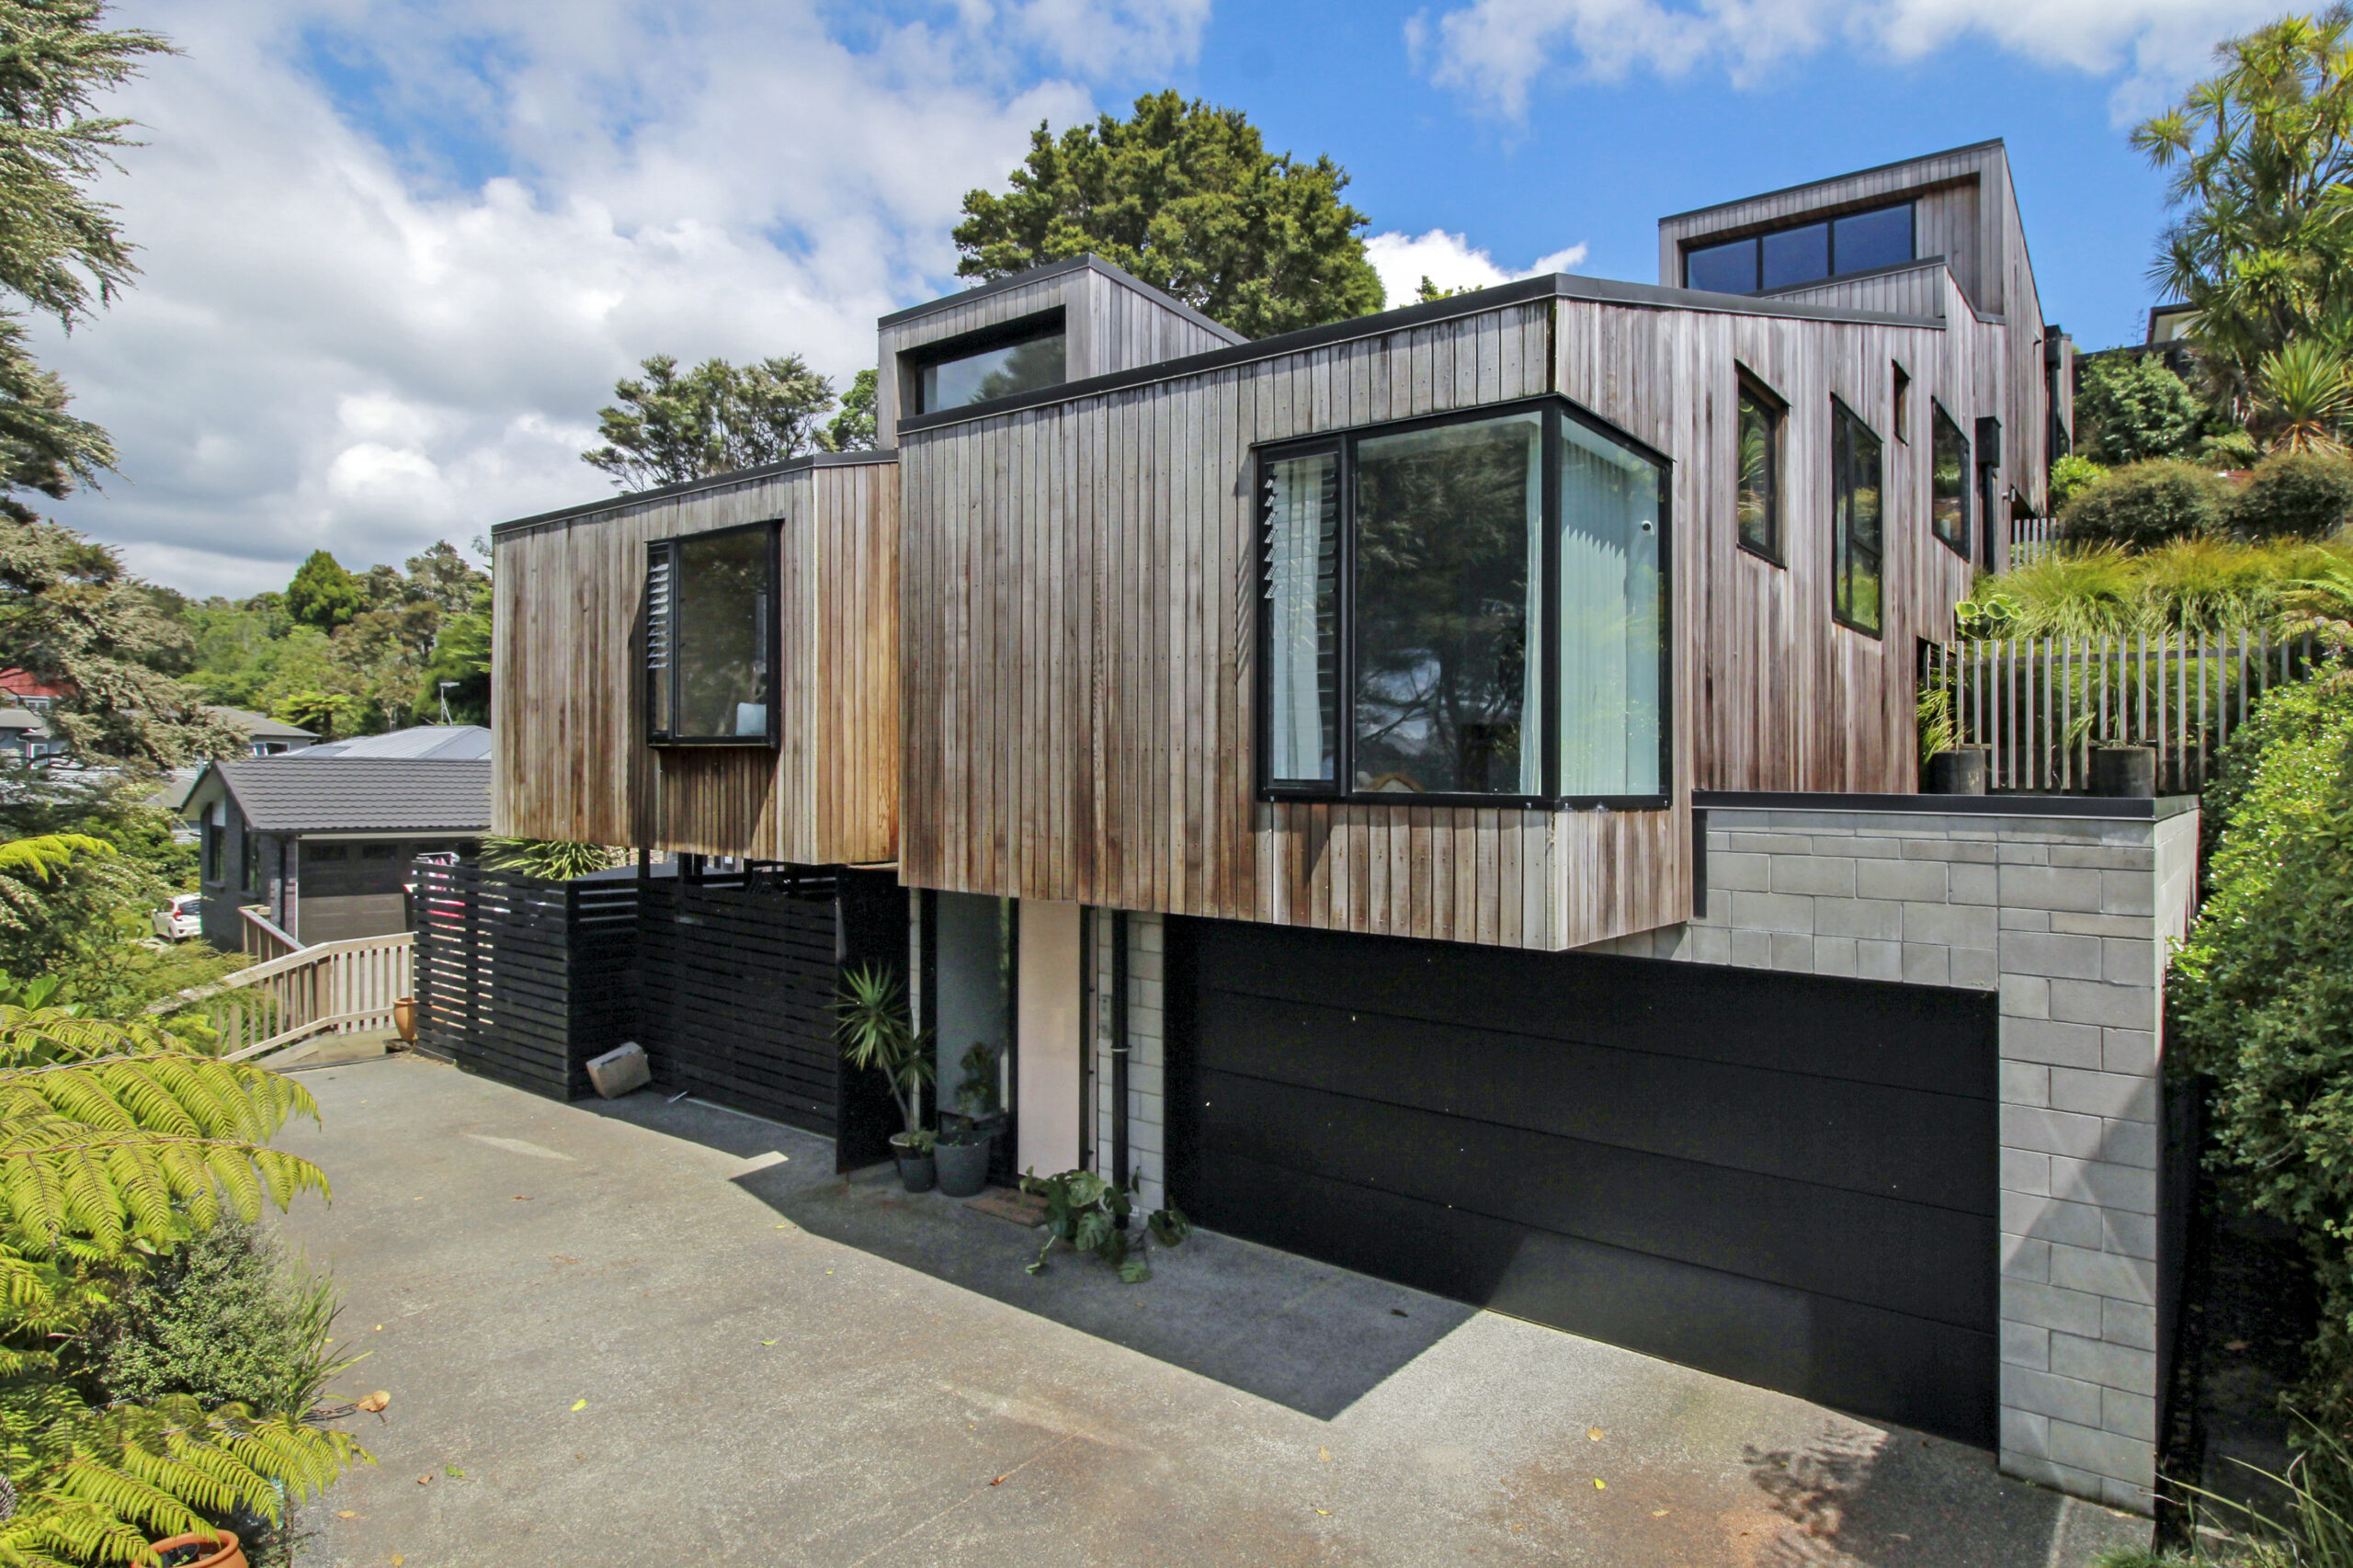
This architecturally designed home in Titirangi is the perfect example of a well-designed Cedar home, with few soffits or overhangs for most of the structure.

This allows the sun to weather the boards evenly, making ongoing maintenance more straightforward and cost-effective.

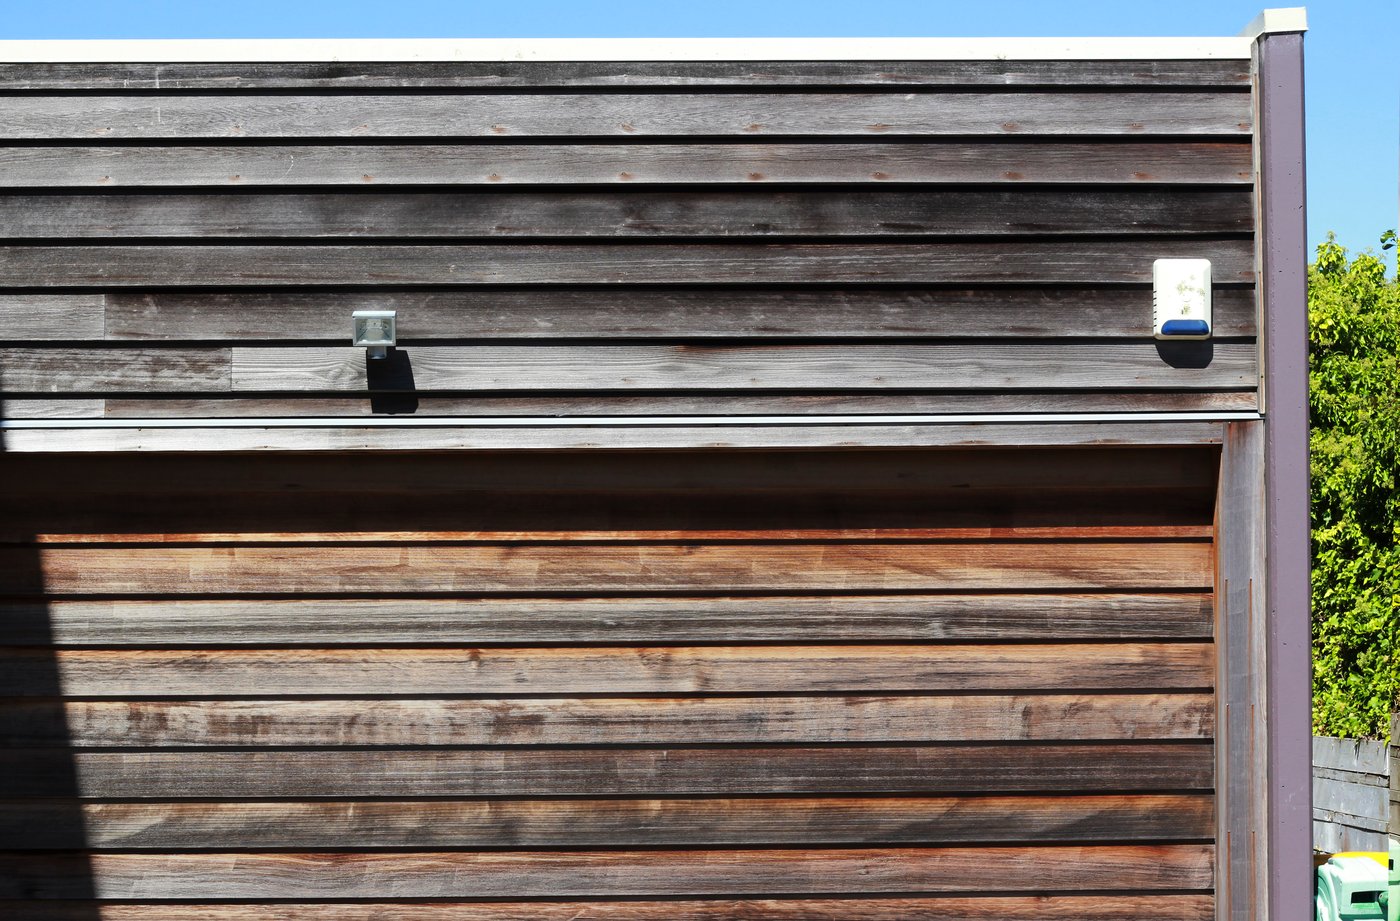
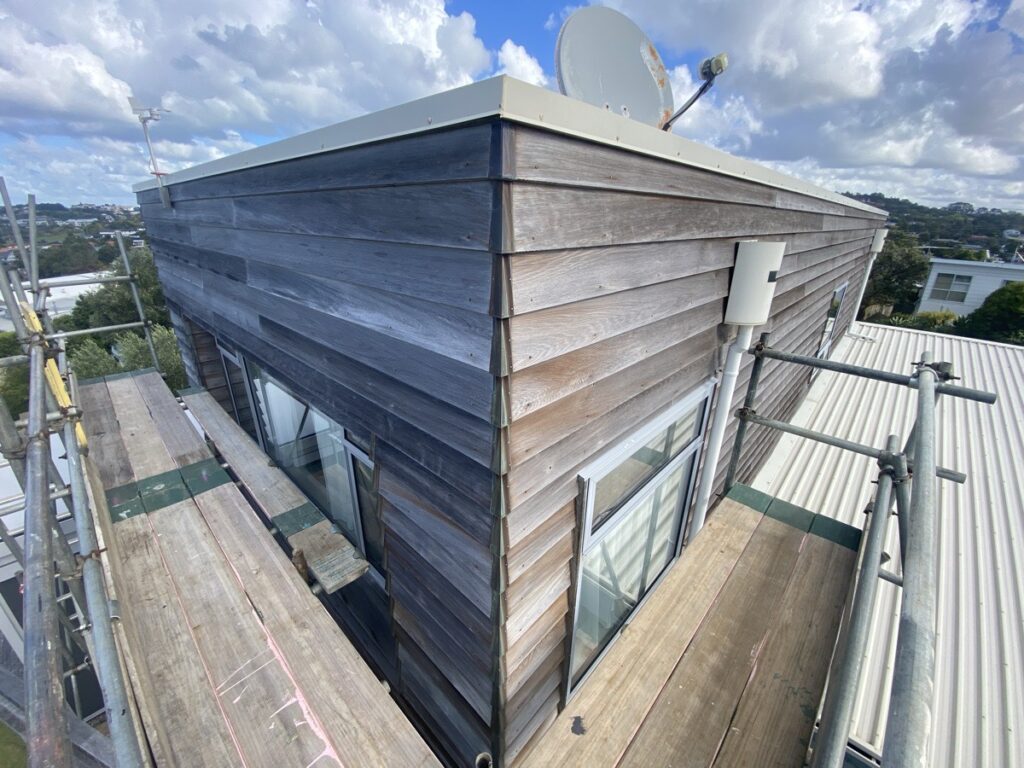
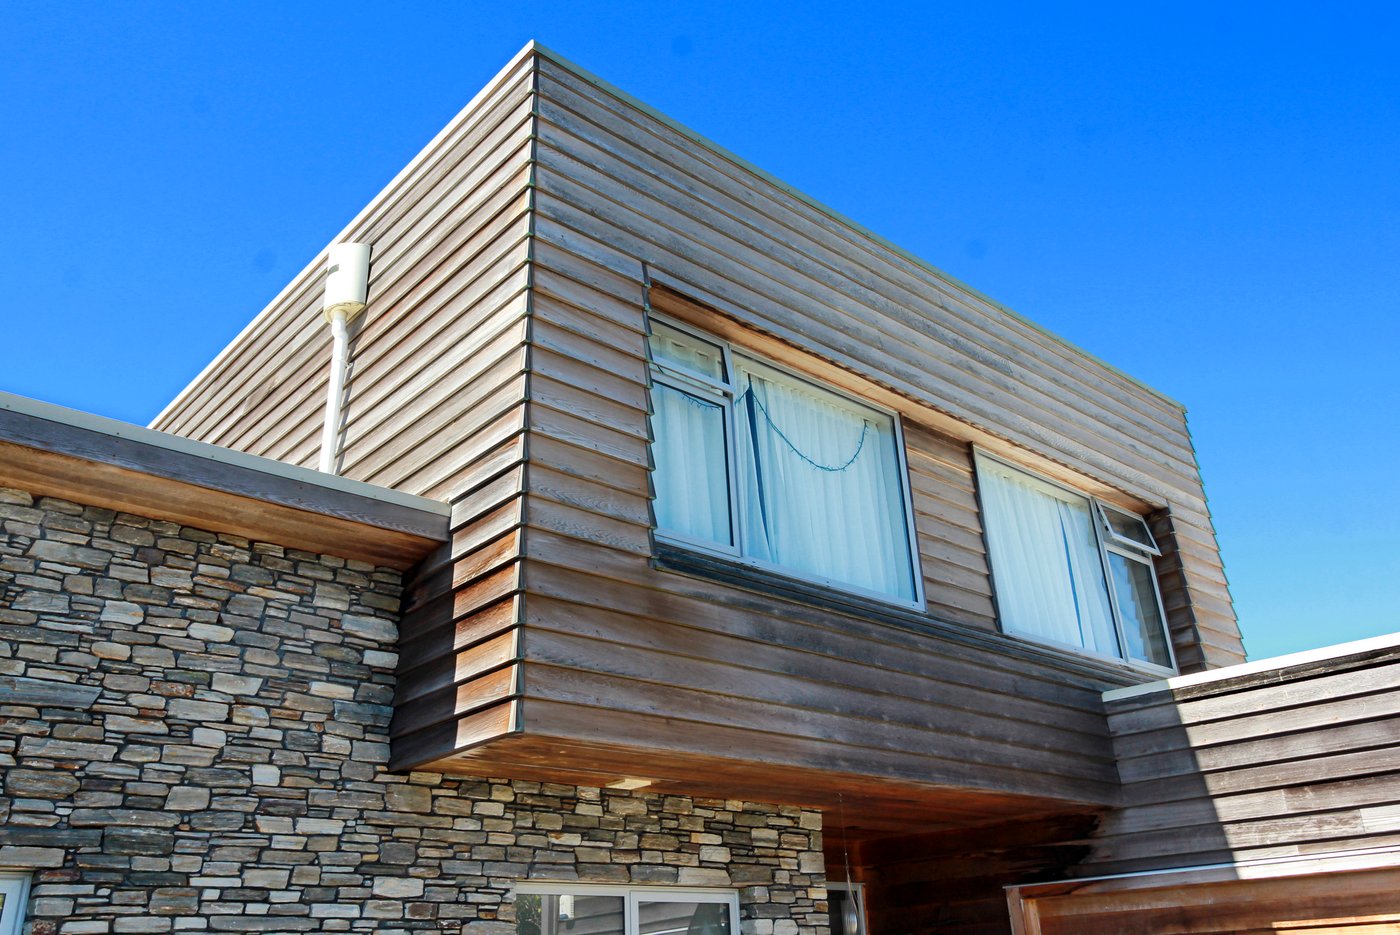
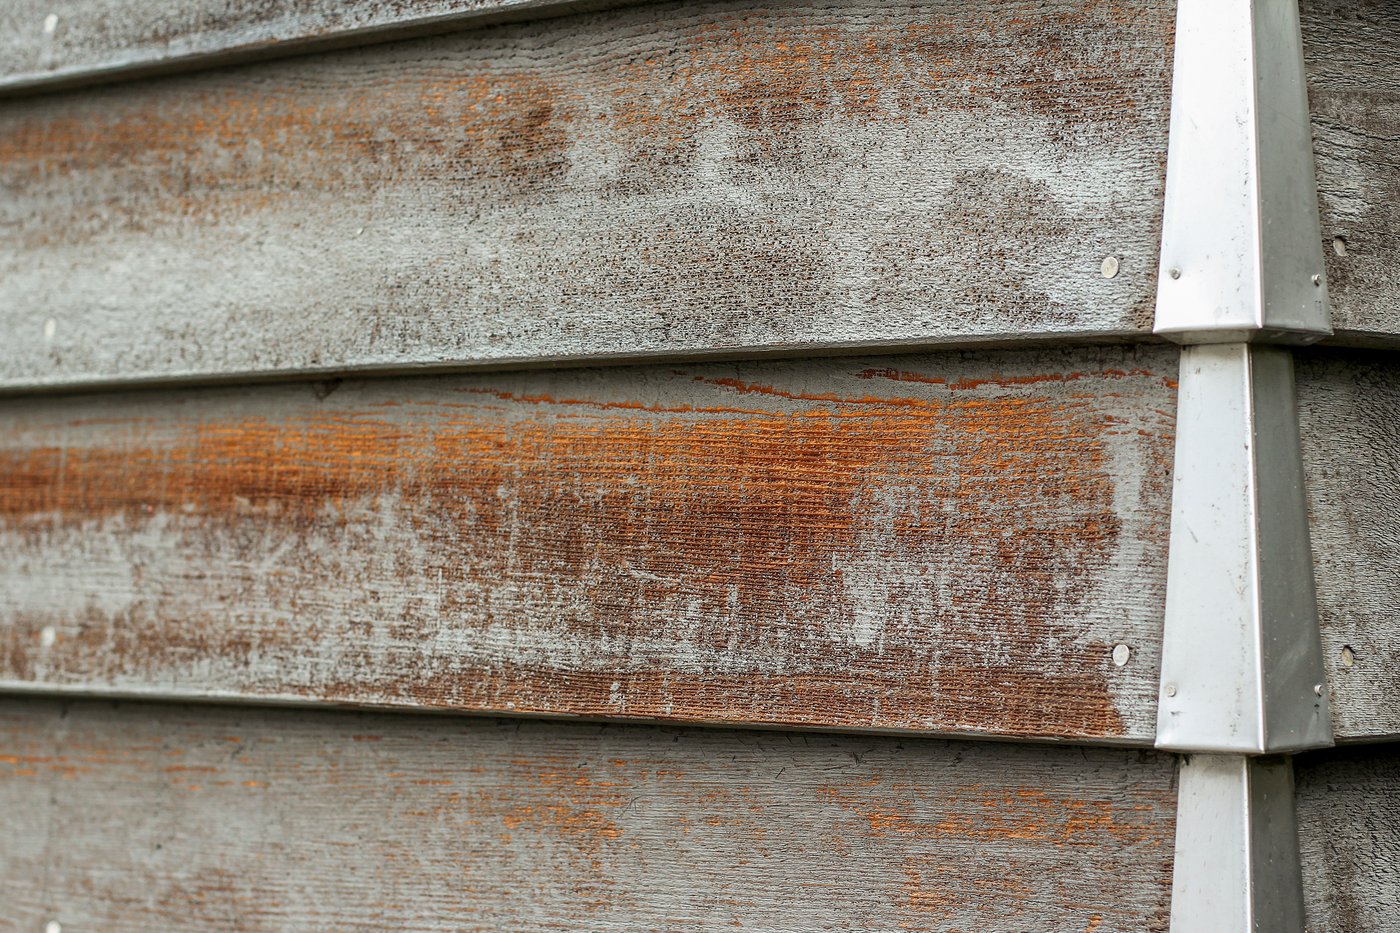
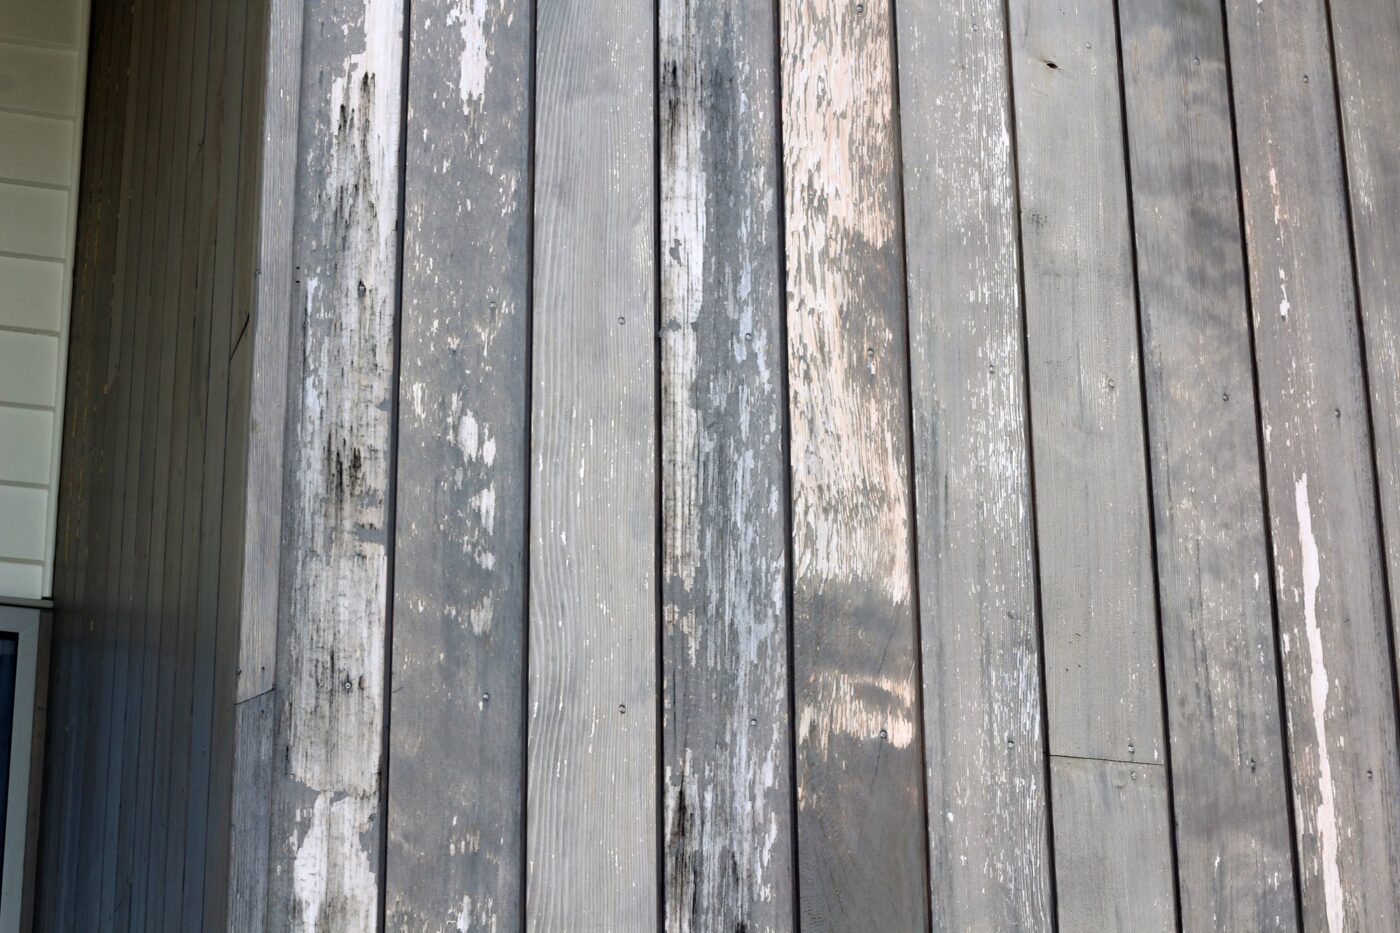
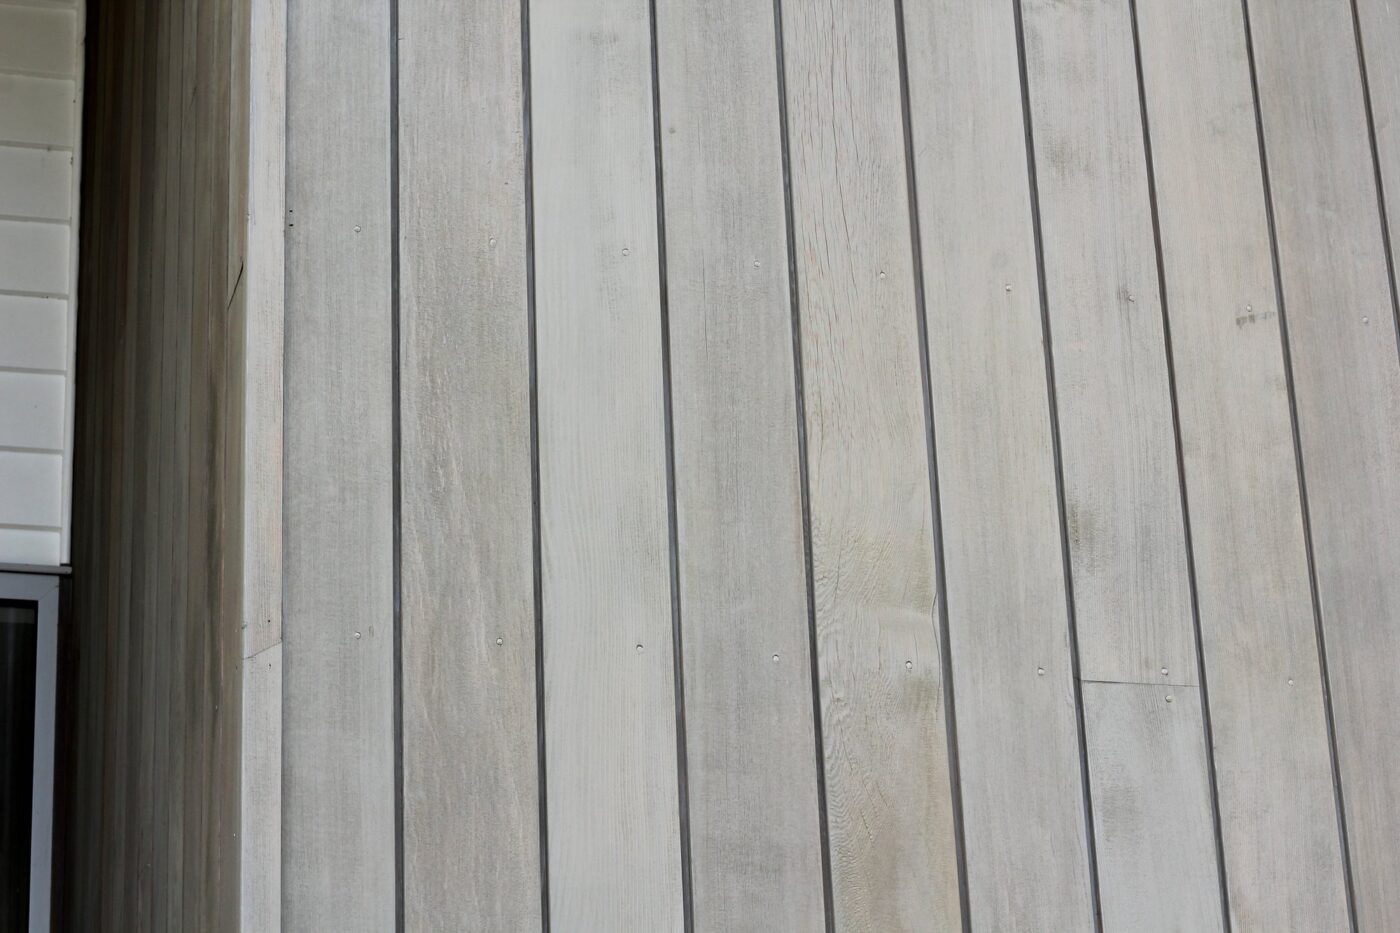
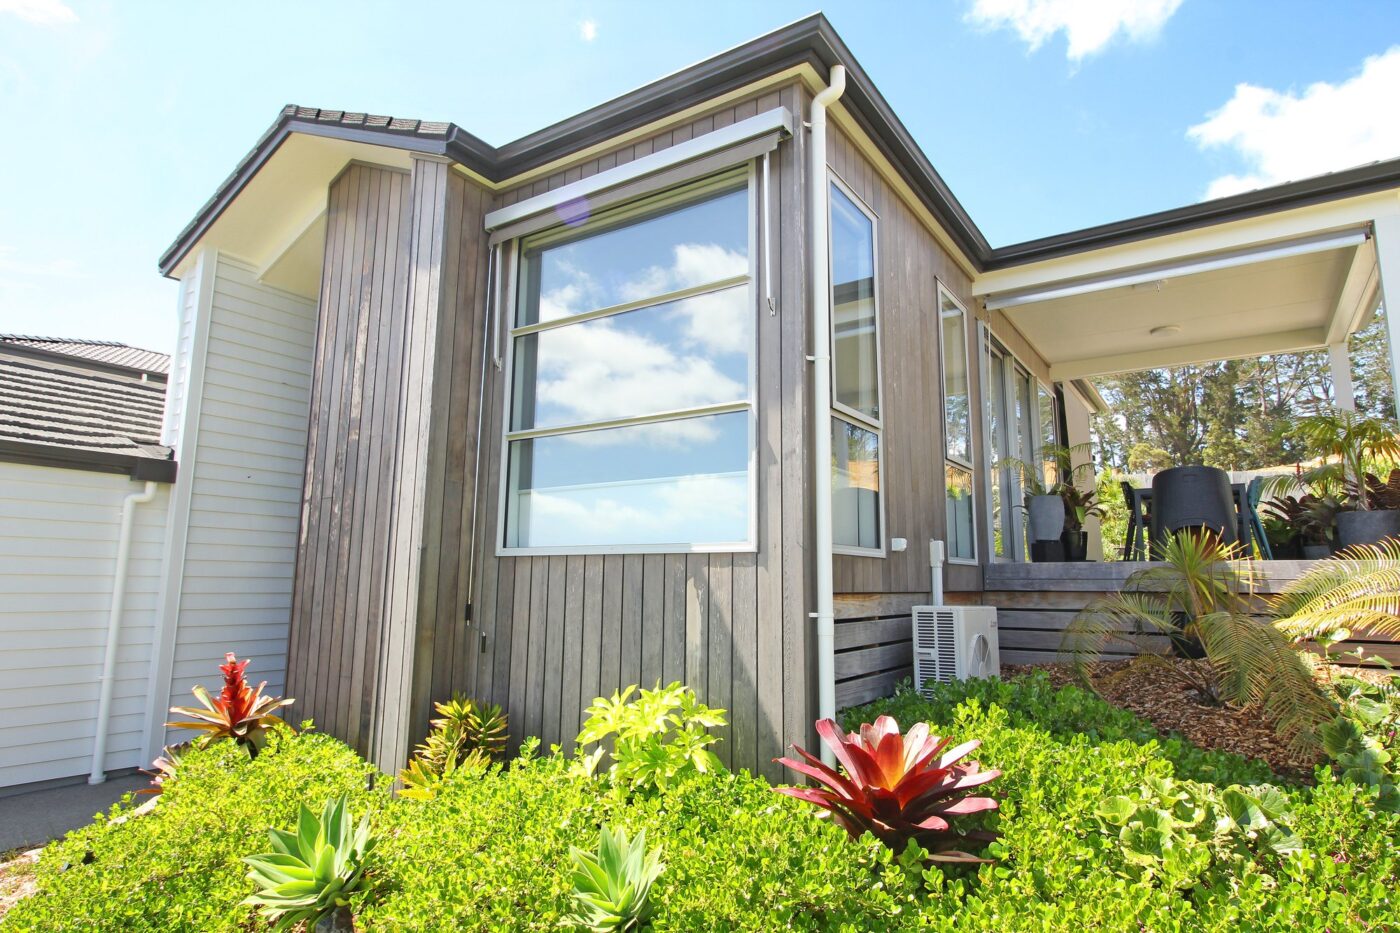
The western face at the rear does have an overhang, and you can clearly see the uneven effect it can have on Cedar. Uneven weathering usually requires restoration as opposed to maintenance.

This Cedar was installed 10 years ago, with little more than a light oil to protect the timber against the harsh UV. That coating has long since burned off, leaving the Cedar exposed to the sun.

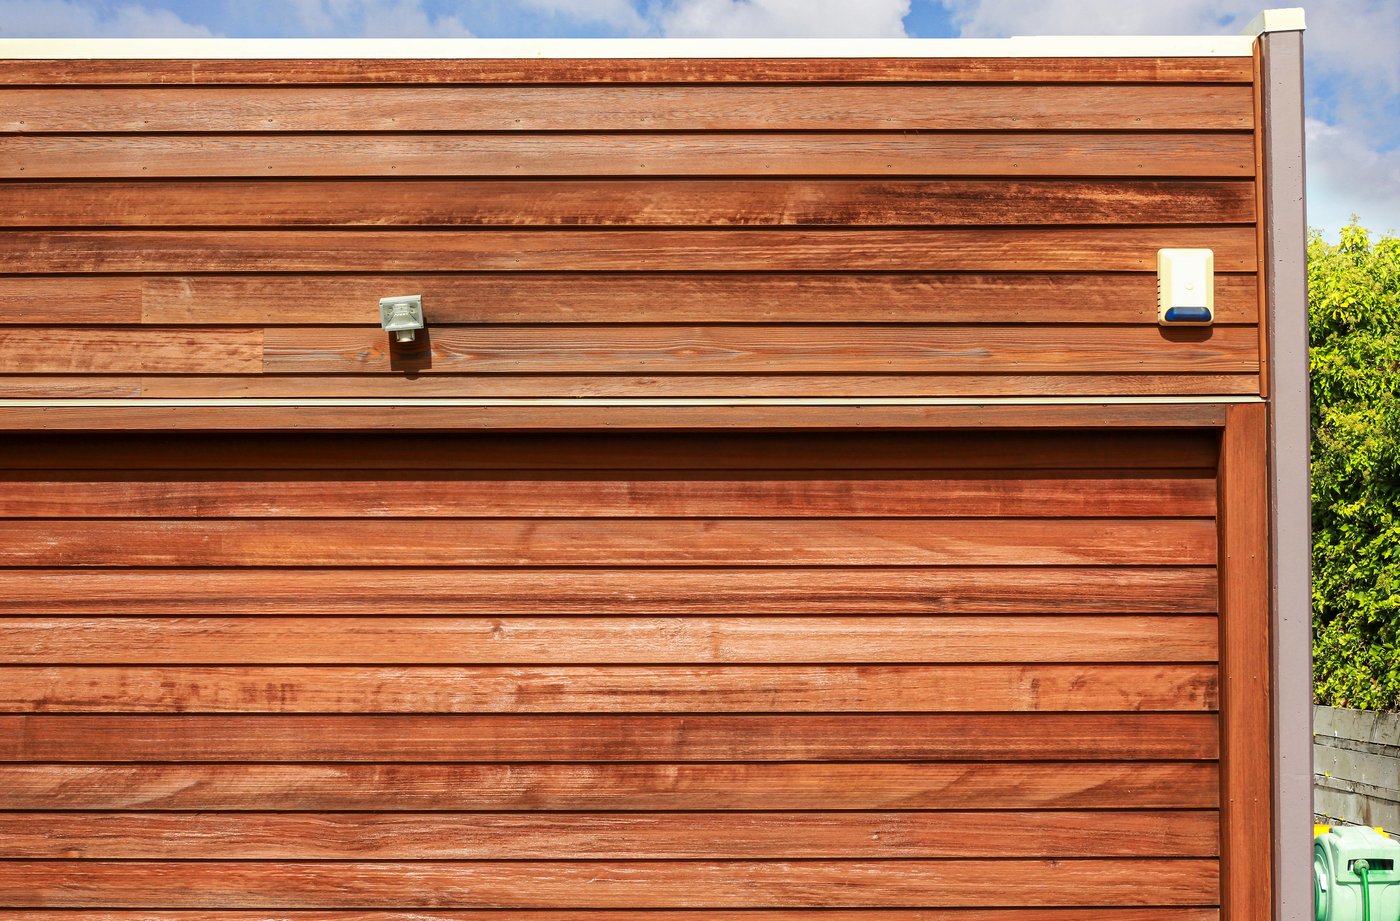
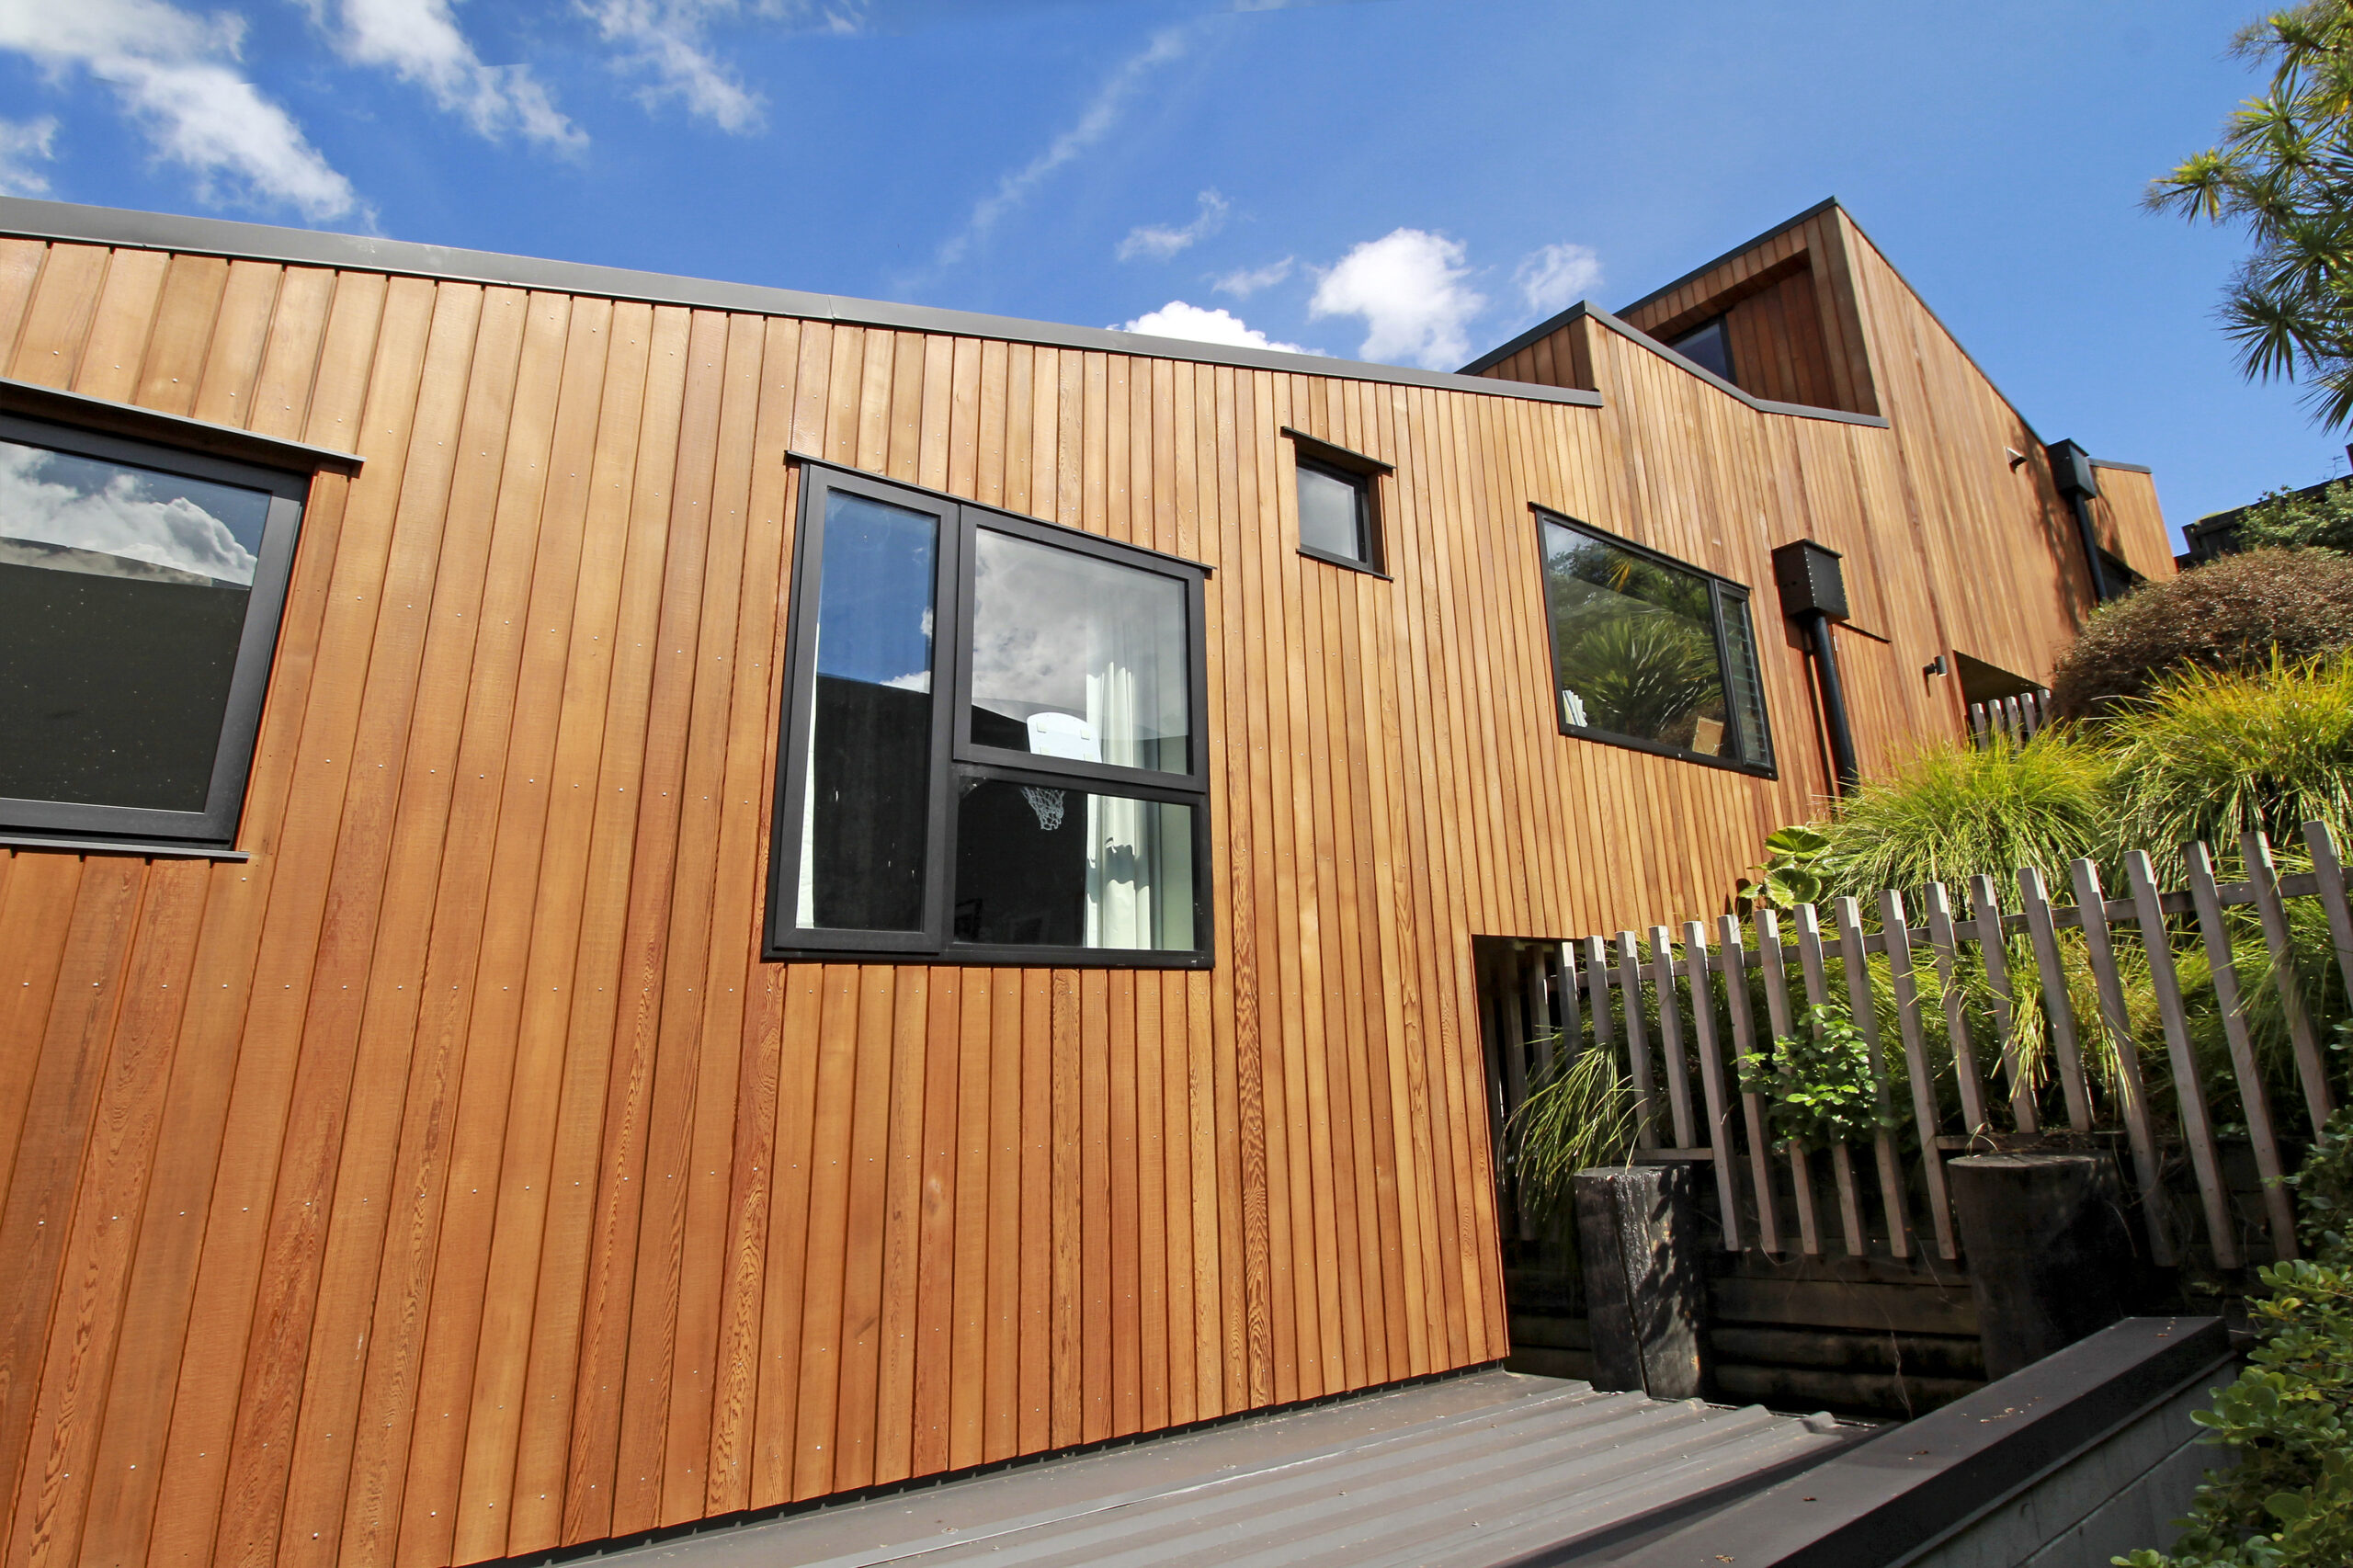
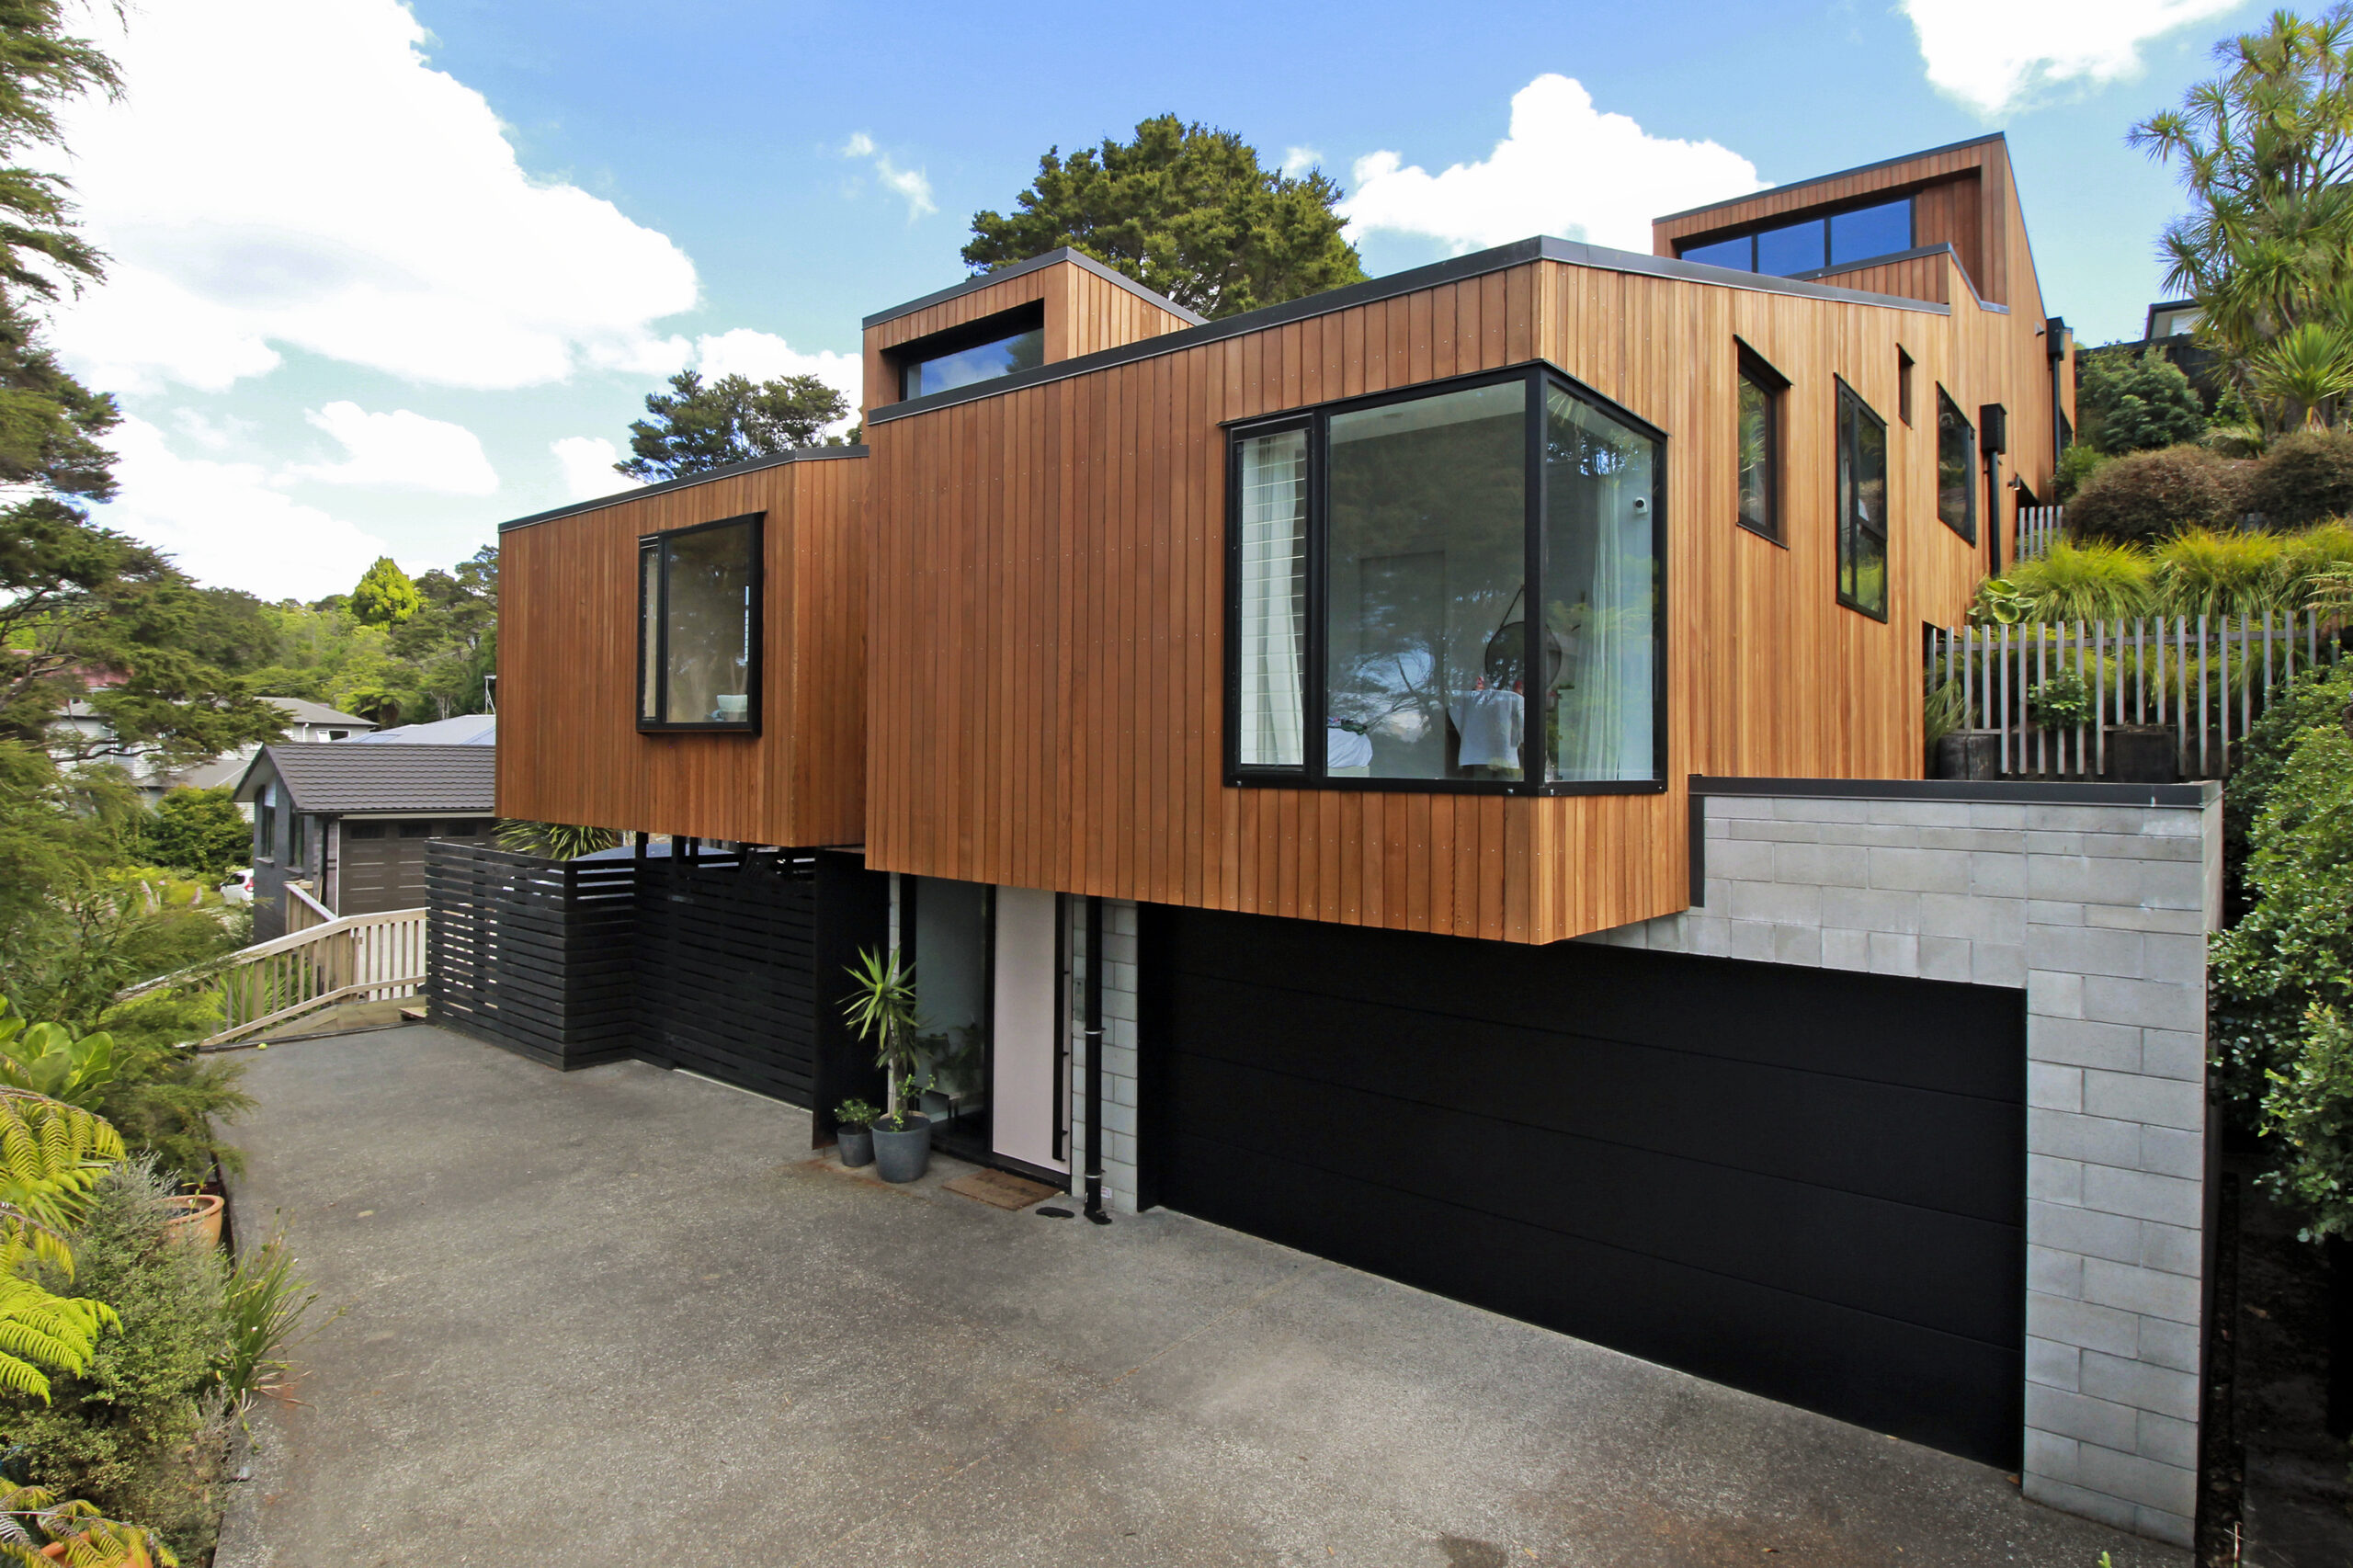
Thankfully, Cedar is such a resilient timber that a deep clean and oil can work wonders.

Maintenance Timeline

The customer first contacted us on the 15th of November, 2024.

  • 21st November 2024 – Initial onsite assessment completed.
  • 25th November 2024 – Quote sent.
  • 6th January 2025 – Team arrived onsite to start the job.
  • 21st January 2025 – Job completed.

Cedar Restoration Process

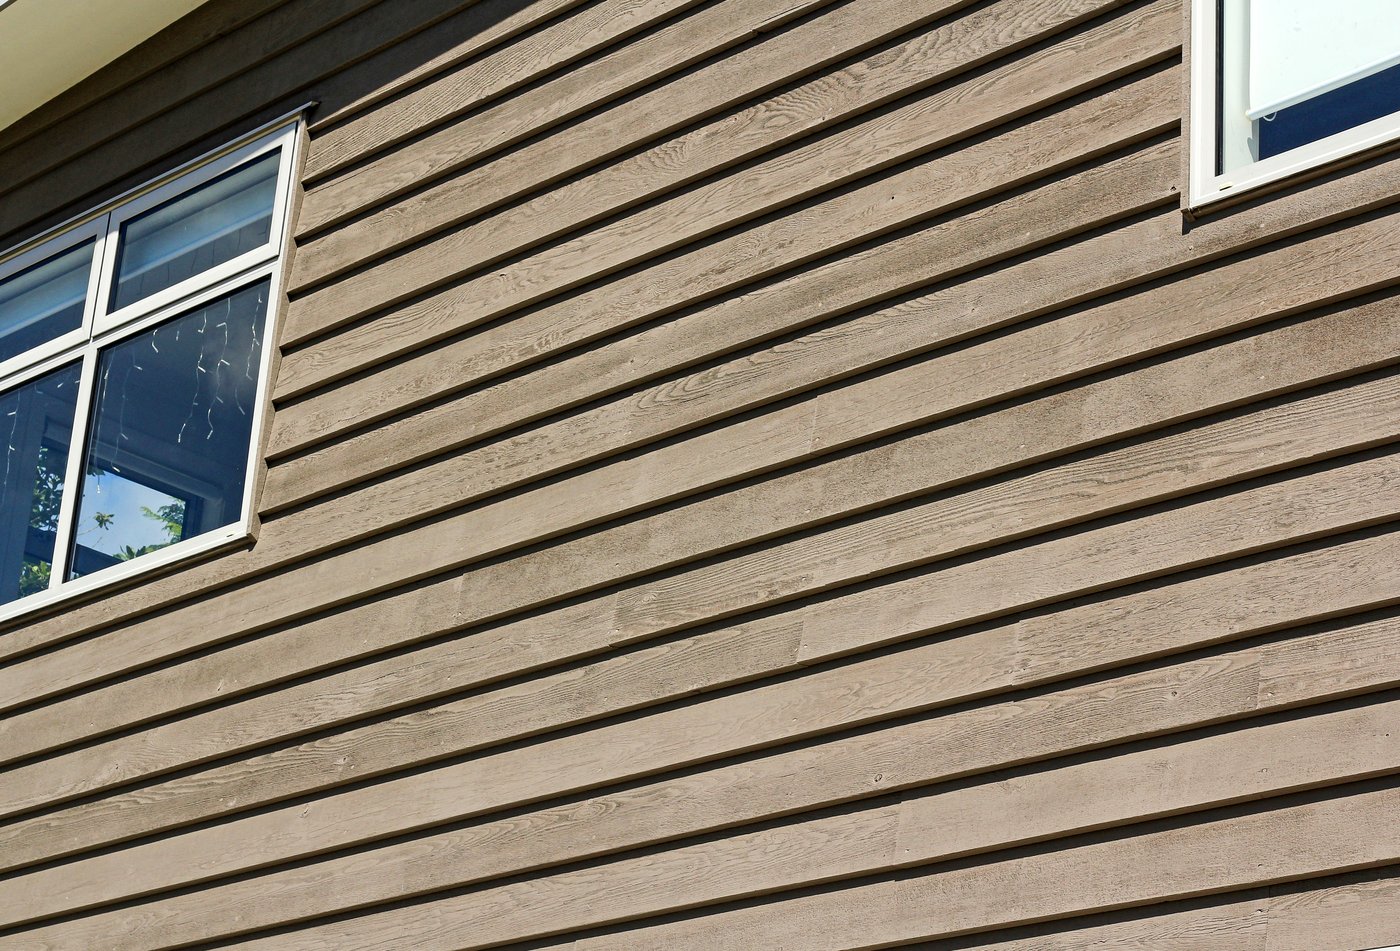
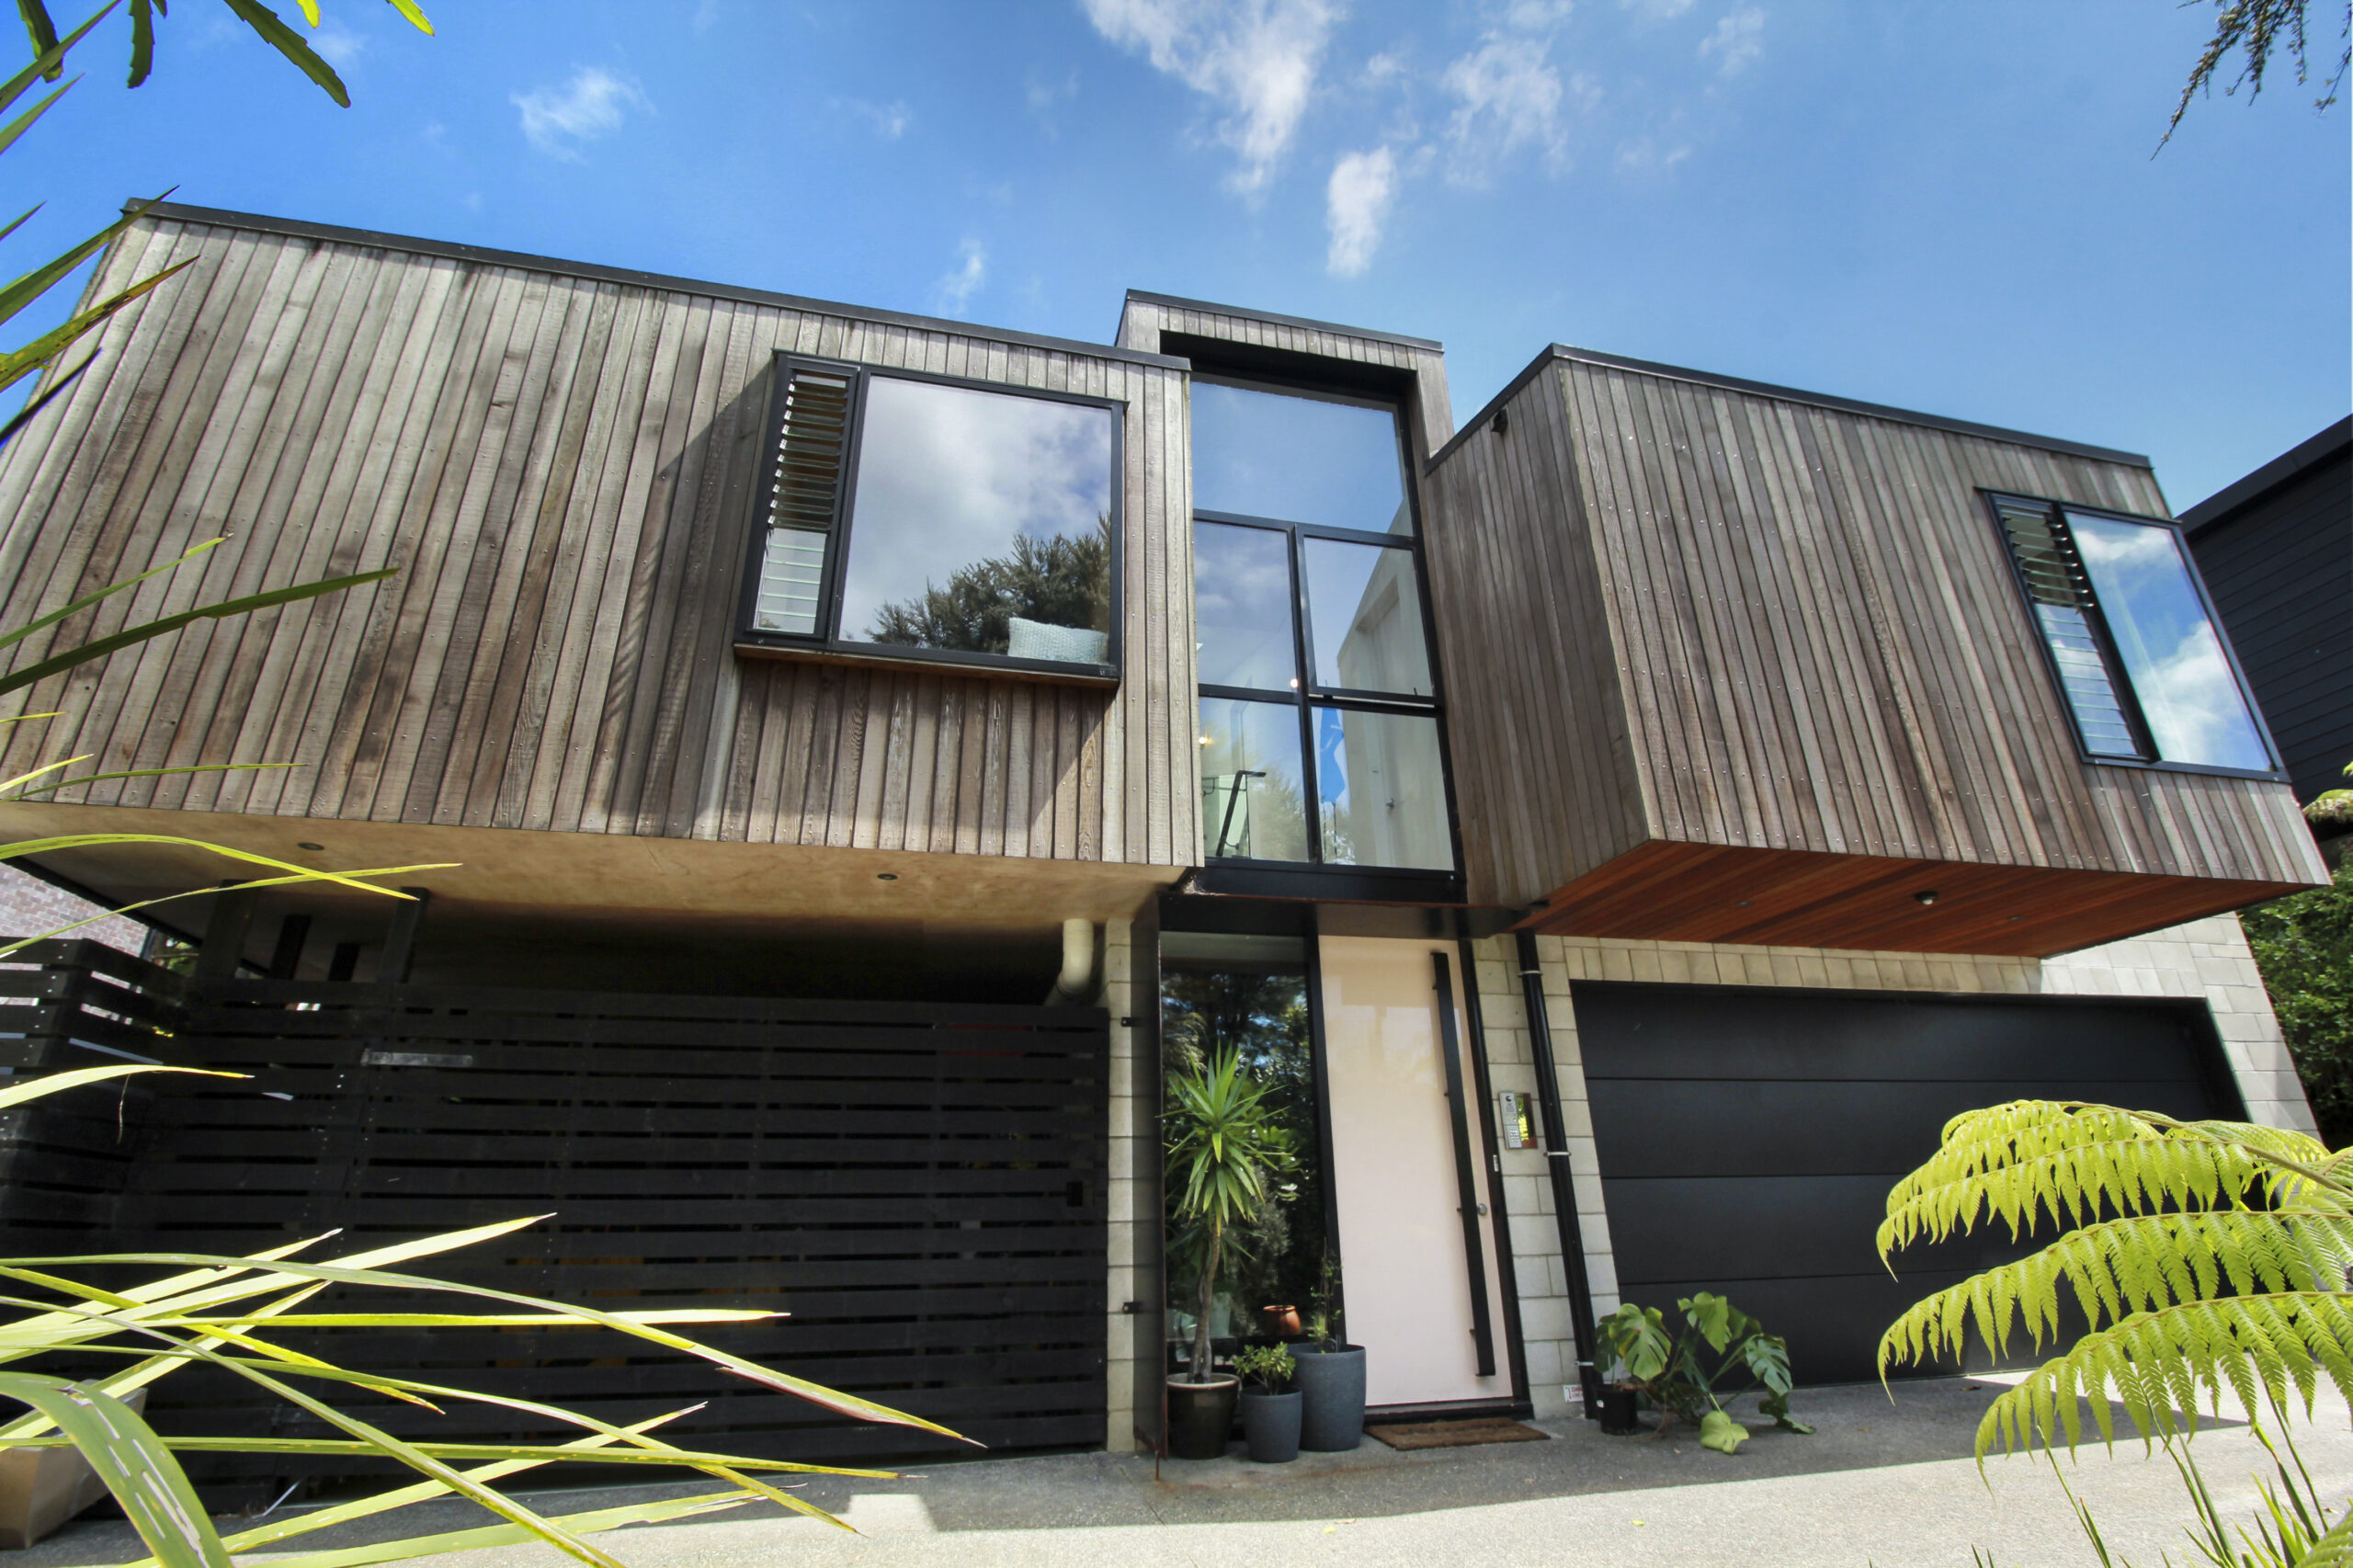
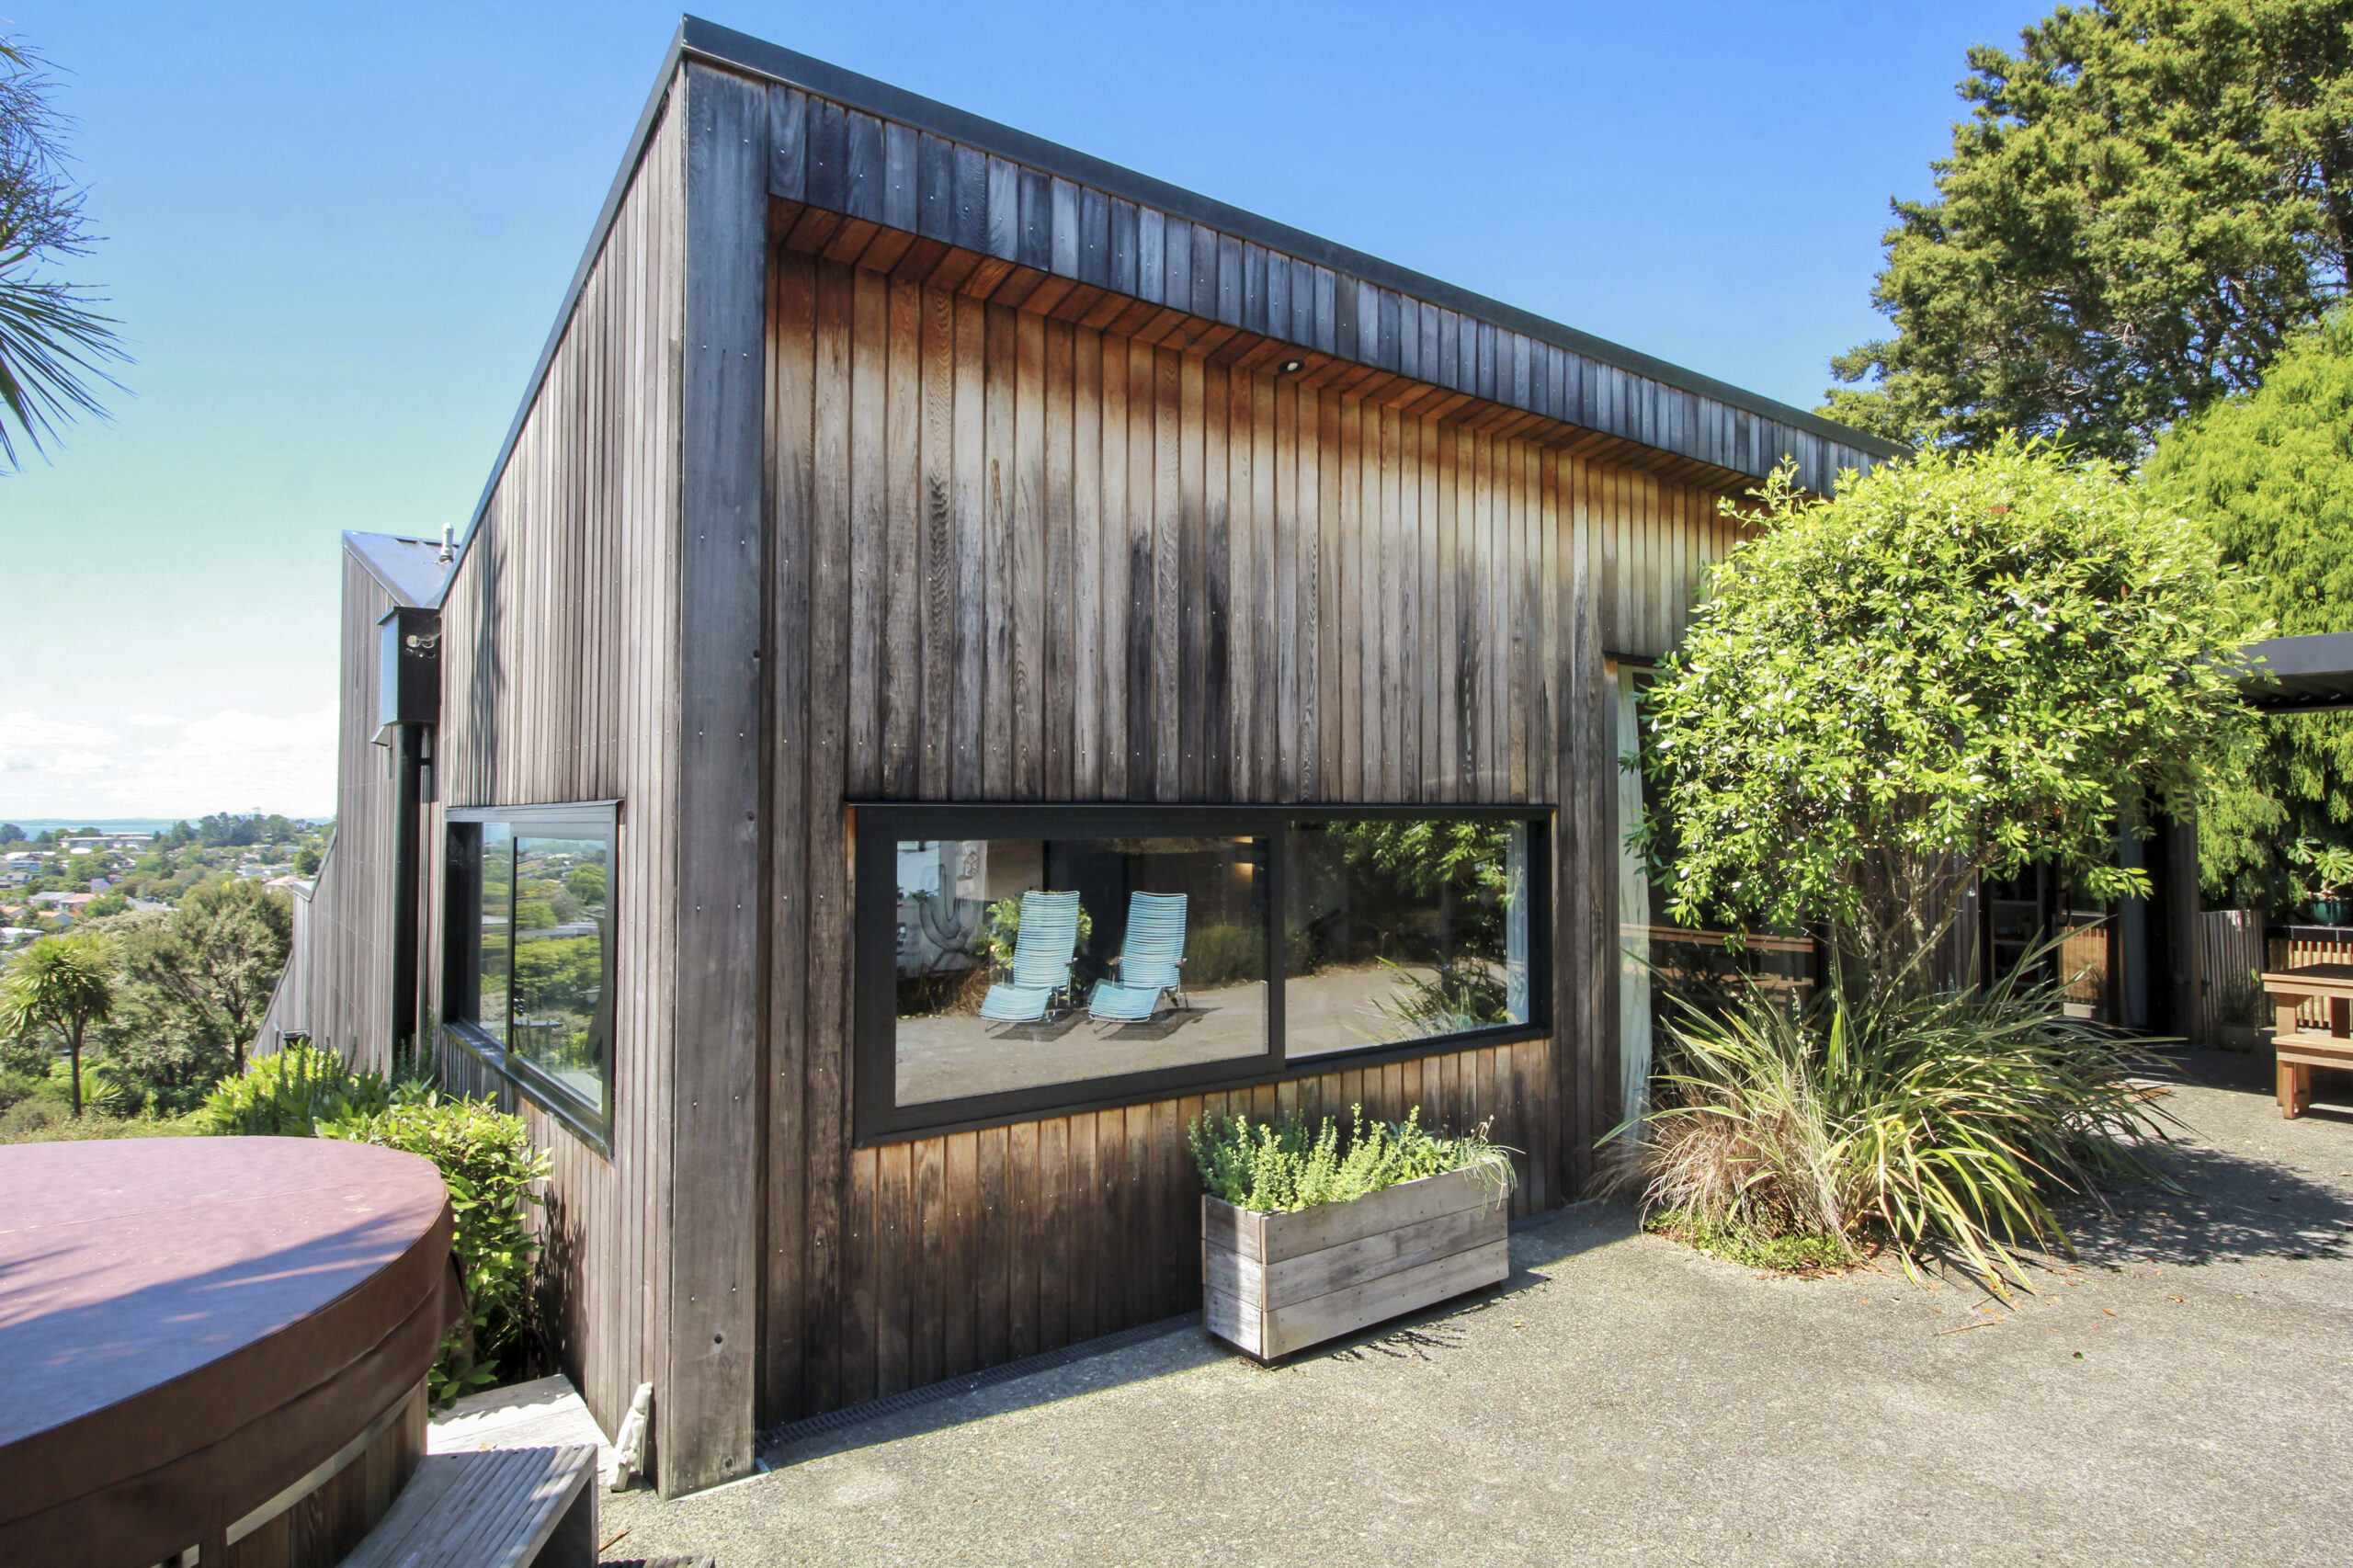
The initial assessment showed that the Cedar was in good overall condition, but the northern and western faces had been burned by the sun and were very dry.

Whatever protective application they initially used did not have any pigment, leaving the Cedar to turn grey over time.

The Cedar also had mould and bacteria growing on the outside, which happens when the harsh UV rays break down the surface of the timber. To remove the organic matter, we deep clean the Cedar using a biodegradable cleaning solution that is safe for pets and does not harm any surrounding plant life.

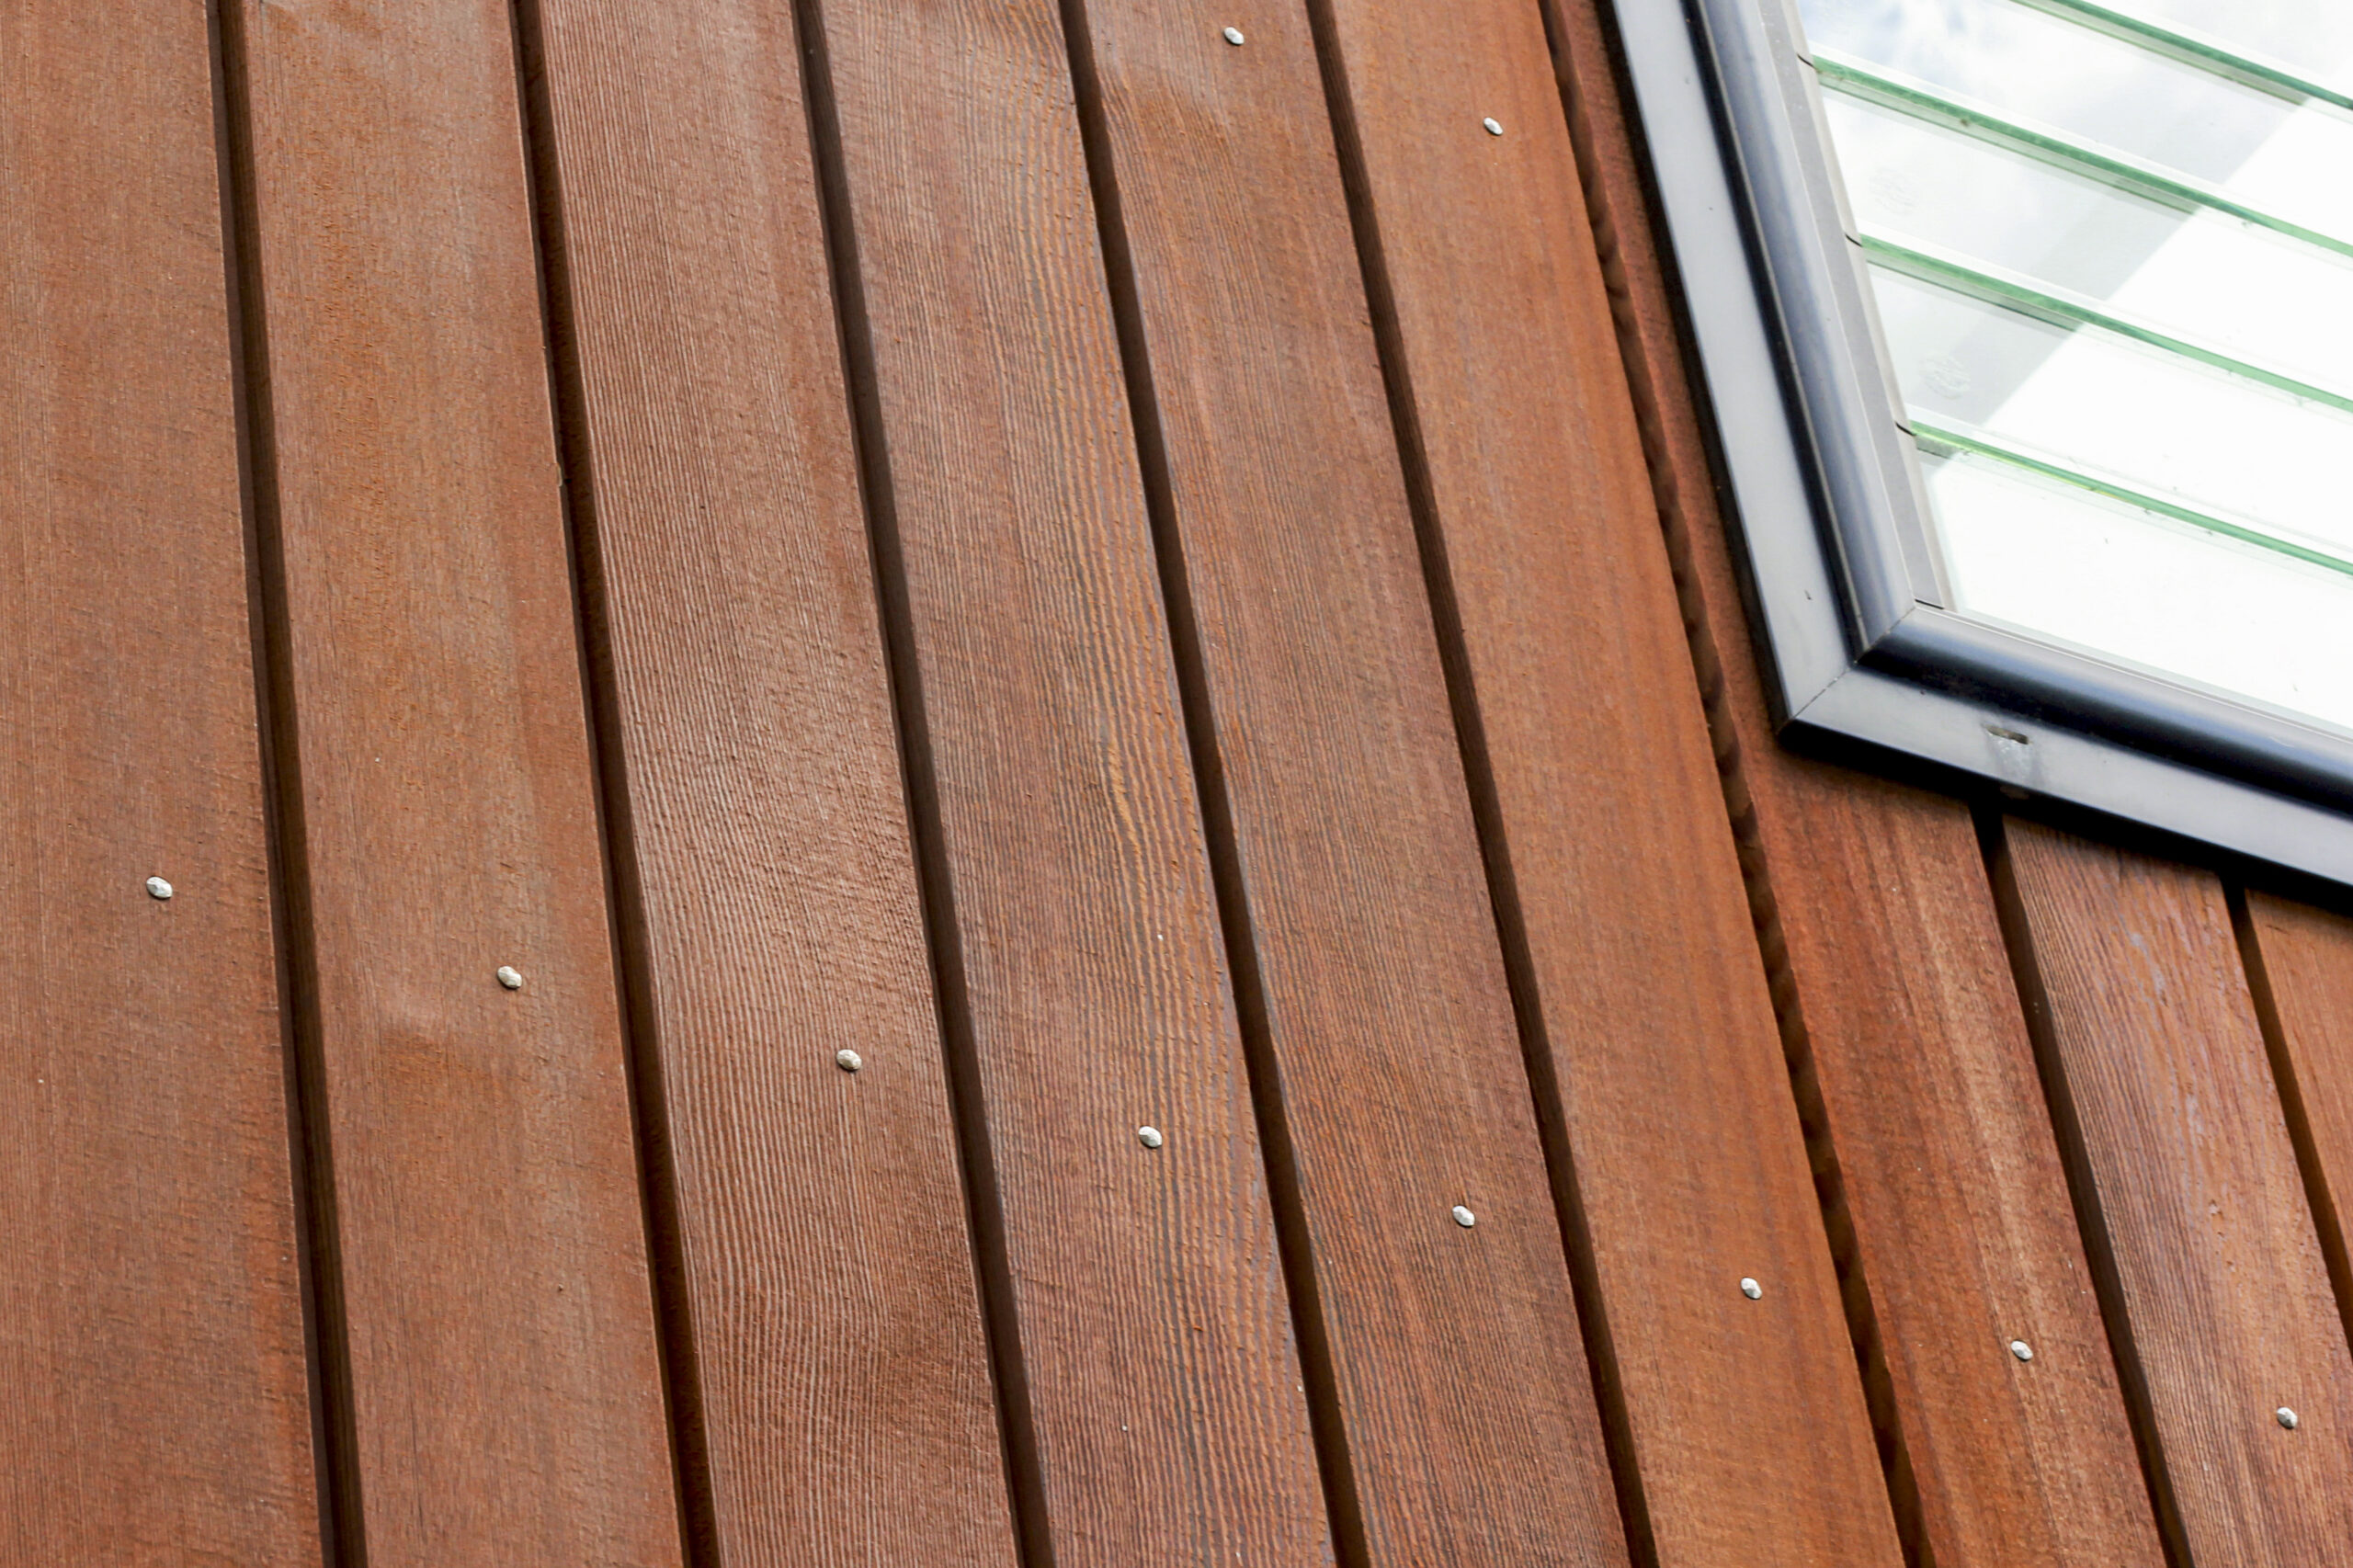
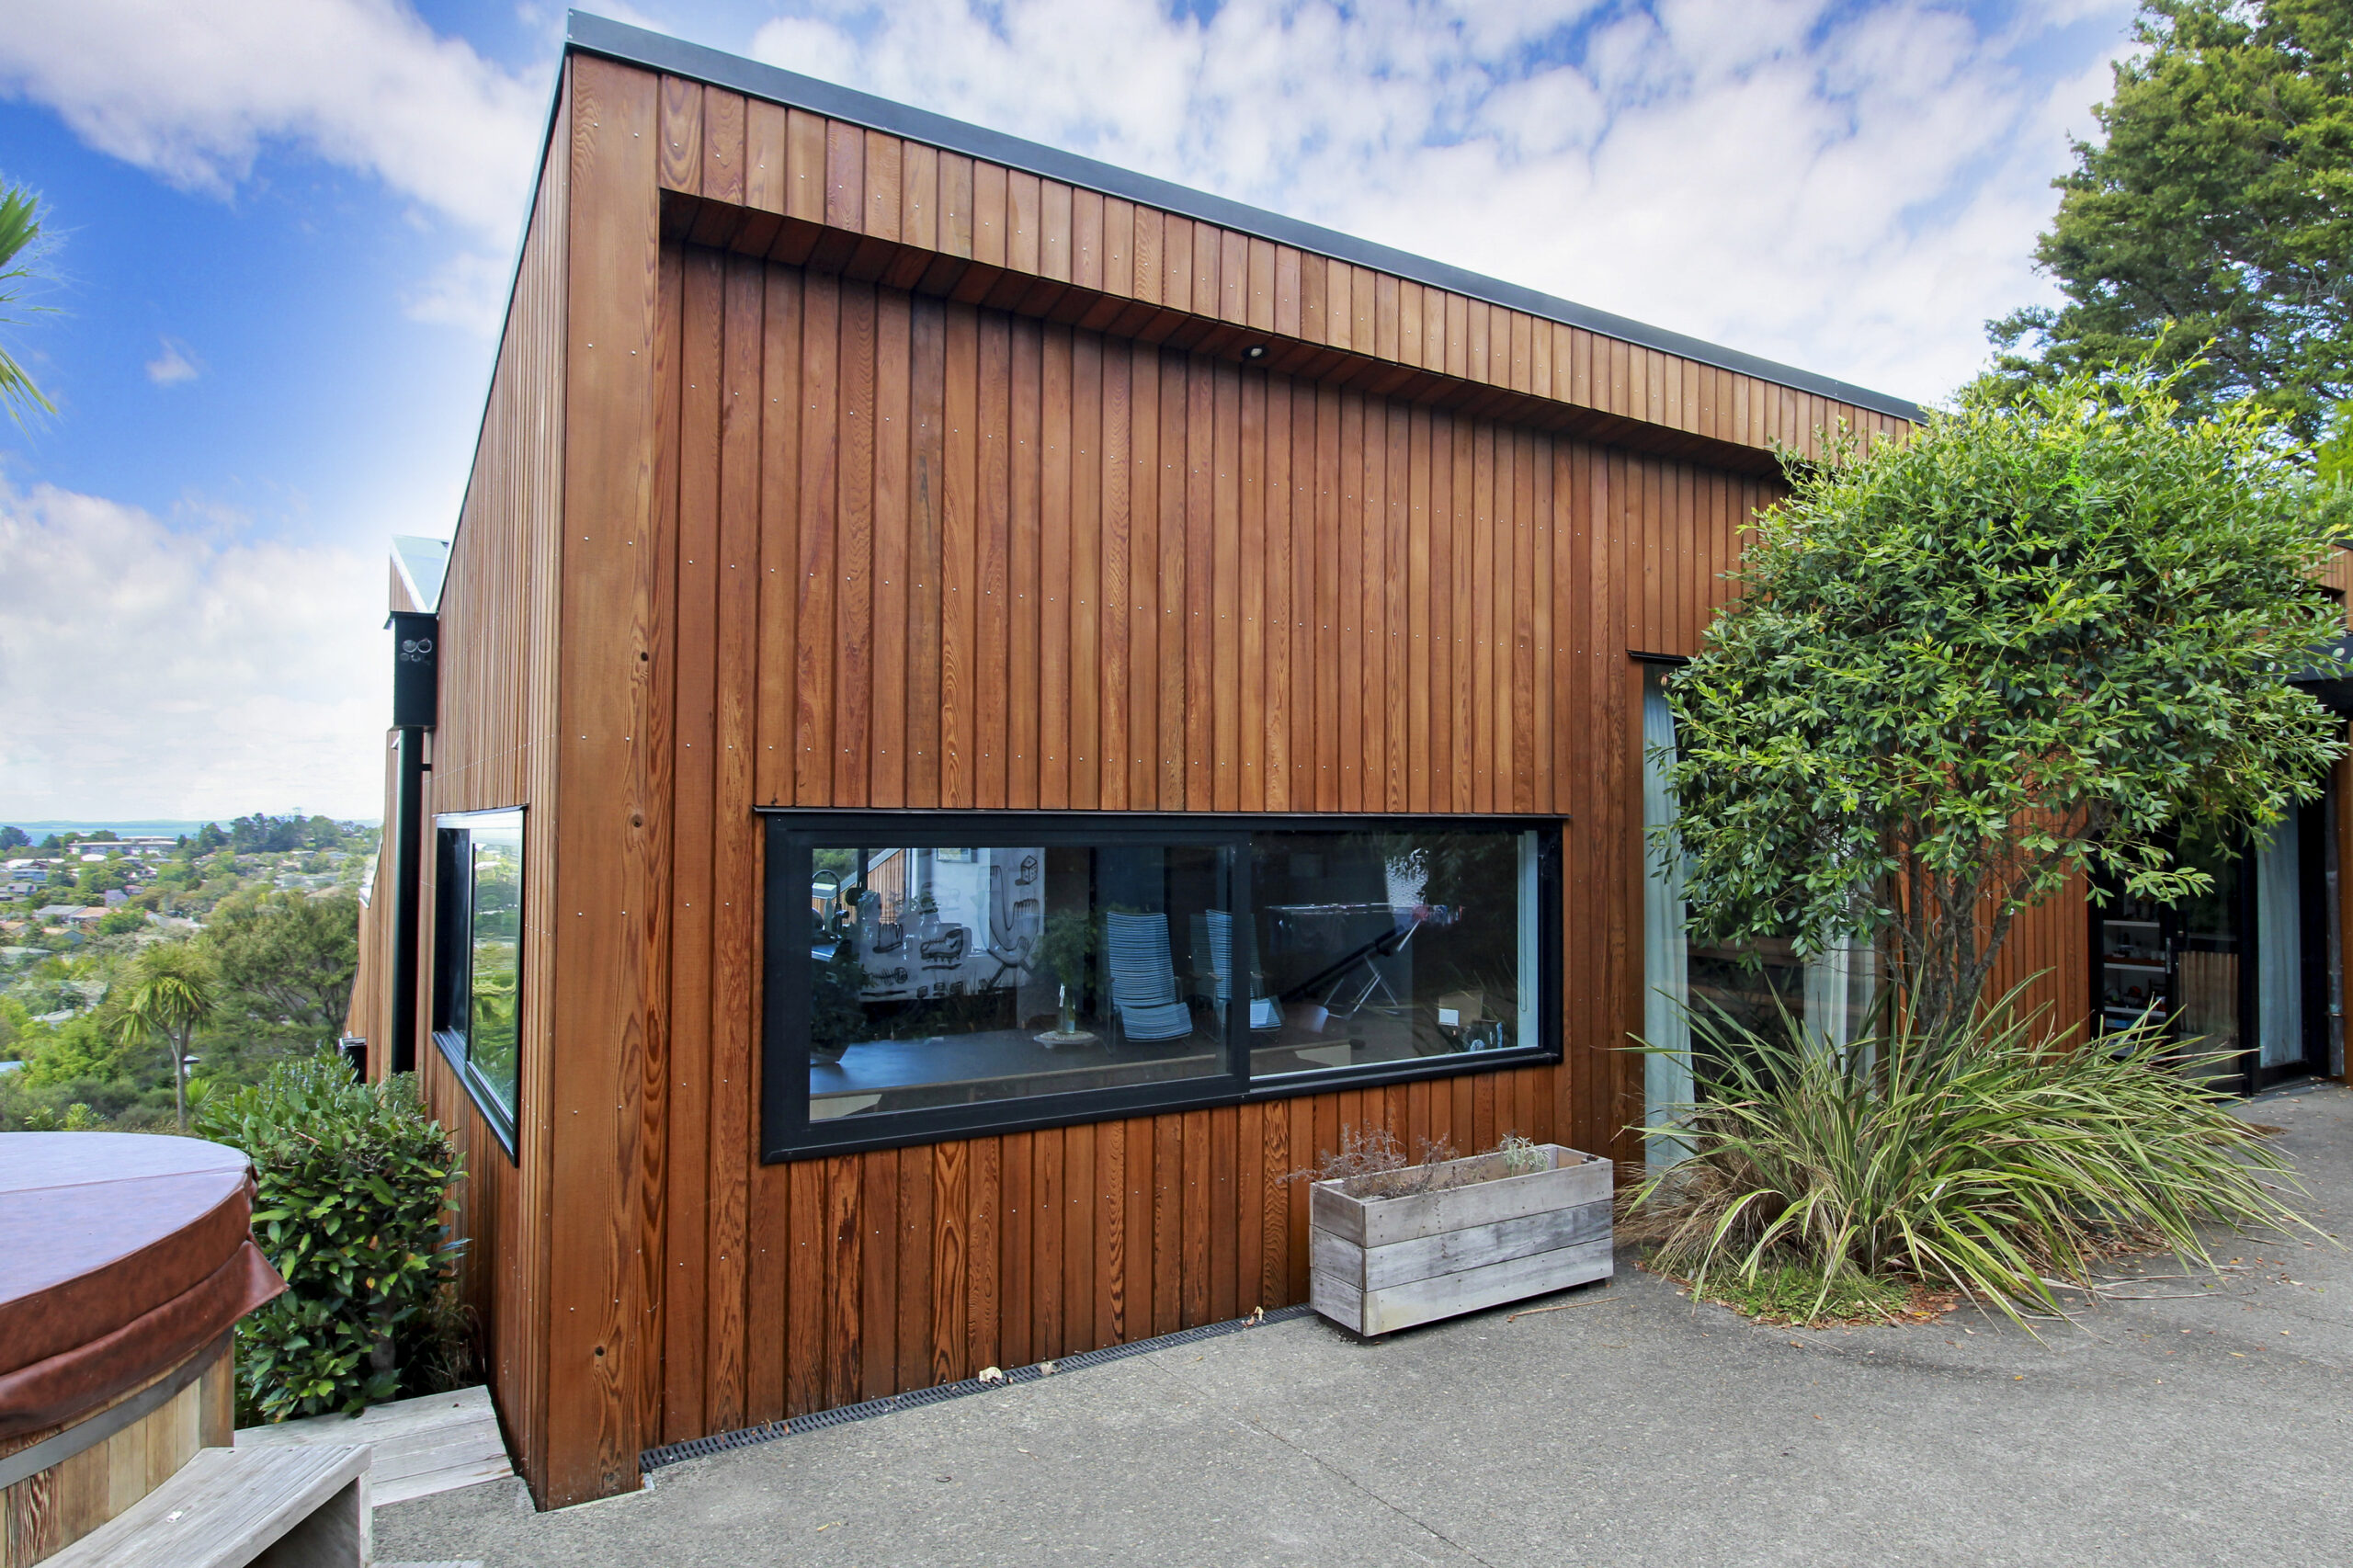
Once the timber is clean and dry, we can start to apply the oil.

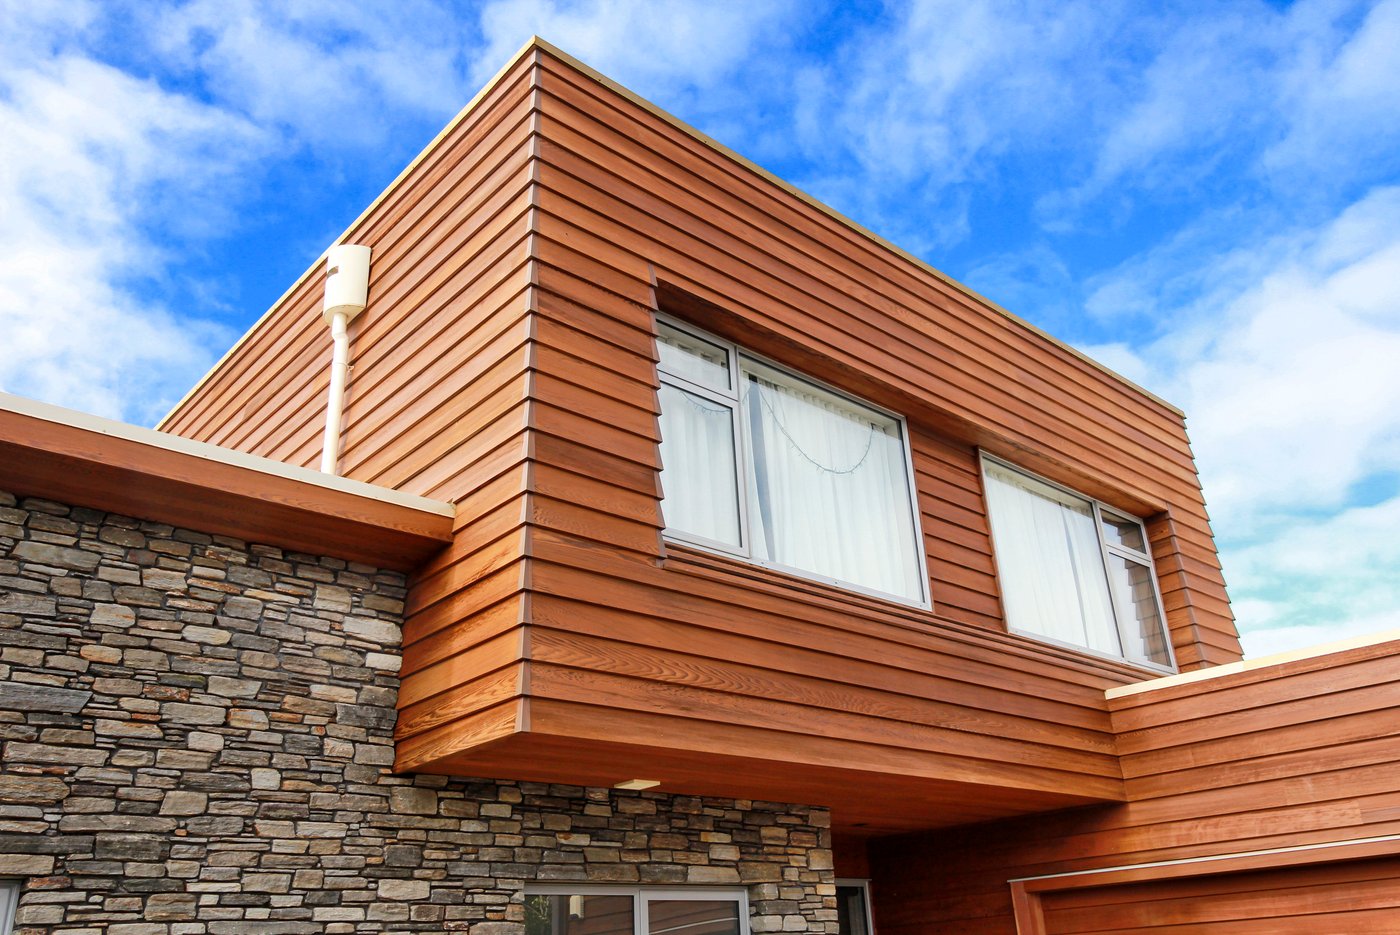
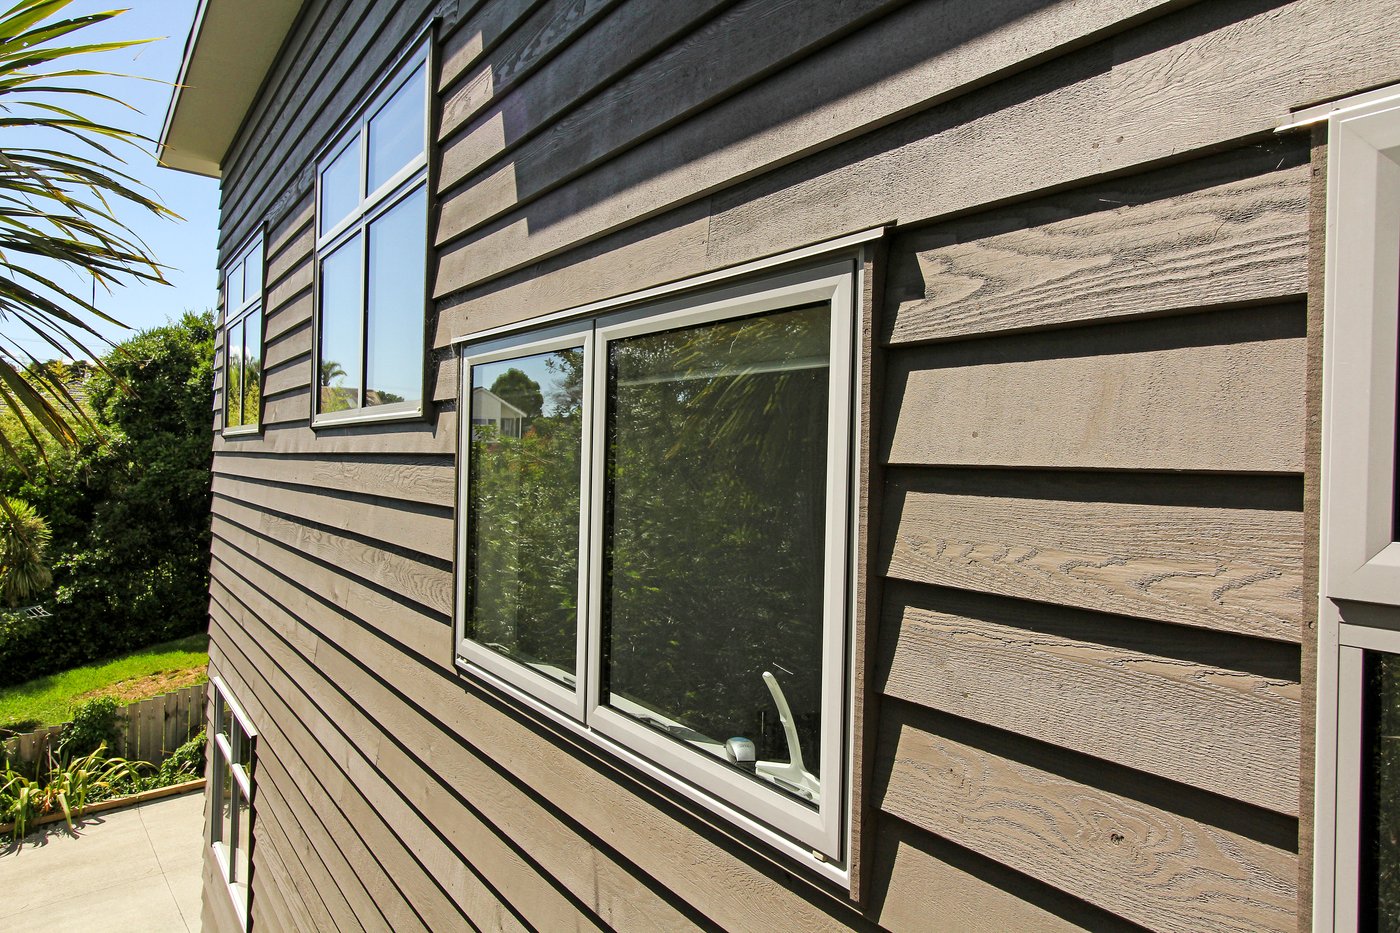
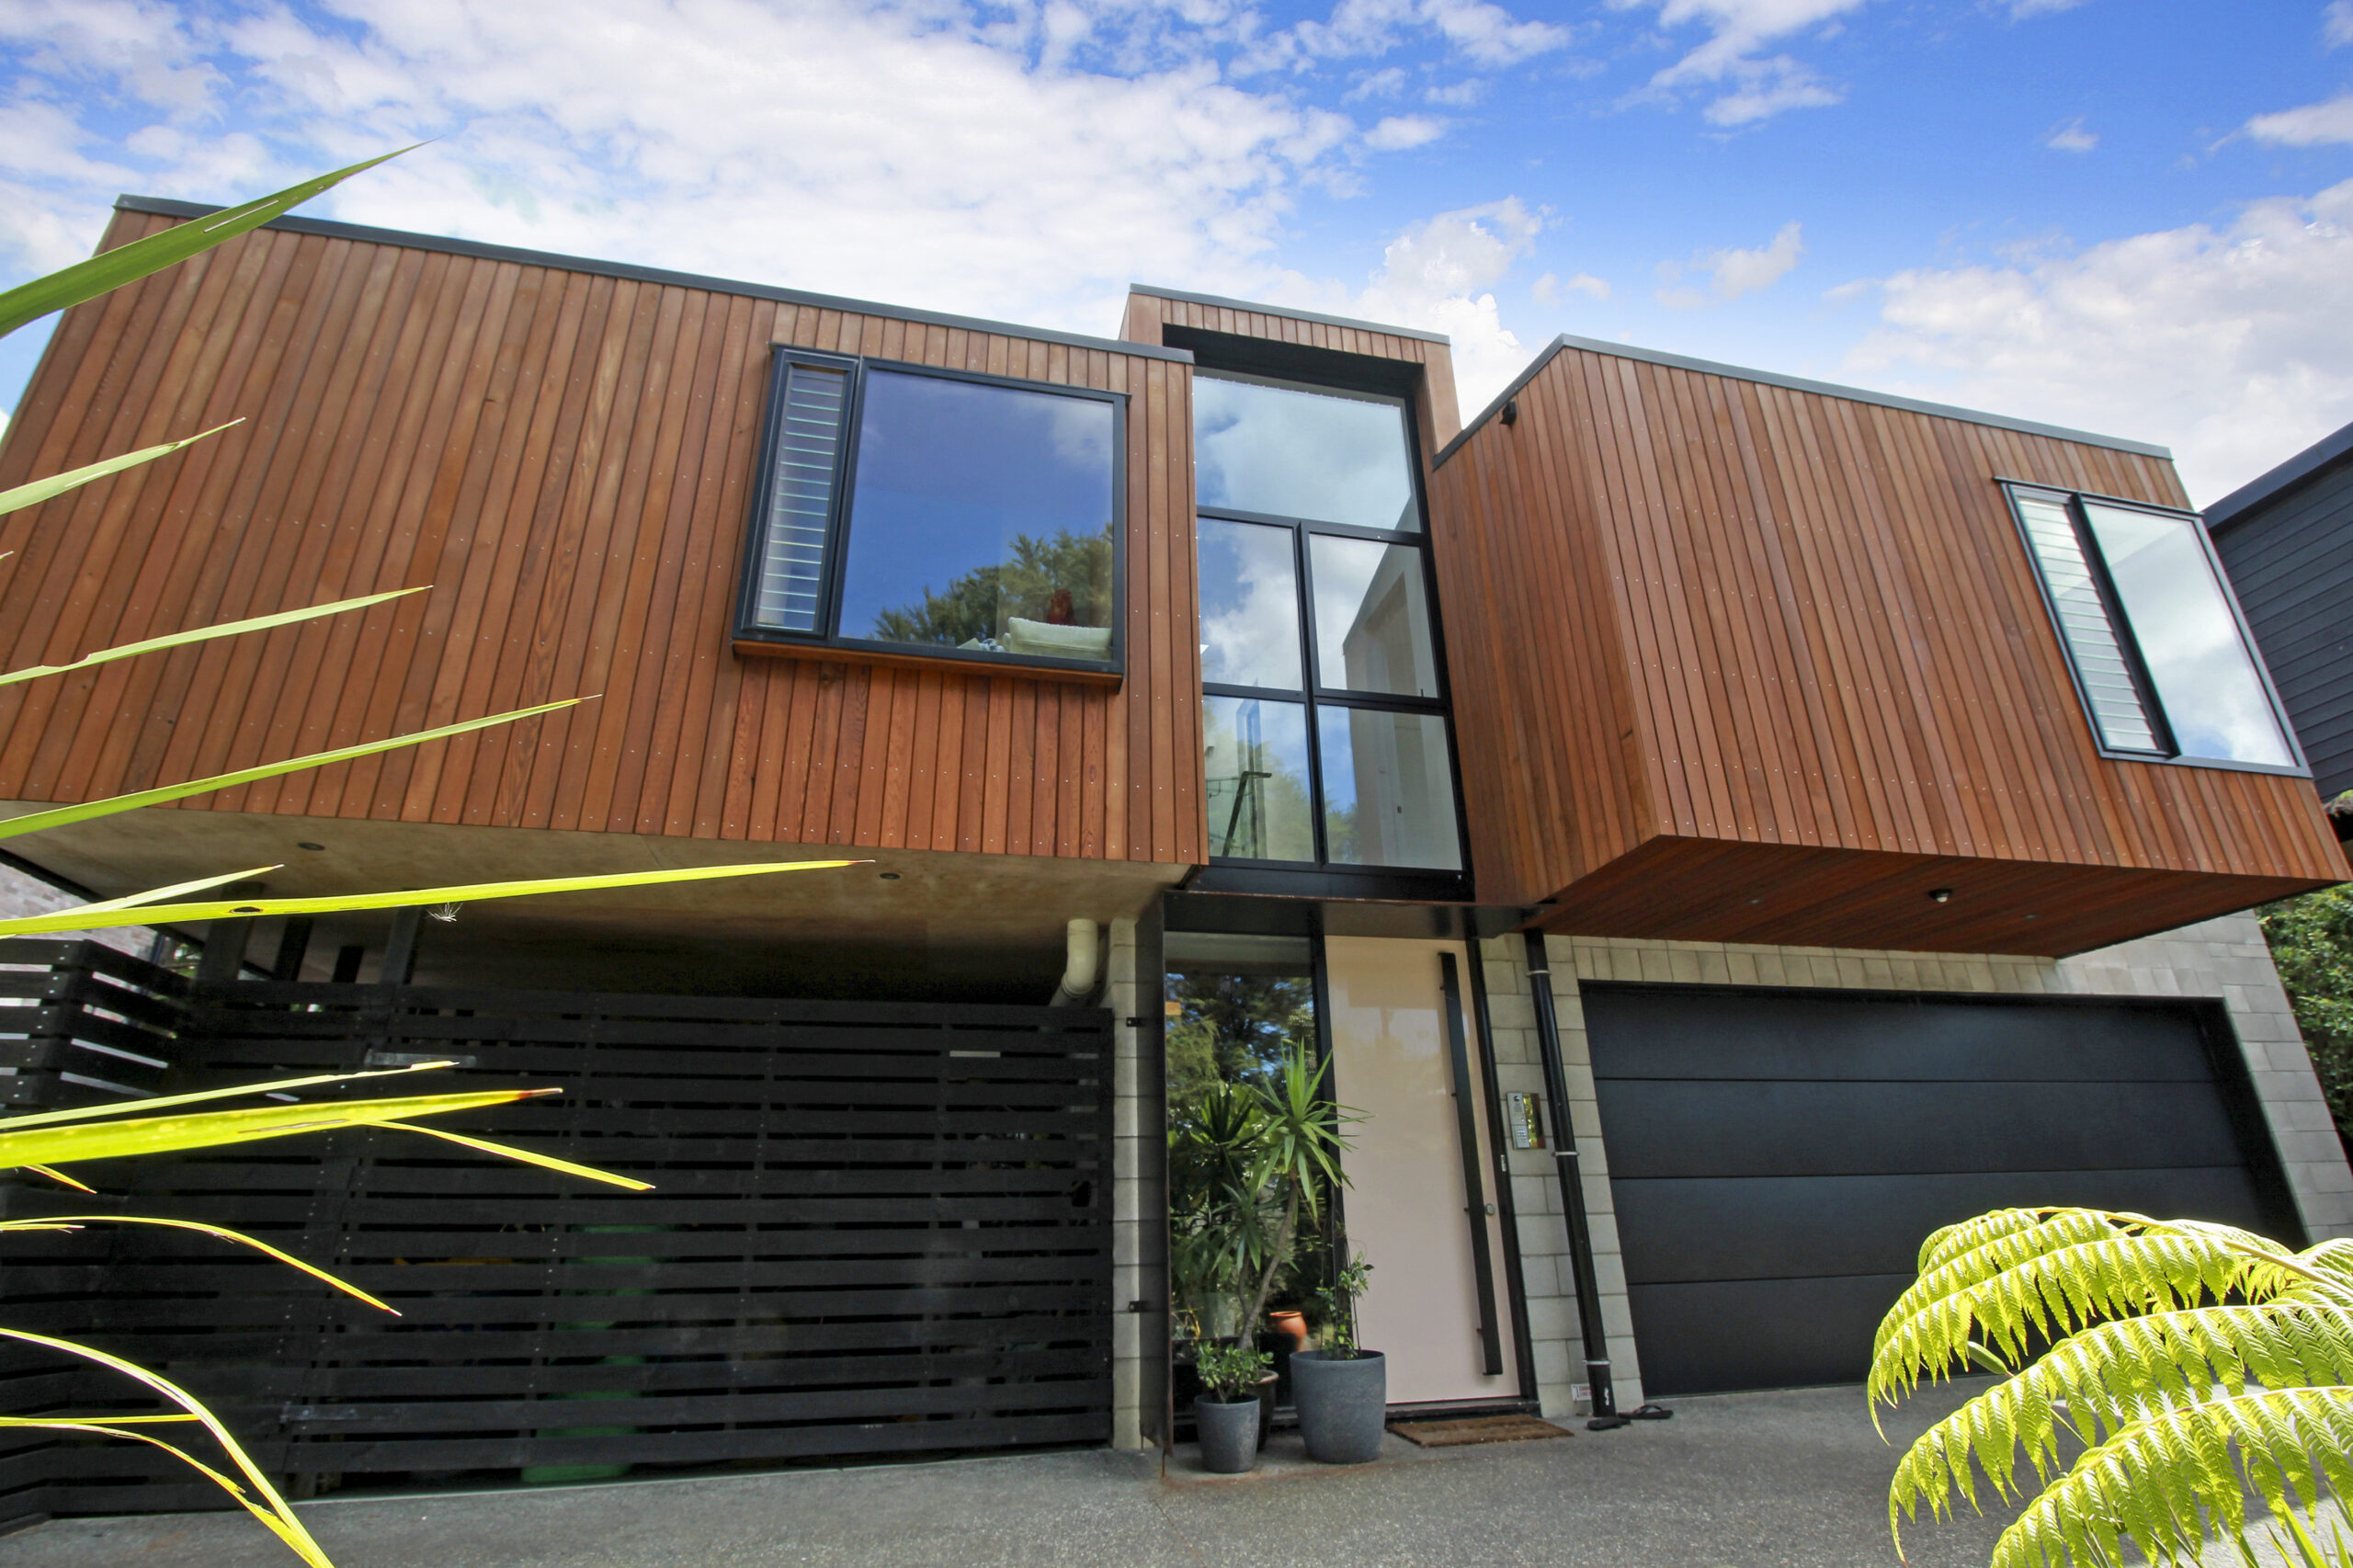
The customer chose Wood-X Kauri Gum to give the Cedar a natural look, closely resembling wet Cedar. This is a mineral oil that soaks into the timber, leaving pigment on the surface to protect against the UV rays.

The northern face of the house runs long up the side of the property and is the first thing you see upon arrival.

The top of the cladding has been bleached by the sun. This was extremely dry and sucked up a lot of oil, around 4 square meters per litre.

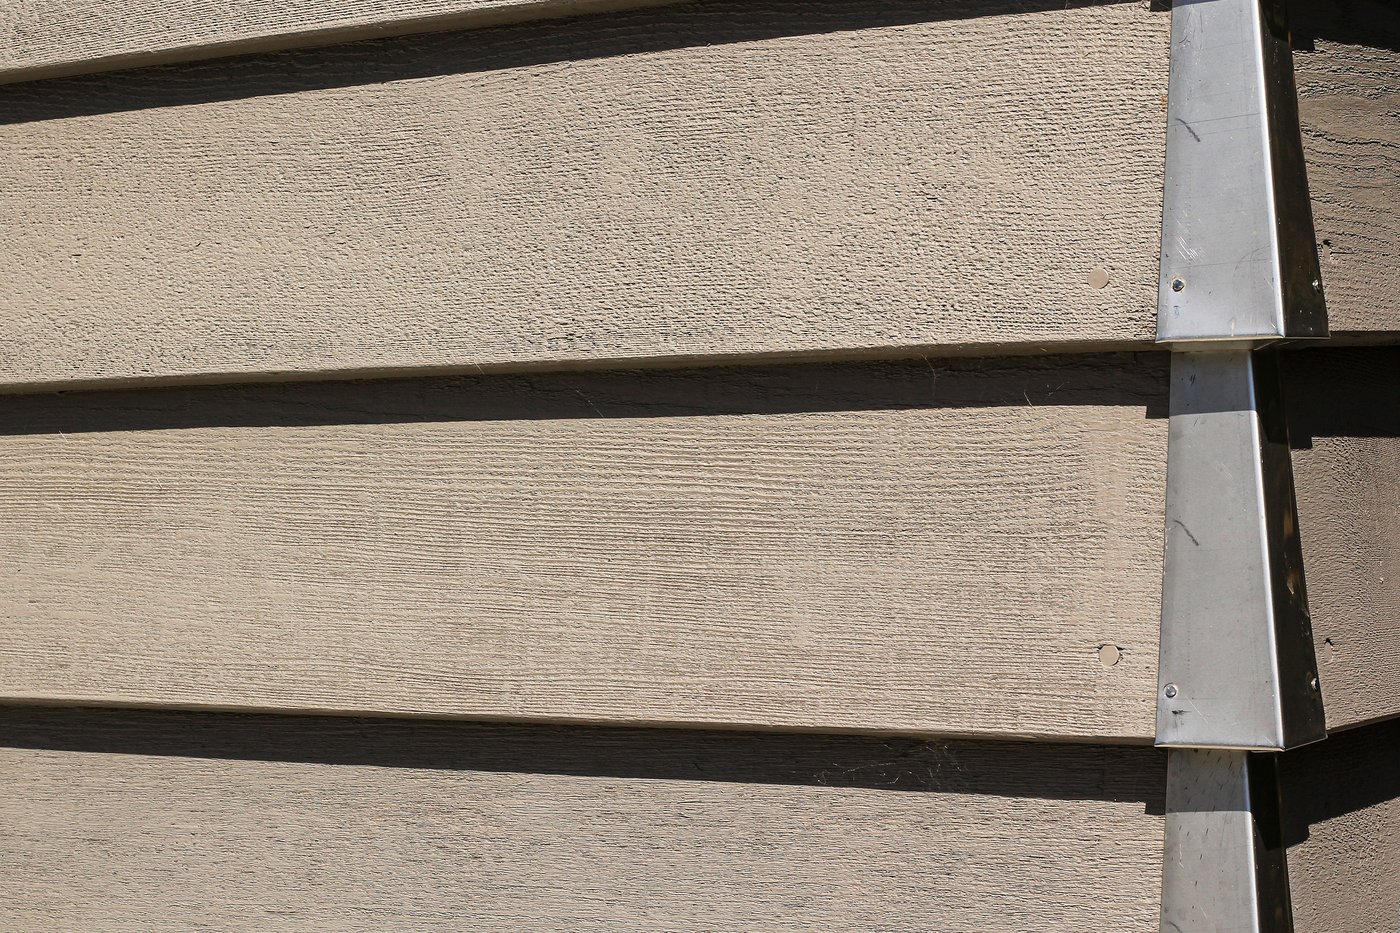
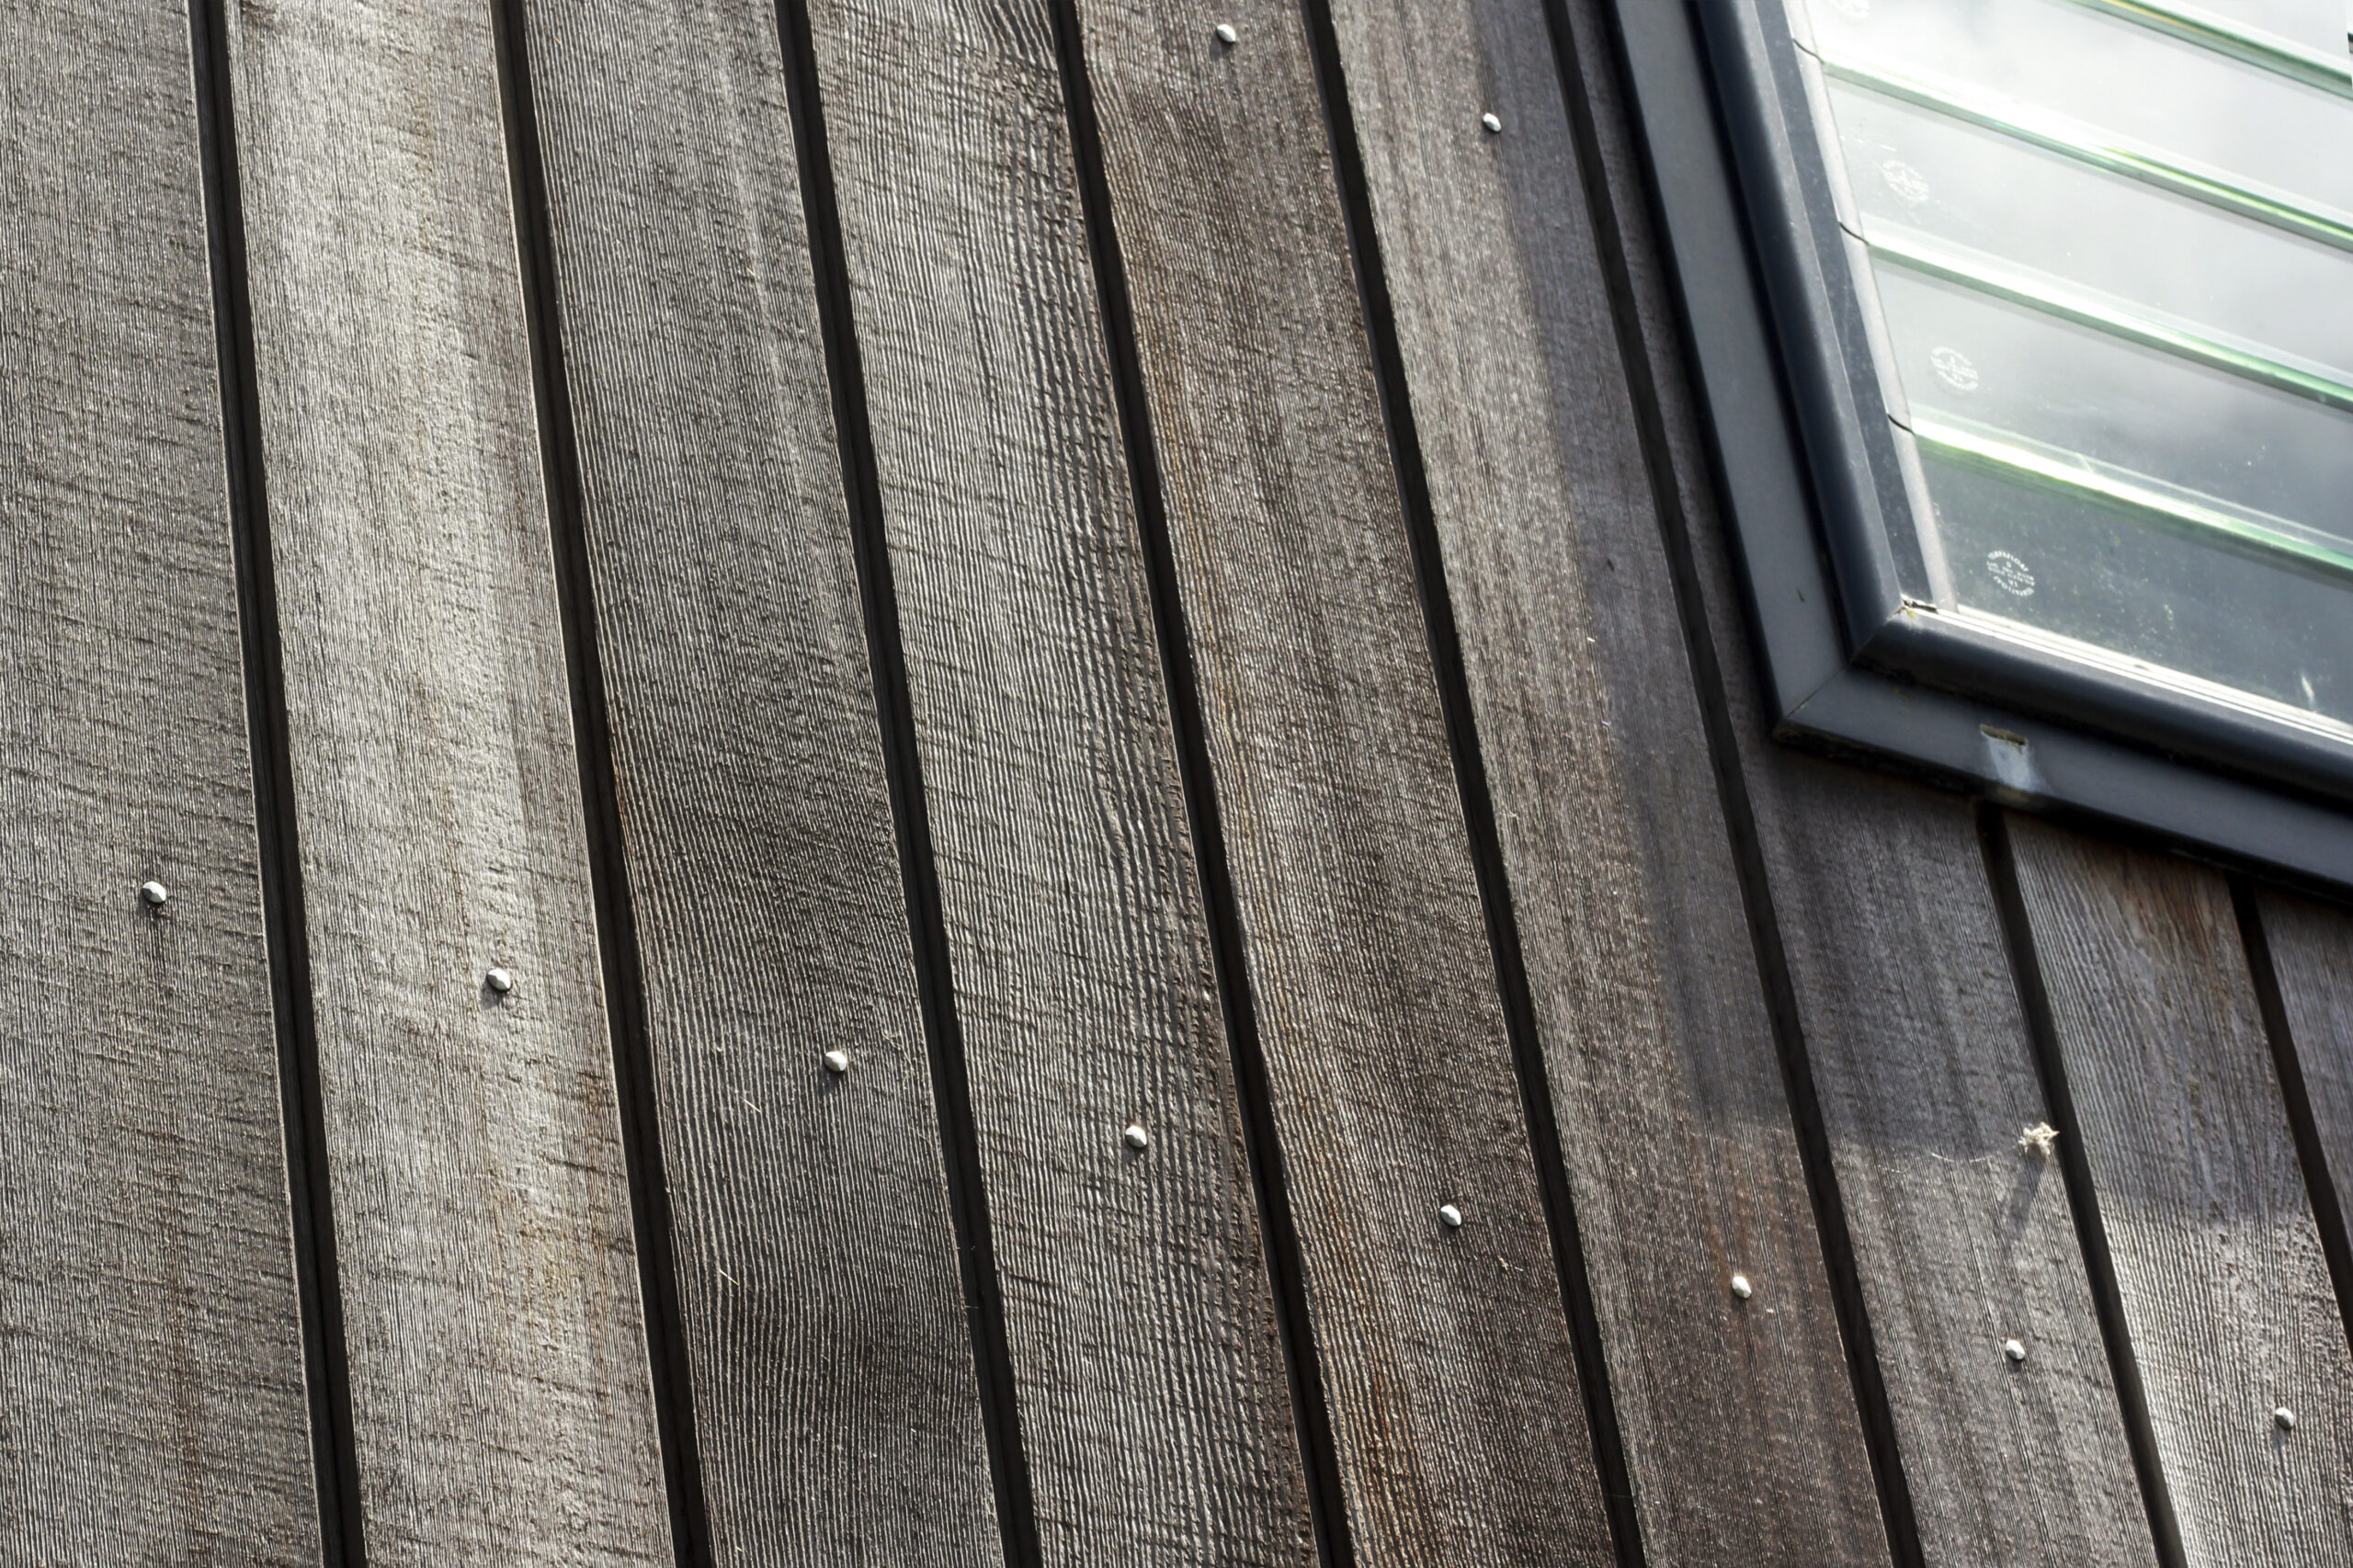
If you look under the window frame, you can see where the windows have been cleaned with a brush. Cedar is very structurally sound, but the surface can be easily damaged if you are not careful.

The darker sections at the bottom are mould and pollen, which have been exacerbated by the surrounding bush. Sometimes the trees can protect the timber if they are nestled in tight, but the number of trees here added to the amount of pollen on the timber.

Cedar Restoration Challenges

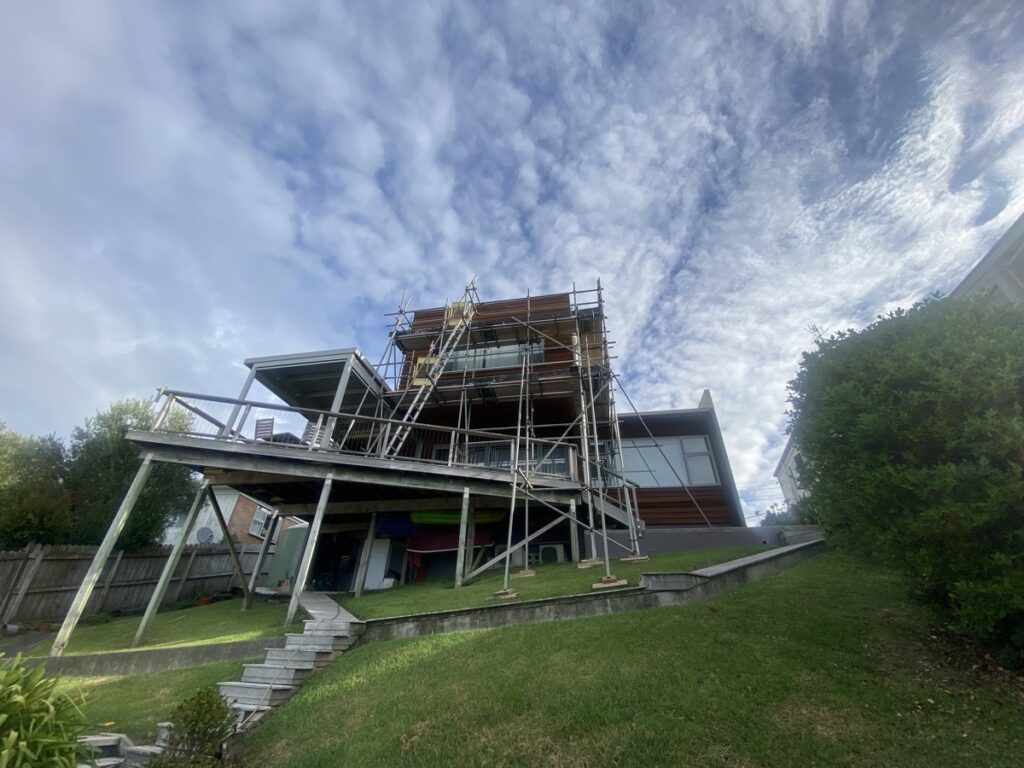
There were two main challenges for this job: access issues and uneven weathering.

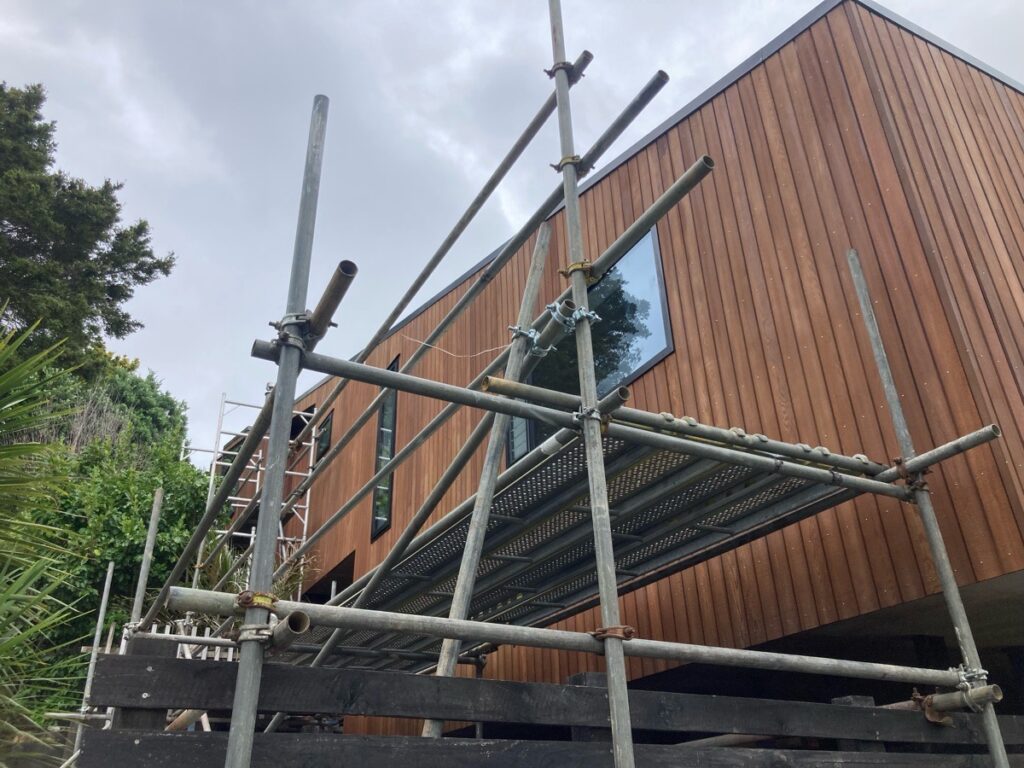
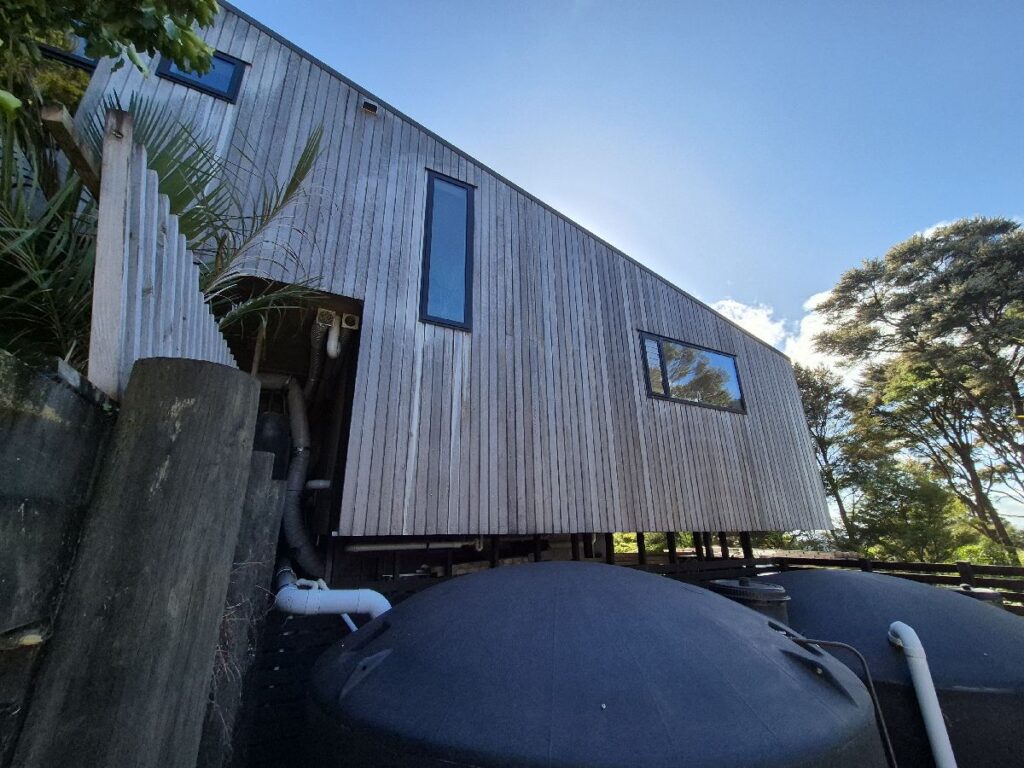
The southern face of the house has high walls and two large water tanks at the base. Without ground access we could not use ladders or mobile scaffolding. To gain safe access to this area, we used fixed scaffolding.

Both the southern and northern faces have uneven ground, with limited access, and required careful use of ladders.

The dormer situated on the roof at the back of the house also needed rope and harness to be done safely.

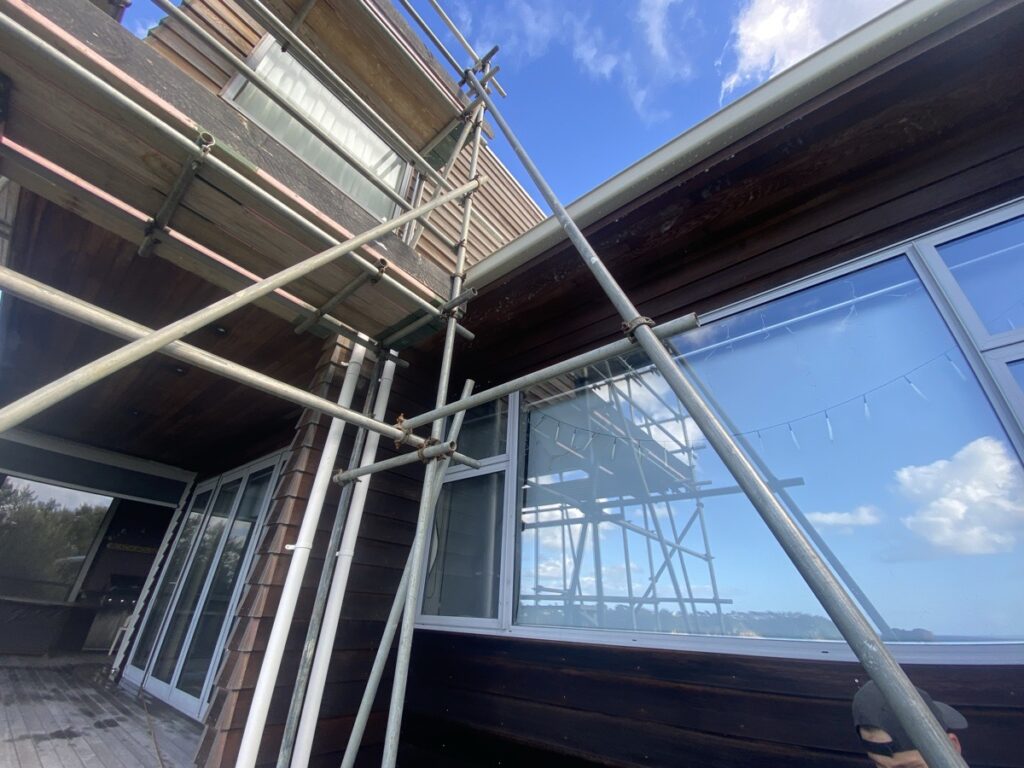
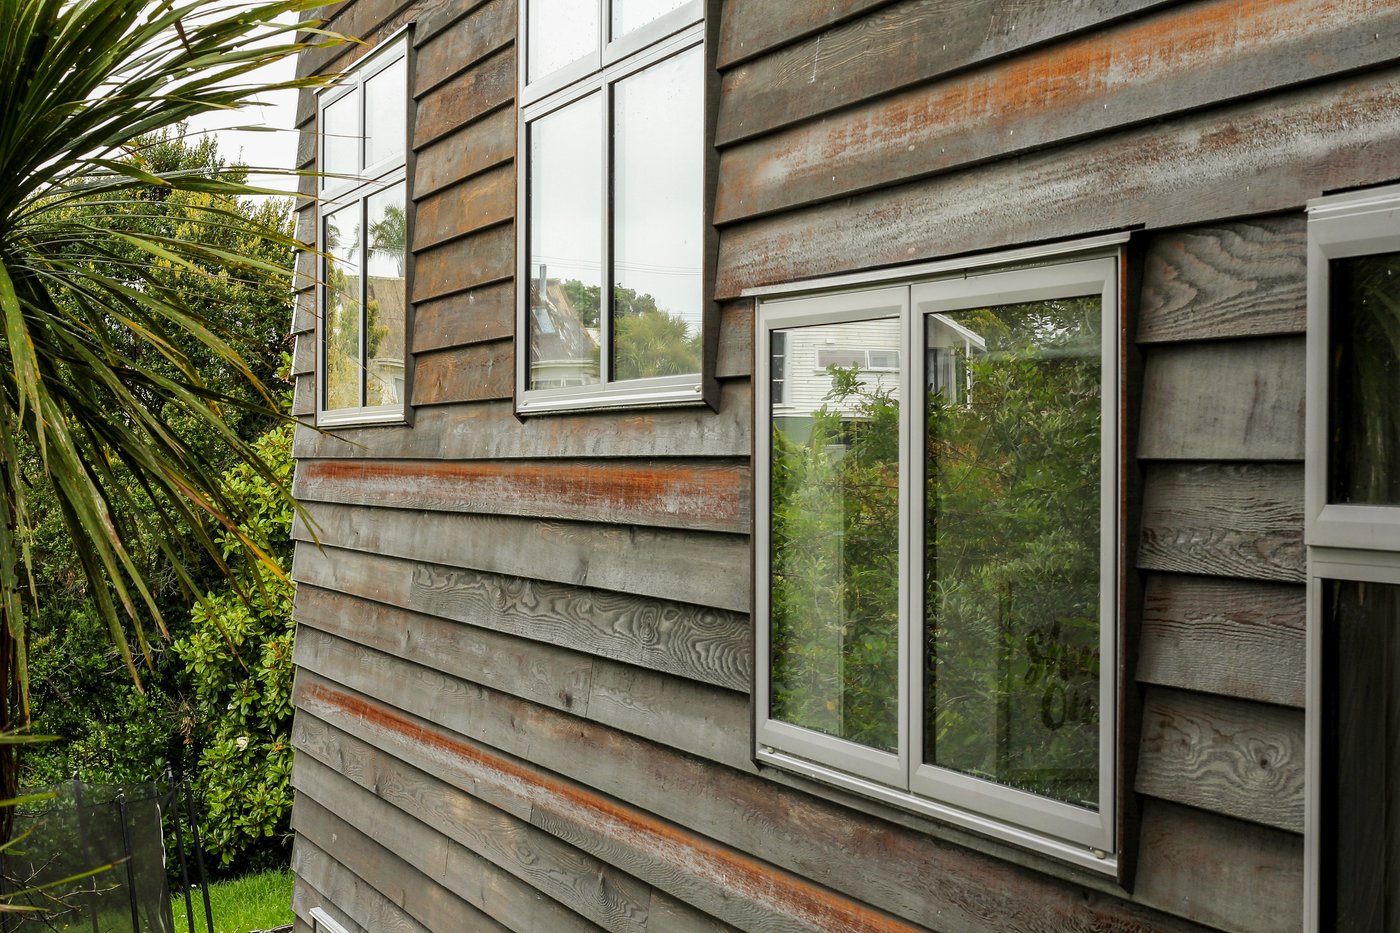
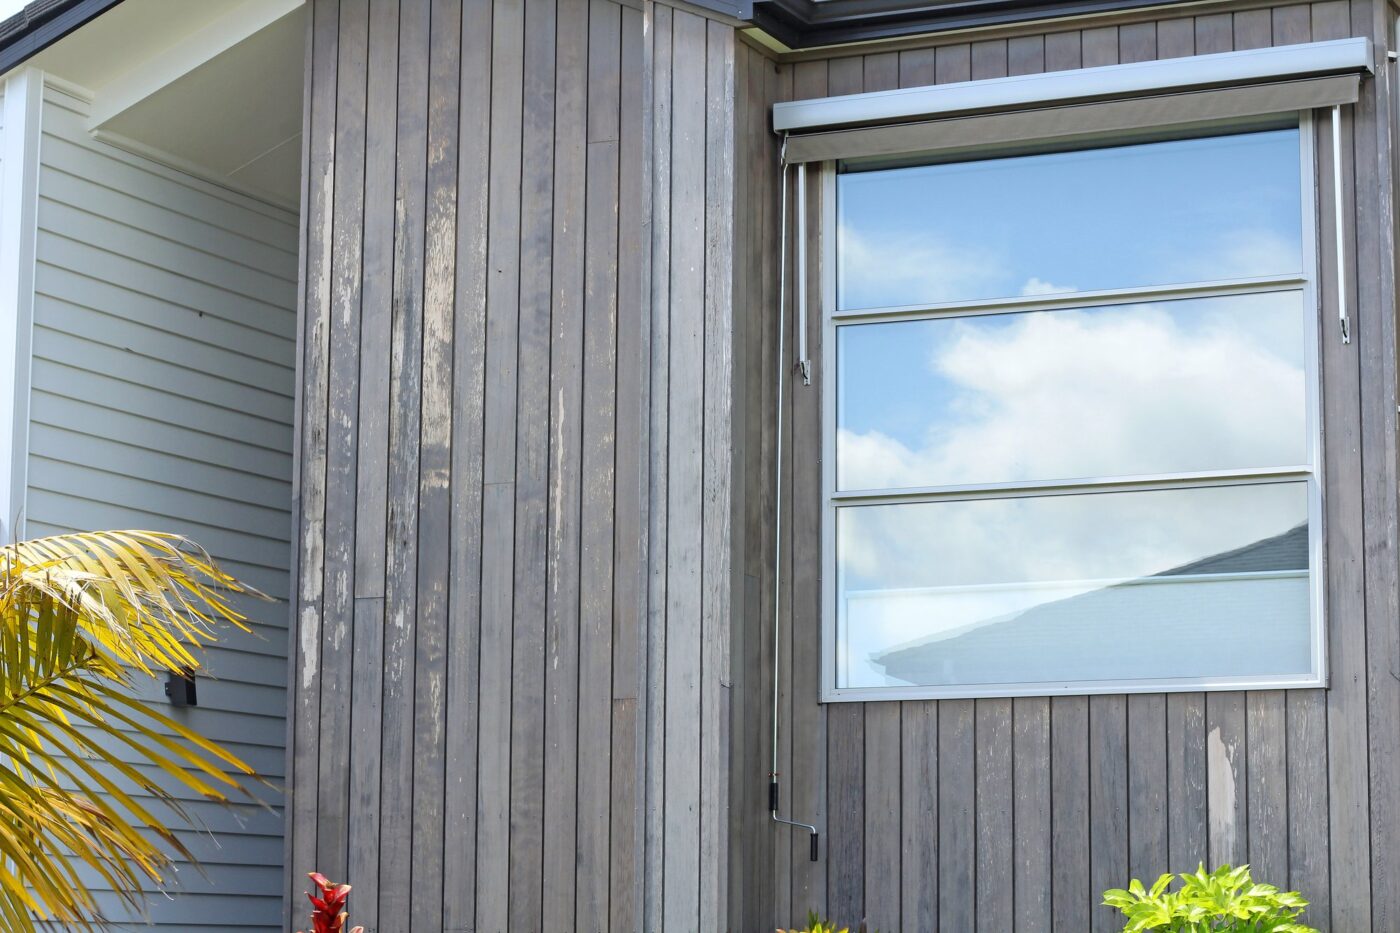
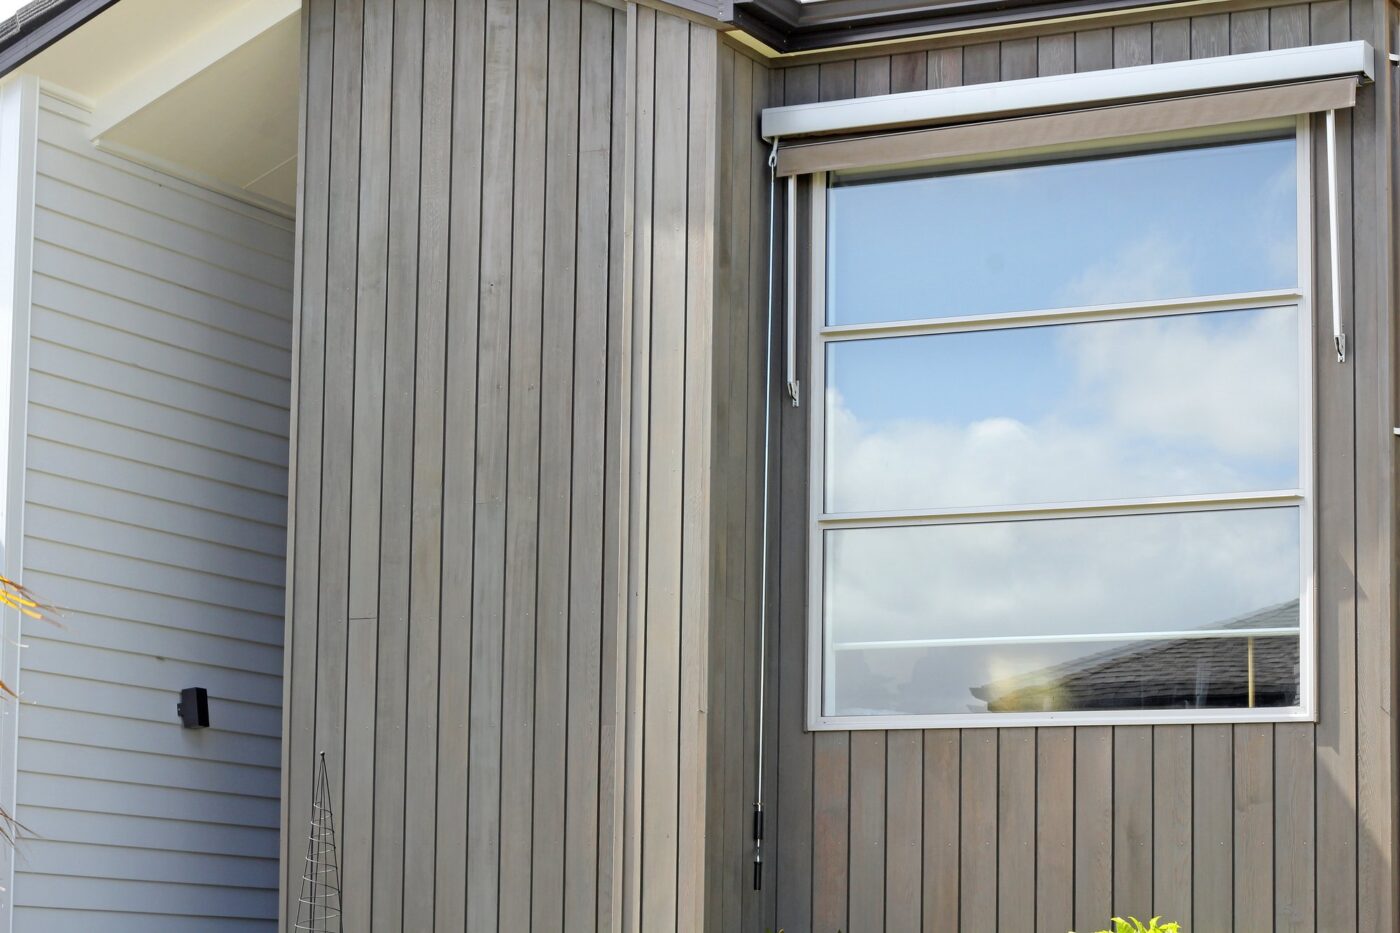
As mentioned before, it’s best not to have any soffits or overhangs on Cedar homes. While they do protect the timber from the sun, the effect can be aesthetically unpleasant, as seen here on the western face.

In the photo below, there is a line just below the overhang where the Cedar was shaded from the sun. To fix uneven weathering, our team needs to strip back the surface to an even finish and then apply oil.

The western face also had some black areas above the window which had been burned by the sun. Below the window, there were even darker areas caused by the rain hitting the concrete and bouncing back, causing dust and muck to accumulate.

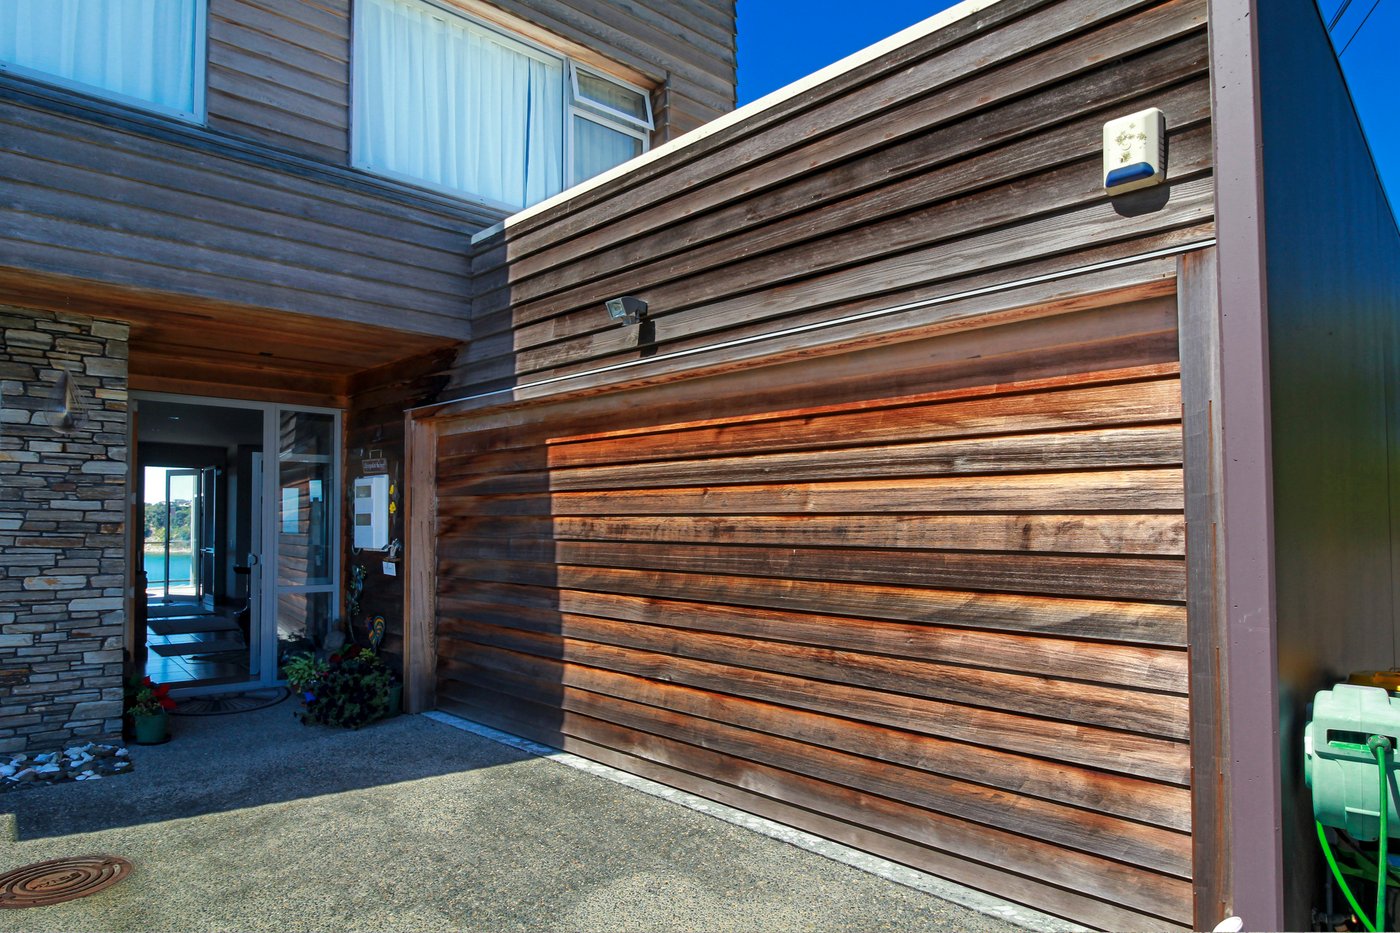
The front of the house, which faces east, had a section of timber above the front door that had not been exposed to the sun and appeared orange (the natural colour of the Cedar), in stark contrast to the grey timber to either side. This required an expert touch to even up the colour, which can be seen below.

Ongoing Maintenance Requirements

Our recommendation is to recoat the northern and western faces within 3 months. If you look at the top of the walls in the after photos, the oil is already soaking in and appears lighter. And we used a lot of oil on this wall.

The recoat isn’t critical, but topping up the pockets in the Cedar with oil will provide maximum protection and make sure the colour remains consistent.

After that, the house will fall into a regular maintenance schedule, with sun exposed areas needing a recoat every 2-3 summers.

Final Thoughts

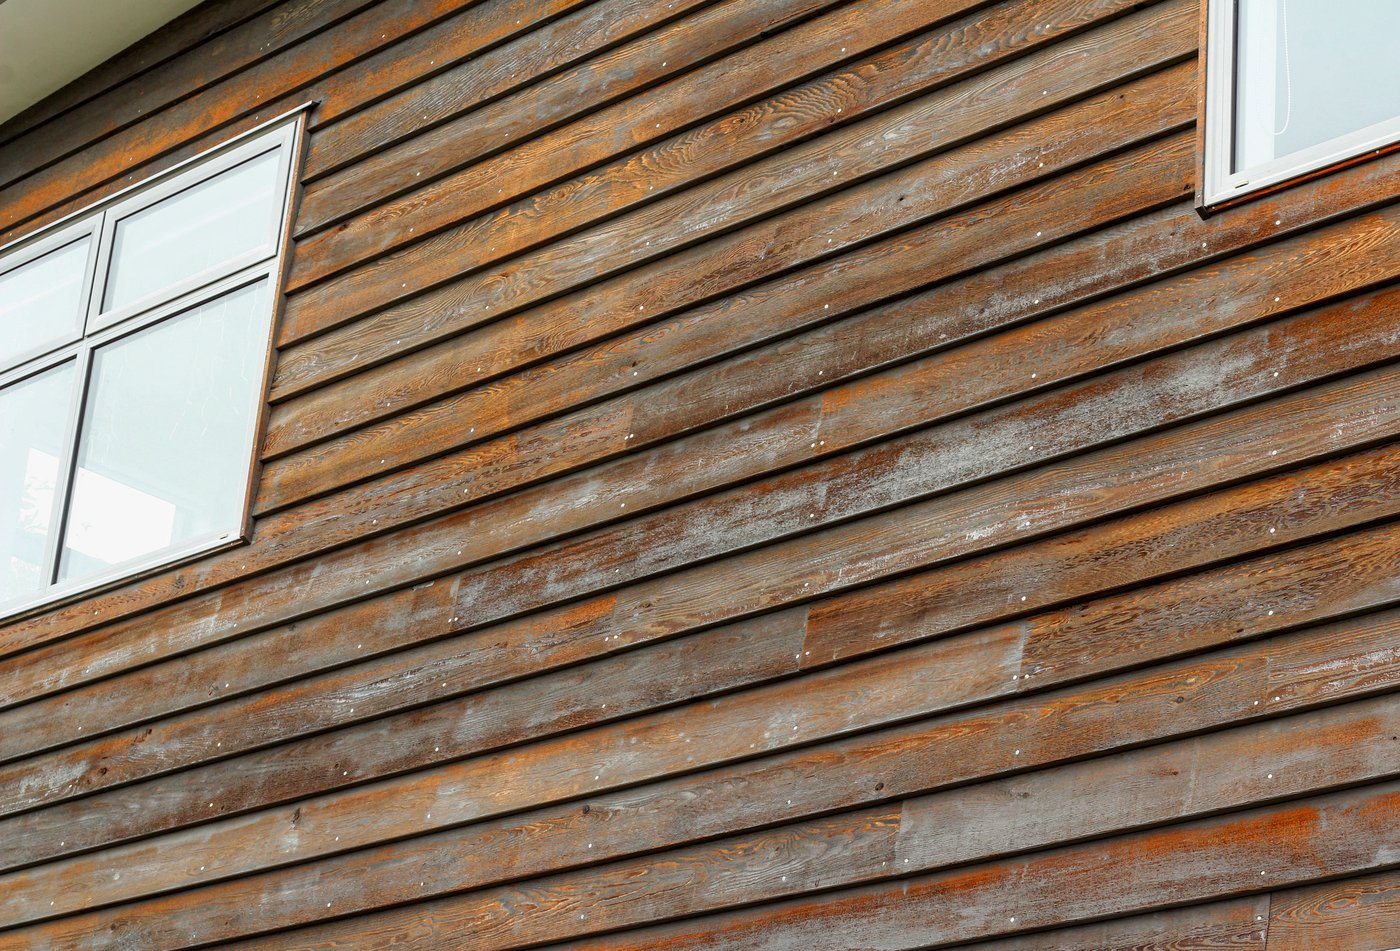
The customer was knocked back by the transformation. The years of grime and dirt were washed away and replaced by glistening Cedar that looked better than the day it was installed.

The contrast between the Kauri Gum tint and the black joinery looks amazing. We even washed their skylights while we were up there!

This was a quick job, with the bulk of the work being done in a week by our technicians, Mikey and Lorena. Great work, fantastic results!

Property Details

Year of Build:
2015
Location:
Titirangi
Coating:
Wood-X Kauri Gum

Category:

More Featured Properties

15 May 2024

This architecturally designed home is located along the eastern coast of the Whangaparaoa Peninsula, with magnificent views across Stanmore Bay.

The home was built in 2009 and the Cedar had not received any maintenance before the customer contacted us.

Cedar located along exposed coastlines has different requirements than Cedar in tree covered areas. Without any shelter, the Cedar is fully exposed to the harsh New Zealand sun, which can burn the timber fibres on the exposed faces and dry out the boards.

Coastal winds can also be strong and contain higher amounts of organic matter, such as dust, pollen and sea salt.

Due to the lack of maintenance and exposure to the elements, this Cedar home required a complete restoration.

Maintenance Timeline

The customer first approached us on the 25th of January, 2024.

  • 1st February, 2024 – Initial onsite assessment completed.
  • 8th February, 2024 – Quote sent.
  • 26th March, 2024 – Team arrived onsite to start the job.
  • 4th April, 2024 – Job completed.

Cedar Maintenance Process

Before oiling, the Cedar required a deep clean to remove all the built-up organic matter and burnt fibers on the surface of the timber.

The customer wanted a golden look for the Cedar. We used Wood-X penetrating oil in Kauri Gum, which is the most popular and natural Wood-X colour tone.

As the front of the house is the main feature area – and the faces most exposed to the sun – we allocated more time and materials here to make sure it looked stunning.

The colour of the garage door (in the before photos) shows what the boards would have looked like if they had been washed previously.

Unfortunately, the garage had been water blasted by someone unfamiliar with Cedar, leaving the surface streaky and damaged. Because the timber is so soft, these lines will stay in the timber forever, unless they are either washed or sanded out.

Above the garage door, the boards have been oxidised by the sun, giving them a burned and blackened appearance.

After putting drop cloths down, we sprayed oil from the bottom up, then across the boards, and by the time we got to the top corner, we had to start again as the oil had already been sucked into the timber.

This was coated 4 times in an hour, and the section above the garage door alone would have used 1.5 litres of oil.

We then left it for 24 hours and came back the next day to apply another coat, mainly because it’s a feature area and we wanted it to pop, rather than still look thirsty.

On the face running perpendicular to the garage door, the boards have been bleached by the sun. Walls facing to the west can sometimes get just as warm and weathered as the northern faces, especially if there is no tree cover.

We recommend that sun-exposed areas are recoated every 2-3 summers. As these boards were so dry, we will return in 9-12 months for a recoat.

This gives the oil a chance to really suck into the pores of the timber before adding more. If done any sooner, the oil will sit on the surface and wash off when the rain hits.

Cedar Maintenance Challenges

The biggest upfront challenge for this job was how steep the property is at the back. As shown in the photos below, the house is built on a very steep coastal hill and required extensive scaffolding.

The next big challenge was just how dry the Cedar was.

The boards used for many Cedar homes are scalloped at the bottom, so that they overlap the board below and sit flush. The boards on this home are solid timber without any decorative features, allowing the boards to sit on top of one another.

They are not much thicker than standard boards, but the difference is that the thickness goes all the way down. This thickness makes the boards very durable, as the thinnest part of the board is where most of the cupping occurs.

The thickness of the boards, along with how dry they were, required more coats of oil than usual and anyone untrained in Cedar maintenance might have slapped on a coat of oil and called it a day. The end result would not have been pleasant to look at.

Ongoing Maintenance Requirements

We recommend recoating sun-exposed faces every 2-3 summers. That doesn’t mean the whole house, just the faces exposed to the harsh UV. The rest of the house may not need further maintenance for 5-7 years.

The Final Outcome

The restored Cedar makes it look like a brand-new house. Contrasted with the grey schist, the lovely golden hue creates a timeless alpine look, both homely and sophisticated.

The owner was away while we did the maintenance and was stunned by how it looked upon their return. They knew we would make it look better, but they didn’t think the transformation would be so dramatic.

Even Mark was impressed with how well the Cedar polished up, and that saying a lot having been in the business for 30 years! What a fantastic result for the homeowner, and a restoration we are very proud of.

20 Mar 2024

This modern, 2-story home is located in the leafy suburb of Titirangi, a beautiful area far from the bustle of the city, but which also has a lot of tree cover and higher than average rainfall, creating the perfect environment for moss and lichen to grow.

The new homeowner contacted us while waiting for the home to go unconditional. The Cedar hadn’t been maintained in 8 years and was looking shabby and discoloured.

Cedar should be treated every 2-3 summers to keep it protected from New Zealand’s harsh UV rays, and to keep it looking cosmetically beautiful.

Without regular maintenance, the UV rays will eventually dry out the timber, leading to fine cracks and roughening of the surface. This creates a toehold for mould, mildew and lichen to get established and makes the timber look unsightly.

Img 2759 Before Img 2759 After

As the Cedar was left such a long time, the story of this property can be told in the before and after photos. We don’t usually have such dramatic transformations with most houses we maintain, so it was a real treat to see how beautifully the Cedar tidied up.

Maintenance Timeline

The customer first approached us on the 14th of October, 2020.

  • 16th October, 2020 – Initial onsite assessment completed.
  • 22nd October, 2020 – Quote sent.
  • 26th November, 2020 – Team arrived onsite to start the job.
  • 9th December, 2020 – Job completed.

The job took 72 hours in total: 14 hours to wash and strip the timber in preparation for the coating, and 58 hours to apply the stain. The entire job took 9 days from start to finish.

Cedar Maintenance Process

Cedar that has been sheltered from UV rays has a flat, uniform surface that is straightforward to maintain.

Cedar that has been exposed to high amounts of UV will have broken-down stain or oil still on the surface, which often creates a toehold for organic matter to grow.

The two front faces of this Cedar home demonstrate both situations perfectly.

Img 2705 Before Cedar Moss and Lichen

The sheltered face, next to the front door, has a flat even colour; while the exposed face, above the garage door, has been exposed to the UV rays.

The starting point for both faces is the same: the Cedar is washed using a biodegradable cleaning solution to remove organic matter and any remnants of the broken-down stain.

After the deep clean, the sheltered face was ready to be coated.

The exposed face required a more rigorous cleaning process. The orange colour on the Cedar is mould, an organic growth that washes off quite easily during the deep clean.

Img 2766 Before Img 2766 After

The dark brown sections of timber are stain that hasn’t been broken down by the UV and is still in reasonably good condition. To remove this and get the boards back to a natural state, we had to strip the boards.

The stain used on this property is Resene Woodsman Waterbourne, smokey ash colour. This is a very light-coloured stain, one of the lightest on the market, and it leaves the boards looking natural and warm in tone.

Cedar Maintenance Challenges

Soffits keep moisture away from the roof and help prevent wood rot and mould, but they also shelter the Cedar from UV rays. This sounds good in theory, but often makes the Cedar under the soffits darker than the Cedar exposed to the light.

If these areas are not prepared properly, the finished result will look odd as both stain and oil are translucent and will show whatever is on the surface below. Preparation here is key, and it takes experience and expertise to make sure the surface is even before applying the treatment.

Img 2735 Before Img 2735 After

This property also had two high faces over 4 meters that required scaffolding. As the ground below is flat, we were able to use our mobile scaffolding which kept access costs down.

Ongoing Maintenance Requirements

Now that the whole house has been restored, it’s only the sun-exposed faces that will need maintaining every 2-3 summers. The rest of the house may not need further maintenance for 5-7 years.

The Final Outcome

Location matters with Cedar. In an area with lots of tree cover and rain, the boards are often in good condition, but covered in lichen, moss and all sorts of organic material, and they are more susceptible to moisture damage.

That’s nothing out of the ordinary, but it does require some extra work if the Cedar is not regularly maintained.

The new homeowners were delighted with the result. Their newly purchased home cleaned up even more stunning than they imagined, especially the front facing areas that people first see when arriving.

This property is an excellent demonstration of how resilient Cedar really is. An amazing timber that will look great for years to come, with a little love and care.

18 Dec 2023

This stylish, modern home in Swanson was built in 2016, but soon ran into problems with the appearance of the Cedar.

The building company had used a stain product that wasn’t tested in New Zealand conditions and soon deteriorated in the harsh UV rays, becoming porous and exposing the Cedar to the elements. Air borne mould took root in the timber and quickly spread once the moisture got in.

Img 2426 Img 5196

As the house was relatively new, the homeowner was understandably upset. Thankfully, the building company did everything to make things right – including bringing in TimberTech to give our expert advice.

Maintenance Timeline

The building company first approached us on the 23rd of September, 2020.

  • 27th September, 2020 – Onsite Cedar assessment completed.
  • 29th September, 2020 – Quote sent.
  • 14th December, 2020 – Team arrived onsite to start the job.
  • 25th January, 2021 – Job completed.

The job took 3 weeks in total, with some time off over the holiday period.

Cedar Maintenance Process

We first masked all the areas that were adjacent to the cladding and stripped off the old stain using a paint stripper.
Modern paint strippers are less potent than in the past and are made from organic compounds, which are harmless to gardens and more environmentally friendly.

Once the paint stripper had been applied, we scraped the weatherboards and removed all traces of the old stain and stripper. To prepare for the new treatment, we lightly rinsed the surface with a water blaster to remove any remaining dust and organic matter, then sanded the boards to take away any of the furring.

Img 2442 Img 5191

The final step was to apply 2 coats of an oil stain. Oil-borne stains are oil mixed with solvents that evaporates upon application, allowing the stain to cure. These types of products are not used as much these days as the market has shifted to waterborne products that are more environmentally friendly.

Solvent based products give a much flatter finish that absorbs the light, giving a less shiny, more natural look.

Cedar Maintenance Challenges

As the house was basically new, we had to take special care masking around the edges of the timber to ensure the oil stain didn’t come into contact with the joinery, or the established gardens.

The awning on the front face of the house also had to be removed. We supplied and erected mobile scaffolding to give the builders access to the awning.

Img 2438 Img 5192

Another challenge for this particular property was liaising between all the concerned parties to achieve a satisfactory outcome. This included the customer, the building company and the company that supplied the initial product.

TimberTech has the staff and the experiencing to manage jobs of all sizes and we gladly took on the management of this project – which proved to be a great relief for the customer.

Ongoing Maintenance Requirements

To keep the Cedar looking beautiful for years to come, all it needs is a light wash once every few years and a recoat of exposed areas every 2-3 summers.

The Final Outcome

Img 2417 cedar restoration

The final outcome was an outstanding transformation. The Cedar has a smooth, even finish that is free of mould and still retains the natural textures that make Cedar look unique.

We are very proud of the restoration work done by our team, but the highest praise came from the customer, who sent us an email soon after the work was completed:

I wanted to let you know how pleased I am with the work completed at my property, it’s now looking fab. I was particularly impressed by the team, they did a fantastic and thorough job, they demonstrated an excellent work ethic and they were very easy and trustworthy to have around. I’d like to schedule regular maintenance for the cedar – please let me know what I need to do to lock this in. Thanks again for all the hard work – excellent job!” 
– Jannette

Showing 1 - 10 of 14

Subscribe

Sign up to our quarterly newsletter for all the latest Cedar tips and expert advice.

Your Free Cedar Diagnosis

TimberTech comes to you, or we review the supplied photos of your Cedar. Next, we provide you with a professional treatment plan.

Let’s get started…