Scroll Down

Cedar Maintenance Tips

Knowledge Hub

The Knowledge Hub is a free resource for homeowners, with expert advice on Cedar protection, maintenance and restoration.

Cedar is a miracle timber if ever there was one – stunning to look at, extremely durable and a superior insulator – and if looked after properly, it will last the lifetime of your home.

Every month we will be sharing articles with tips, knowledge and advice on how to care for your Cedar and keep it looking beautiful for years to come. To stay informed, sign up for our quarterly newsletter.

No spam, no sales pitches, just top-quality advice and a lot of love for this amazing timber!

Newsletter Sign Up

Category: Cedar Maintenance Tips

13 Mar 2025
Looking after Cedar is often a lot more cost-effective than people assume, and that cost just goes down with regular maintenance.

Time to answer the million-dollar question: how much does it cost to maintain or restore a Cedar home?

Thankfully, the answer is nowhere close to a million dollars! Looking after Cedar is often a lot more cost-effective than people assume, and that cost just goes down with regular maintenance.

Naturally, all homes are different, and no single price will fit the huge variety of Cedar homes across the country. The prices given here are a range, based on Mark’s experience looking after Cedar homes for 30+ years.

To cover the widest range of homes, we have categorised the pricing under 3 different eras, with some variables at the end.

Late 80s to late 90s

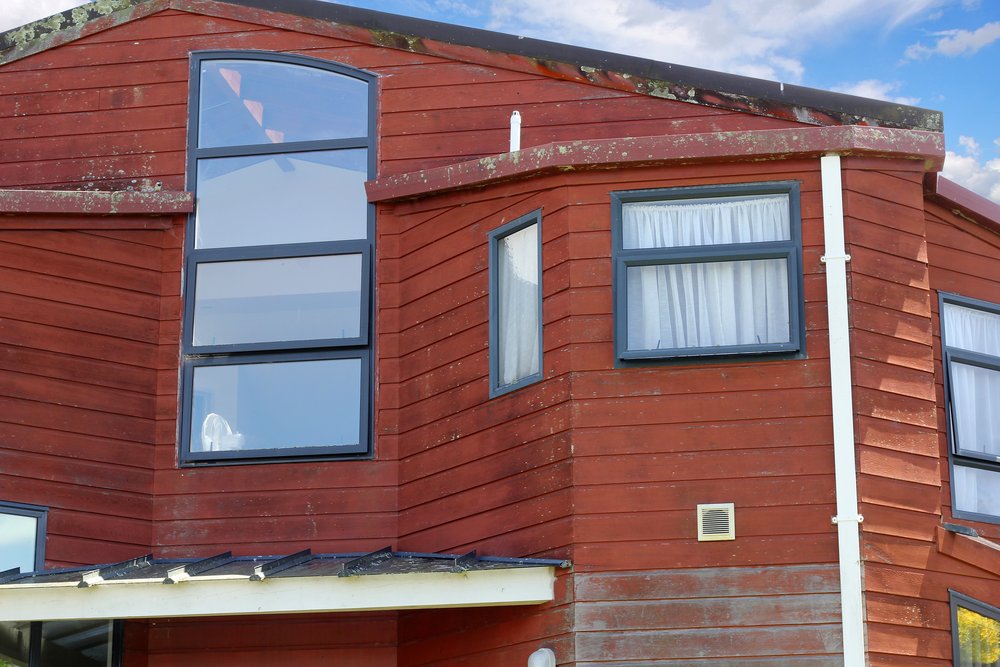
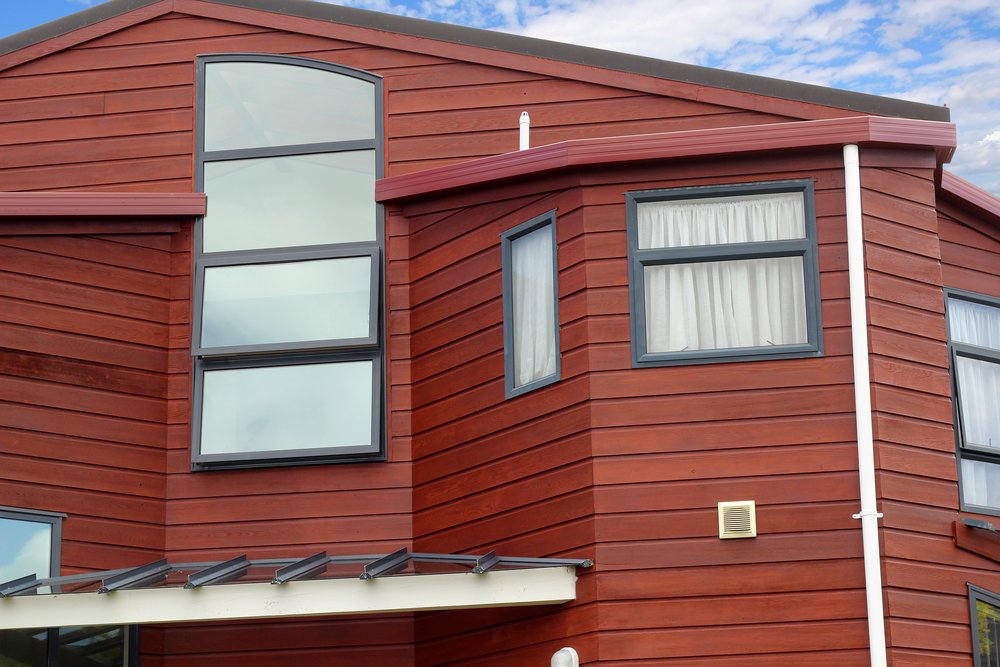
Cedar homes from this era are stained in a distinctive shade of reddish brown. There were only two types of stains available, and they were both brown.

To change the colour of the boards will be very costly, as you would need to strip off the stain before applying a new stain or oil. Most people go for a light rinse and a recoat using one of the new waterborne stains.

The boards themselves are often still in great condition. The Cedar from this era was milled from slow growing trees, making the boards denser and more stable.
cedar-restoration-before cedar-restoration-after

Cedar homeowners were also more likely to maintain the Cedar themselves, so the Cedar often has multiple coats of stain that further protect the boards from harmful UV rays.

Standard maintenance, or a combination of maintenance and restoration, will cost between $5.5k – $8.5k for a single-story home, and $8.5k – $10k for a double-story home.

Early 2000s to 2010

Cedar homes from the early 2000s often used Cedar as a feature, installed up high, to enhance the look of weatherboard and solid plaster houses. There are very few houses from this era that are clad entirely from Cedar.

20 years on, most of these houses have had nothing done to them. The culture of maintaining your own Cedar has diminished due to busier lifestyles and more focus on health and safety, resulting in Cedar on sun exposed faces looking shabby and tired.

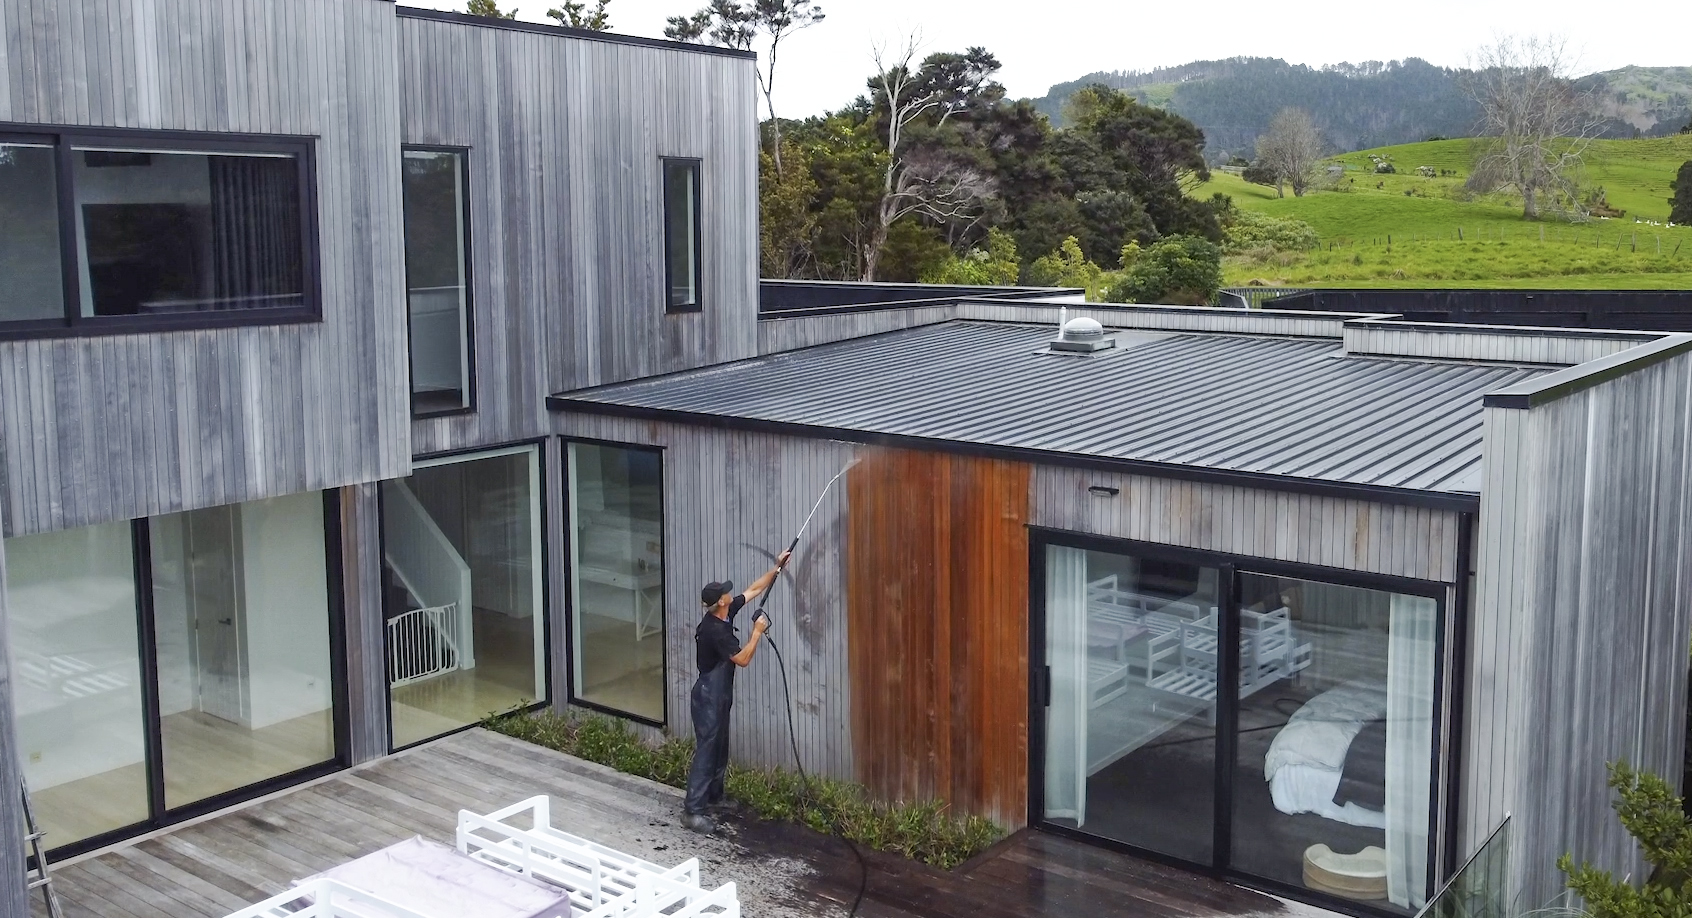
This scenario usually requires restoration over maintenance. Restoration involves washing the house, removing any organic matter, stripping back any old stain, and then applying a new coat of oil.

The cost of restoration will depend on volume and aspect: how much Cedar was used as a feature and which direction it faces. If it’s northerly facing, you will need to do considerable restoration work. If you have a feature on the south face, it might still be in good condition and only require recoating every 10 years.

If the Cedar can be accessed by ladder or mobile scaffolding, the standard cost of a restoration is between $3.5 – $5.5k. Fixed scaffolding will add considerably more to the cost.

2010 – Present

Since 2010 onwards, Cedar has only grown in popularity. Homes are trending away from brick and tile, towards new townhouse developments, or architecturally designed properties.

Cedar is still a premium building material, but the price has come down in recent years due to faster growing methods and better exchange rates. As a result, we are back to building whole homes in Cedar.
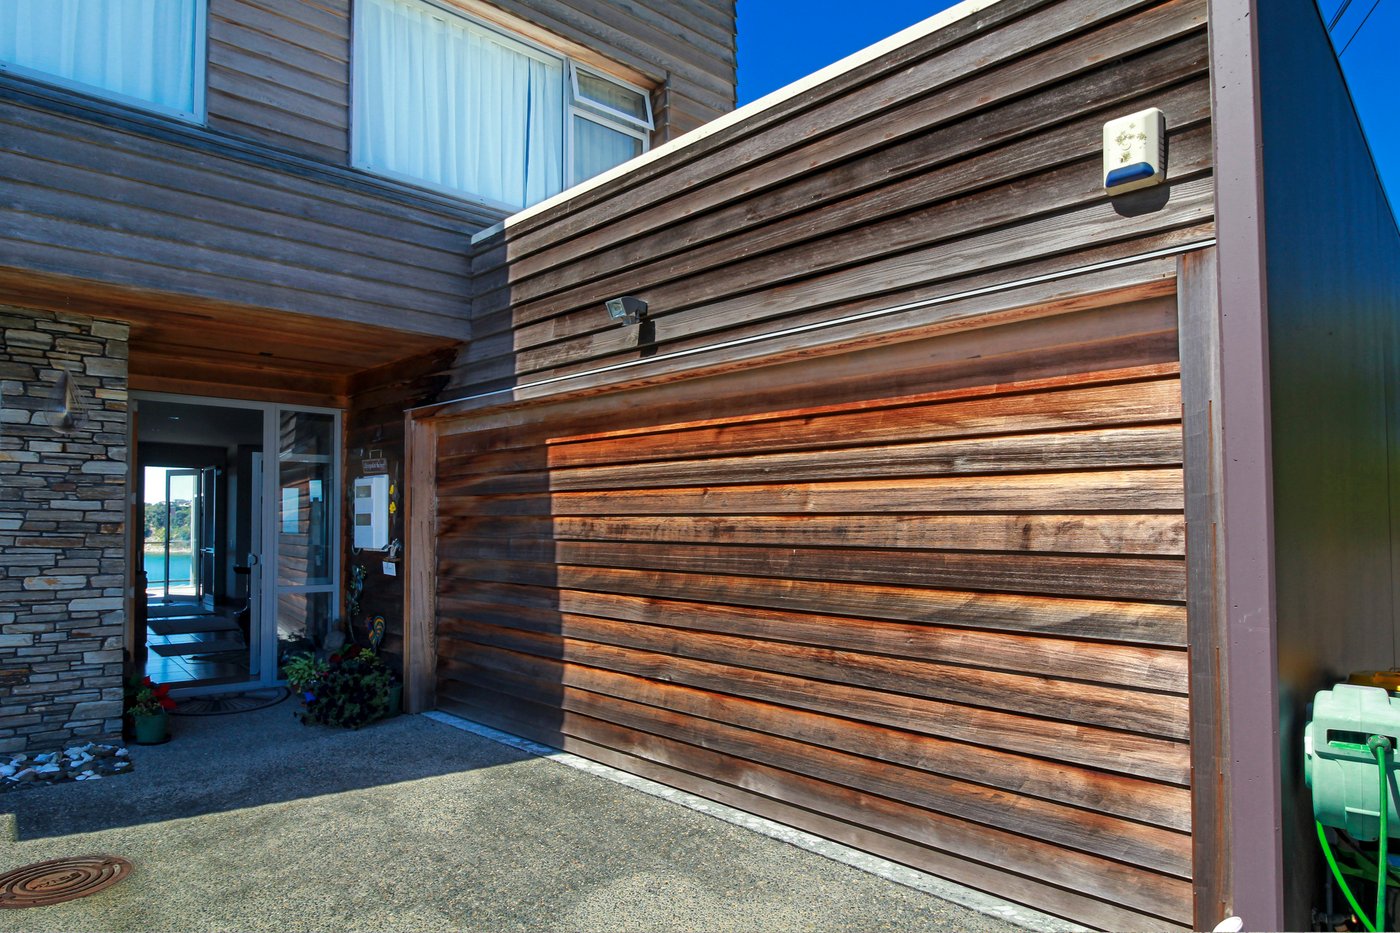
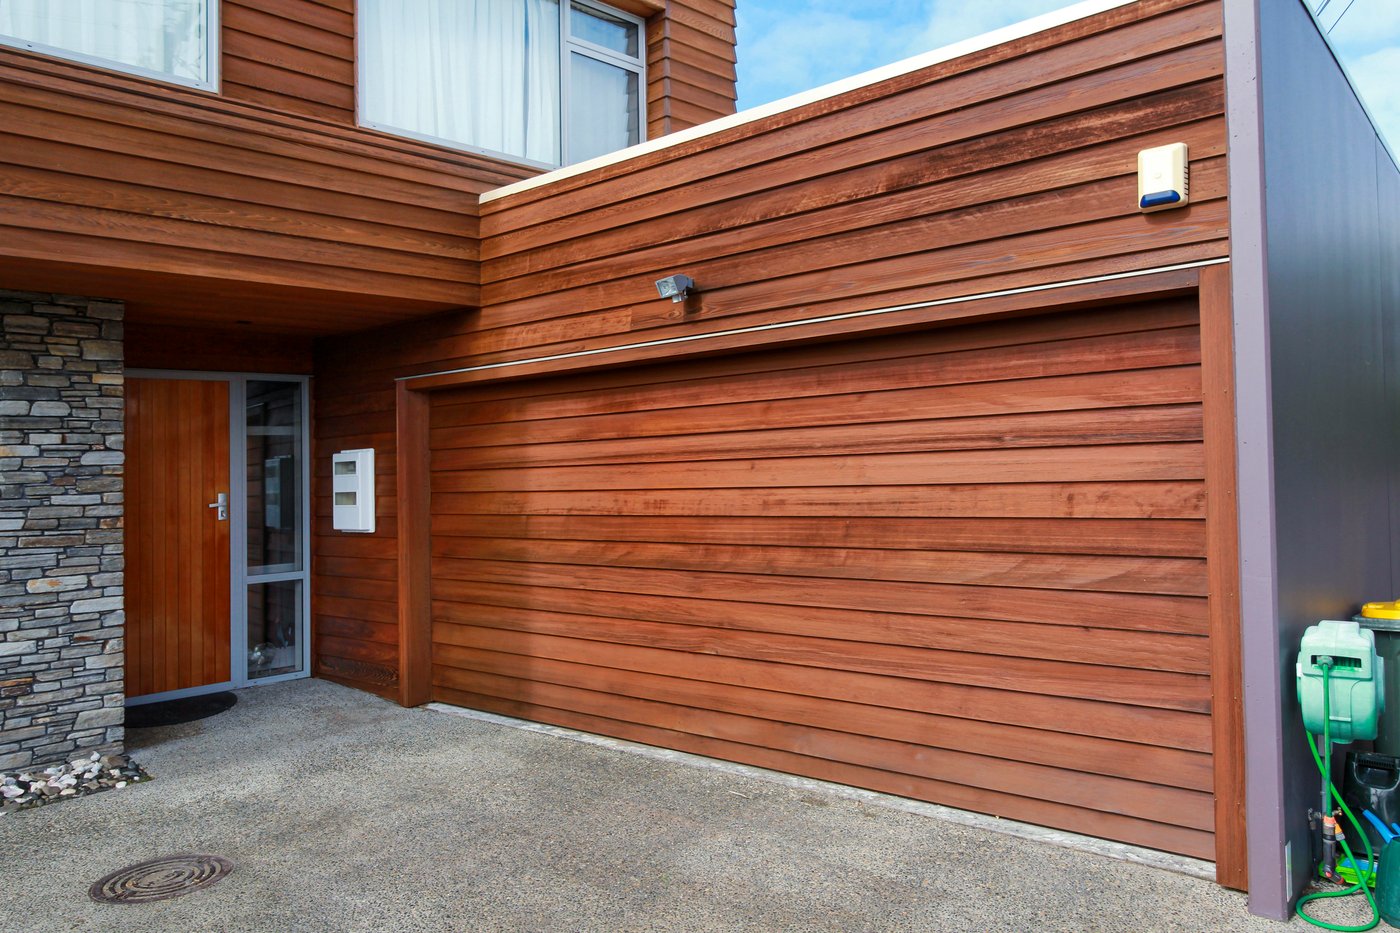
The downside is that the faster growing timber isn’t as dense as the old boards. It’s still an incredibly robust cladding but requires regular maintenance to keep stable. If neglected, the boards will start to cup, and at some point, begin to pull the fixings through the timber.

Single-story Cedar homes cost $6.5k on average for a wash and recoat. Double-story Cedar homes are upwards of $8k – $10k. Large architectural homes are $15k – $20k.

Pricing Variables

  • Fixed scaffolding

Where possible we work from our own mobile scaffold towers and extension ladders, which are safe and fast, and keep costs down. Fixed scaffolding is often required when you go from 2 to 3 stories.

Scaffolding a large house will cost an additional $7.5 to $10k home. Scaffolding a smaller home, but still 2 story with high areas, will be $4k-$5k.

  • Access issues

These are houses that are built on steep hillsides or have very high walls. There will always be additional costs when our team must access hard to reach areas, but it’s not often a huge expense. The areas that need rope and harness are usually limited, and it’s all part and parcel of what we do.

  • Size of the house

The bigger the house, the more time, stain and oil it requires.

Additional stories on top of that will always be more expensive, and when you go from 2 to 3 stories scaffolding is required. If you have 2 stories, but there is very little up top, the extra cost will be minimal.

  • Time passed

If you haven’t maintained your Cedar in the last 3-5 years, it’s going to be very dry and require a lot of product.

  • Restoration vs Maintenance.

If the Cedar has never been touched, the boards will require a deep clean and oil. If they have stain, we need to strip back the broken-down stain. These are two very different treatments, with different costs associated.

Final Thoughts

No two houses are the same. There is a good reason why our team travel out to every house before we send a quote. There are a lot of variables in pricing a quote (and many of them can work in your favour!), so it’s always best to call our team for an onsite assessment.

We never push Cedar maintenance if it’s not needed and prefer to look after the best interests of our customers over the lifecycle of their homes.

15 Dec 2024
Applying the right amount of oil is essential in protecting your Cedar from the harsh New Zealand sun. For stress free Cedar maintenance, simply follow the manufacturer's guidelines and your boards will last forever (well, almost).

Applying the right amount of oil is essential in protecting your Cedar from the harsh New Zealand sun.

The purpose of applying oil is to seal the boards from moisture. And the only way you can seal the boards is to put enough oil into the deep pockets of the timber that the water will stop getting in.

If the pores of the timber are not filled with oil, they will accept whatever other liquid there is available, such as the rain or moisture in the air. This causes the boards to swell and contract, absorbing and releasing moisture.

The summer heat will then dry the surface of the timber and as the surface tension gets tighter, the boards will begin to cup.

Follow the Manufacturers Guidelines

For the purposes of this article, we will look at the manufacturer’s guidelines for Wood-X.

Coverage of Wood-X penetrating wood oils is dependent on surface condition, timber type, air temperature and other factors. The following is an approximate, typical guide.

Wood X Guidelines

The range of sq meters per litre (such as 9-14 sq meters for the first coat of dressed timber) is a guideline for different situations. There will be areas where the boards will allow you to put the maximum recommendations on, and areas where you will only get the minimum.

The end grain of the Cedar is nice and open and will suck up the oil, whereas the heart of the tree is a lot harder and does not absorb the oil as easily.

Other factors include the porosity of the board, how warm it is (in warm temperatures the boards will expand and oil will penetrate more easily), and the type of timber also makes a difference.

A dressed faced board has a smooth finish, like trying to get oil to penetrate glass, so it takes a long time for the oil to soak in. With a band sawn finish or weathered finish, the pores are open and will accept oil more readily and get deeper into the timber.

Is More Oil Always Better?

More is best. You can’t put too much Wood-X on. The intention is to saturate the surface and put as much oil into the timber as you can.

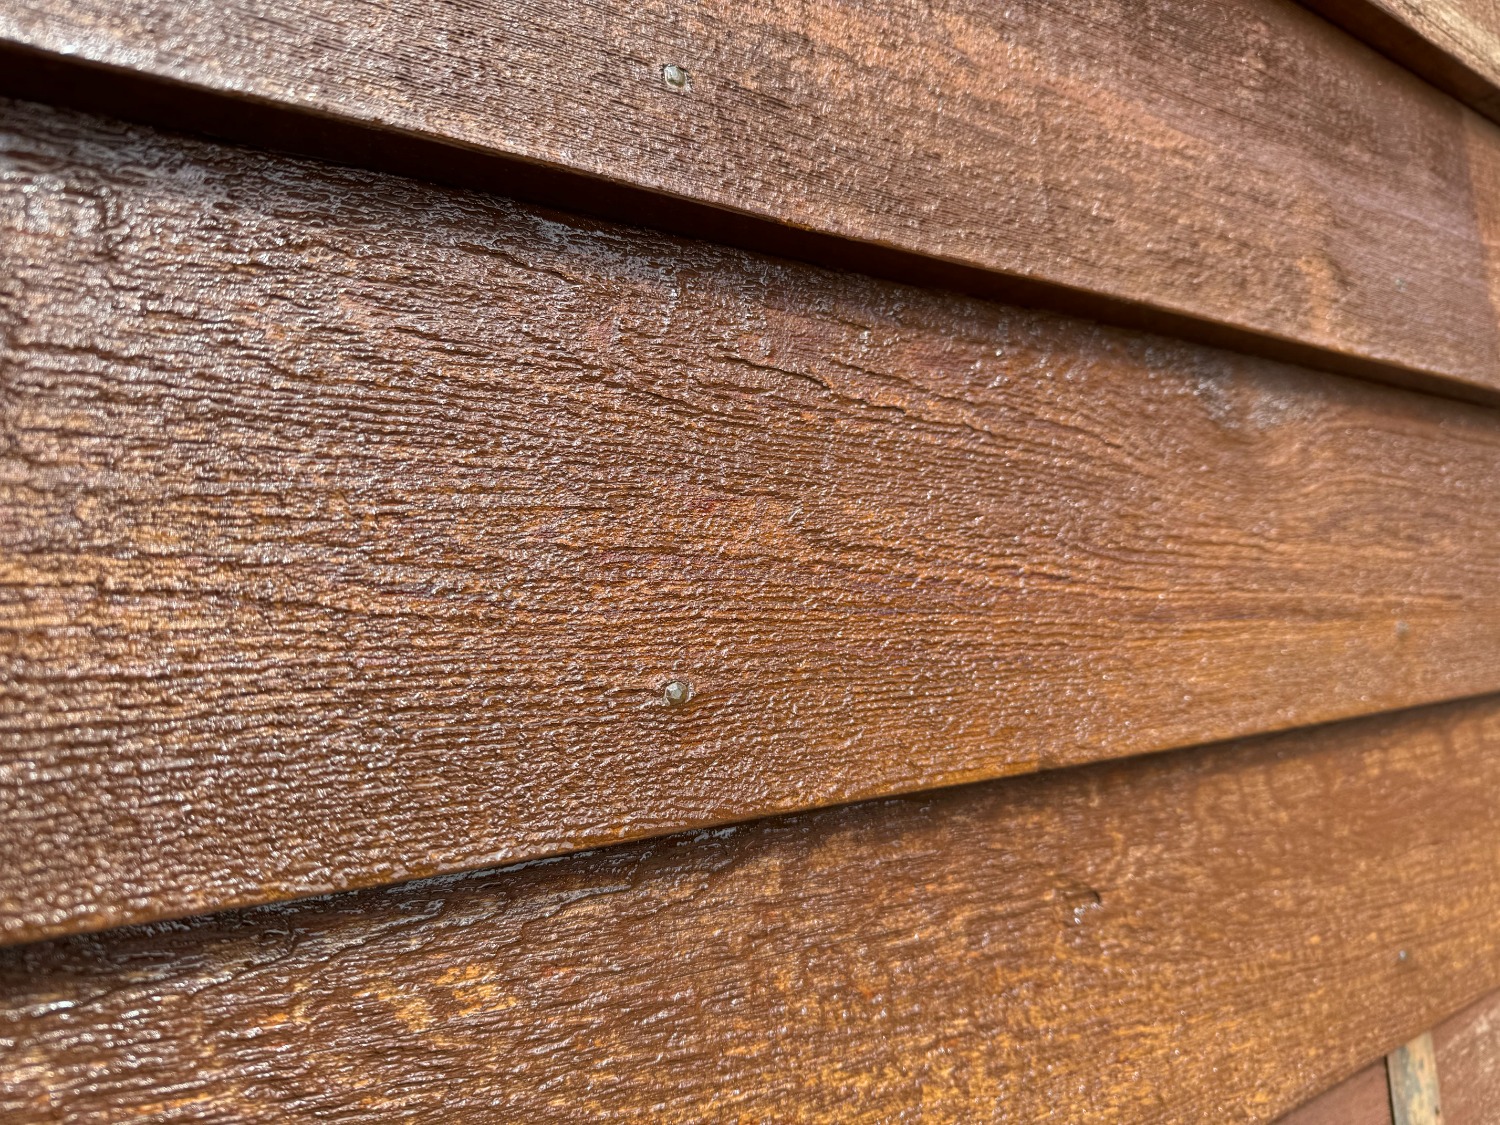
The timber will tell you when it’s full. It says that by perspiring. It leaves a shiny film on the surface and at that point, you know that no more oil is going in.

Sometimes people try and apply stains or oils sparingly and get them to look pretty with the first application. That’s not the design of a penetrating oil such as Wood-X. Wood-X needs to be applied so the boards get saturated and no longer absorb oil. At that point, you stop.

3-5 sq meters per litre is not a lot of timber to cover with quite a lot of oil, but that is what’s required if you want the boards to be protected.

Does Recoated Cedar Have Different Requirements?

No, the same principles apply. Saturate the surface and put as much oil into the timber as you can.

For new Cedar, the first recoat timing starts when the boards are installed and exposed to the air trafficking around the outside of the board. On a dressed face, the small pockets have already been filled with oil, so you are going to get 12-15 sq meters per litre.

That first coat can feel like it’s a waste of time. It’s not, it’s just very labour intensive for not a lot of gain, but it will set you up for the future of your timber.

Application Tips

  • Be careful to protect the areas you don’t want oil on. It migrates very quickly and will get onto decking and painted weatherboards. Once soaked in, oil is difficult to get out.
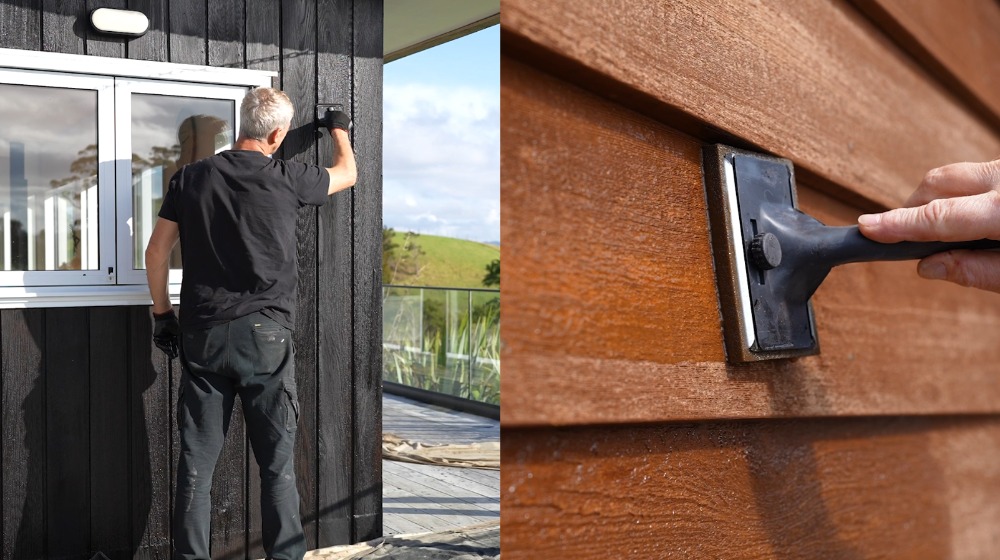
  • Using a spray gun is fast and effective, but we recommend using a brush or speed brush to take off any excess oil before it drips.
  • Spend the time to get the colour right. Choose a colour you like and stay lighter, that way the 2nd coat can go darker. It’s hard to go the other way around.
  • How long until the oil is dry to touch? If it’s a warm and windy day, around 48 hours after coating. With harder woods, or in cold conditions, you may need to extend that to 72 – 96 hours. As long as it takes to soak in.
  • When you start to see the colour fade, that’s an indicator that your Cedar needs attention. Or when the rain comes and the boards go very dark because they have soaked up the water. Both are tell-tale signs that there is no oil in the pores of the timber.

Final Thoughts

Wood-X is tried and tested in New Zealand conditions. For stress free Cedar maintenance, simply follow the manufacturer’s guidelines and your boards will last forever (well, almost).

If you need further advice, do not hesitate to get in touch with our team. We are always happy to help!

15 Oct 2024
Even amongst building professionals, there is a lot of confusion around different Cedar treatments, and which is best for the long-term protection of Cedar in different situations. This article aim to set the record straight.

Tinted oils and stains are two very different products – each with unique compositions, application requirements, and long-term maintenance needs – but the names are often used interchangeably.

Even amongst building professionals, there is a lot of confusion around different Cedar treatments, and which is best for the long-term protection of Cedar in different situations.

In fairness, the difference is not always obvious, and much of the confusion comes from the terminology used by manufacturers in the past.

This article aims to set the record straight, and show why it’s beneficial – both for your Cedar and for your wallet – to know the difference between Cedar treatments.

Let’s start by defining what exactly is an oil and a stain.

What is a Penetrating Oil?

Penetrating oil is designed to migrate into the timber and waterproof it from the inside, protecting against movement from the wetting and drying process, but it offers no UV protection.

We do not recommend using clear oil on Cedar cladding as there is no UV protection.

When a tint is added to a clear oil base, it becomes a tinted oil.

The tinted oil has all the waterproofing benefits of clear oil, but the tint now protects the timber against UV, like a sunblock, and it can be applied with a range of different colours.

What is a Stain?

Traditional stains use a solvent to emulsify the oil and are typically a brown-red colour, prevalent on homes built before the 2000s.

Solvent based stains are still available, but they are being phased out in favour of water-borne stains, which are more environmentally friendly, and come in a range of colours.

Water-borne stains emulsify the oil in water. When applied to the surface, the water evaporates leaving behind the oil to migrate, to a degree, into the surface of the timber.

Stains do not penetrate deeply into the timber, unlike oil, and are designed to erode from the surface over time. Once the stain has been broken down by the UV, any remaining stain will need to be washed or sanded away before applying new stain.

Where Does the Confusion Lie?

Stains and tinted oils are the most common source of confusion when talking with Cedar homeowners.

People think of a stain as something they brush on and the stain then soaks into the timber. This is true, but a stain will only soak into the timber marginally compared to a penetrating oil.

If you pour tinted oil onto a white sheet, it’s going to change the colour of the sheet without changing the texture, essentially staining the fabric.

If you do the same with a traditional stain, which is actually like a very thin paint, it’s going to leave a coating on the sheet. It will change the colour, but only because there is a coating on the surface. It’s not actually staining the fabric.

By this rationale, a stain is not actually a stain, but it’s been called a stain for so many years that the name has stuck.

This may seem like splitting hairs, but knowing which product is right for your Cedar has a significant impact on how your Cedar needs to be maintained.

Why Does This Matter

If you know what treatment is on your Cedar, you can formulate the right maintenance strategy for your home – and potentially save yourself money, and heartache.

Here are a few practical examples:

  • Existing Cedar Homes

If you already have a Cedar home, this means you can use the same treatment as before for the best colour matching and application; while avoiding generic products that do not perform as well, or incompatible treatments, such as applying a water-borne stain over an oil.

  • New Cedar Homes

If you are building or buying a new Cedar home, a stain is often applied as it requires little upkeep for the first 5-10 years, but eventually the sun will dry out the timber and you might have to use a Cedar professional for maintenance or remedial work.

  • Cost and Upkeep

Different treatments have different costs. Oil migrates deep into the timber, but doesn’t last on the surface as long as a stain and needs more regular upkeep. Stain lasts longer, but once it erodes, it needs to be removed evenly before recoating, or you end up with an uneven finish.

  • Cedar Orientation

Areas in the shade require less maintenance than sun-exposed areas, making stain more suitable in some circumstances. And if you have an area of Cedar up high, the cost of scaffolding might be prohibitive for regular application of oil and a stain might make more sense.

All these potential complications can be eased by knowing what treatment has been used on your Cedar, and what treatment is best for different situations.

Final Thoughts

We are not saying that one product is better than the other, but by understanding what treatment is on your Cedar, you can make better decisions about how it needs to be protected.

If you are unsure, get in touch with our team and a Cedar expert will come out to your house to assess your cladding.

15 Jul 2024
Mark has been in the business for over 30 years and has seen a lot of Cedar products come and go. The products recommended here are based on his personal experience maintaining thousands of Cedar homes across the country.

Mark has been in the business for over 30 years and has seen a lot of Cedar products come and go. The products recommended here are based on his personal experience maintaining thousands of Cedar homes across the country.

These are the products we actively use today, or have used in the past, and all have been tried and tested across a range of locations and conditions.

If the product you are considering isn’t mentioned below, that doesn’t mean it’s unsuitable, only that we don’t have enough experience with the product to recommend it either way.

Always follow the manufacturers guidelines and choose the best Cedar product for your specific circumstances.

Lastly, if your Cedar has already been treated with a specific product and is still in good condition, it’s a good rule of thumb to use the same product for the best colour matching and application. If the product is starting to fail, look at the best solution for the timber regardless of what was used previously.

Best Cedar Cleaning Products

Preparing Cedar before applying an oil or stain is the key to achieving a smooth and consistent finish.

Over time, organic matter such as dust, moss and lichen will build up on the Cedar. As oils and stains are semi-transparent/translucent, any product or organic matter left on the surface will show up and look unsightly.

Which cleaning product you use depends on the current state of your Cedar.

  • Hit The Deck

Cedar that has no oil or stain on the surface will only require a gentle wash using an oxy cleaner or percarbonate solution to kill off any built-up organic matter. Hit The Deck by Wet & Forget works very well and doesn’t contain any bleaches or chlorine.

  • Dryden LiquidTimberClean

If your Cedar has been affected by the sun and started to age, you may need to brighten it back up. Dryden LiquidTimberClean is an oxalic acid-based cleaner that is effective at lightening stains and brightening timber. Be careful using this product around windows and joinery as it can tarnish the surface if not rinsed properly.

  • Resene Timber and Deck Wash

For general cleaning, Resene Timber and Deck Wash is very effective for cleaning hardwood and softwood timber surfaces. This wash only has a small amount of bleach and is effective at killing off anything organic. An excellent product, we use it all the time.

  • And avoid…

We do not recommend any products that contain a heavy solution of sodium hypochlorite, commonly known as bleach. This often comes with the benefits of “spray and walk away” or “done in 30 seconds”. It will certainly clean the Cedar and kill off anything that’s on the surface, but it can damage the cellular structure of the timber.

Quick Note About Stains

Stains are like white paint. You can buy white paint from 20 different paint manufacturers and each one will tell you why theirs is the best.

Which stain you use is much less important than when and where you use it.

Stains perform best out of the harsh UV, on areas sheltered by trees and other buildings, south-facing, or under soffits.

If used on areas exposed to the sun, they will eventually break down. If a stain cracks, water will get in behind and delaminate the stain, lifting it from the surface.

When stains fail, it takes a lot of work to make the stained surface look good, even more than with oil. Just remember, when choosing your coating, the sun will ALWAYS win. Make sure the stain is out of the sun, and you should be fine.

Best Cedar Stains

  • Resene Woodsman Waterborne Oil Stain

Resene Woodsman Waterborne Oil Stain is our stain of choice. This stain is a penetrating water-borne wood oil stain that is designed to erode, rather than form a film on the surface, which is what you want. As the stain is very thin, it gives a chance for the oil to get into the timber. This stain has been around for 15+ years and we have a lot of confidence in the product.

  • Cabbots stain

Cabbots stain, by Dulux, is another product we regularly use. Cabbots is an excellent stain, with the slight reservation that this is a film-forming product, and it can get brittle if over applied.

  • Coating Remover Sea to Sky by Resene

If you need to remove a previous stain before application, use a coating remover that uses organic or citrus based compounds. Avoid methylene chloride products, which are very aggressive.

Coating Remover Sea to Sky by Resene is an organic stripping compound that contains no harsh chemicals, and is very effective at removing paints, coatings and residues.

  • Be careful, it’s a messy job…

Mask or cover the areas adjacent to the areas you are working on and make sure you get all the product out of the timber. Use a water blaster at the correct pressure to remove any latent product sitting on the timber’s surface.

Quick Note About Oils

Unlike stains, not all oils are made equally. As oil is the base ingredient in these products, the quality of the oil can affect the speed of penetration and dry to touch time, and the final look and feel.

Choose an oil from a reputable manufacturer that has been formulated for the specific conditions in New Zealand.

Other factors to consider include the biocide package (to keep away nasties), available colour range and the degree of transparency. depending on how much you want the Cedar to come through.

All that said, it’s always better to apply oil to your Cedar than not. You are looking to protect the surface of the timber from the harsh sun, and anything is better than nothing.

Best Cedar Oils

There are 3 different products we can recommend. Before getting to our top pick, we need to cover a little history to better understand the evolution of Cedar oil products.

  • CD50

CD50 (now known as CUTEK Extreme CD50) is the original Cedar oil and has been around for 40 or 50 years. The product has since been bought by an Australian company and reformulated for the Australian market. We don’t use this product much as the alternatives listed below are better suited for New Zealand conditions. Regardless, this is a quality penetrating oil with a long and storied history.

  • Dryden WoodOil

Dryden WoodOil is owned by Dulux and specially designed for our conditions. 20 years ago, CD50 was sold off and the manufacturers reformulated Dryden WoodOil from the old CD50 chemical makeup. Dryden WoodOil is water-repellent, non-filming, and a true migrating oil that gets deep into the timber. We regularly use this product and can recommend it without hesitation.

  • Wood-X

Wood-X is our top pick and the oil we recommend for most of our customers. Wood-X is made by Resene and specifically formulated for New Zealand conditions. Wood-X is a non-film forming, viscous mineral oil that is designed to penetrate exterior hardwood timbers and improve dimensional stability. 

Wood-X also has an excellent biocide package, high quality and proven tints (colour tones), and uses high grade oil content that speeds its penetration and ‘dry to touch’ time.

Full disclosure: TimberTech helped to develop Wood-X and Mark has a small shareholding in the business. We are proud of our association with Wood-X and wouldn’t recommend it if it wasn’t the absolute best product for our customers.

Need Help or Advice?

If you have any questions about the products we covered, please get in touch with our team. We are more than happy to give advice and point you in the right direction.

15 Nov 2023
Let's get to the point. Is DIY Cedar maintenance possible? Absolutely. Furthermore, the process is relatively straightforward. But there are some factors to consider before attempting DIY.

Let’s get to the point. Is DIY Cedar maintenance possible?

Absolutely. Furthermore, the process is relatively straightforward.

Cedar maintenance is all about protecting the timber from the elements, most importantly, the harsh New Zealand sun. If you have a long, hot summer, the natural oils in the boards will be sucked out by the sun.

Your job is to replace the oil that the sun is extracting. Without oil replenishment, the boards will dry out over time and begin cupping.

A general DIY Cedar maintenance plan would involve soft washing your house once every few years and applying a coat of oil to sun-exposed faces every 2-3 summers.

Seems straightforward, right?

So is changing the oil on your car, but very few people have the time or are willing to get their hands dirty. The same goes for Cedar.

Here are some factors to consider before attempting DIY maintenance.

1. Convenience

We have a customer in Northland who is 83 years old and had previously maintained the Cedar on his family home for decades – and did a great job of it. Now that he can’t get up the ladder like he used to, he came to us for help.

Anybody can learn how to maintain their own Cedar, but not everybody has the inclination. Maintaining Cedar is physically demanding, often working at heights, using bulky equipment, in a wet and mucky environment.

Hiring a professional means you don’t have to worry about anything. They will bring all their own equipment, have experience working at heights and clean up after themselves, leaving nothing but a beautifully maintained house.

2. Property Access

Accessing the different areas of your house can be tricky, and potentially dangerous.

Even on a flat property, there are always parts of a house that are difficult to reach. The job gets even more complicated if the ground is uneven.

Double story house can be quite daunting. Some houses require scaffolding, but most houses can be accessed with a ladder.

If you are not comfortable working on a ladder, or the ground around your house is uneven, it is usually safer to hire a professional who is experienced working at heights.

If your house does require scaffolding, a professional Cedar maintenance company will often have their own scaffolding and manage the whole process, saving you time, headaches and money.

3. Risk of Damaging the Cedar

The surface of a Cedar weatherboard can be easily damaged. The water blaster should be set at a low pressure and moved across the boards in a steady motion without pausing.

Water blasting at a high pressure can strip away too much of the soft tissue in the timber, leaving it streaky and unsightly.

This is often when we get called, only now the customer is paying for remedial work to restore the damage rather than just maintenance.

Your home is usually your most valuable investment. By hiring a professional, you are removing the risk of damaging the timber and ultimately, adding value to your investment.

4. Preparing the Cedar for application

Cleaning and preparing the Cedar is the most important part of getting a satisfactory finish.

People can be so scared of damaging the timber, that they use a water pressure that is too low or don’t scrub sufficiently to properly clean the Cedar.

If you do not remove all the built-up organic matter, whatever you put on the surface will then be compromised.

To prepare your Cedar with a water blaster, make sure you wash it at the right pressure, or scrub the boards with an appropriate brush, making sure the boards are free of any timber fibres, oxidised tint, dirt, mould, lichen and moss.

Once all that is gone, you need to make sure any stain on the boards is evenly removed. You don’t want the boards under the soffit left a different colour.

5. Consistent application of the product

Applying a stain is simple, you move the brush from one side to the other keeping an even coverage and a wet edge.

But getting an even finish across the boards takes time and practice. If the stain dries before you finish, there will be lines in it.

We have also seen DIY oiling attempts that only go 3/4 of the way up the wall because they couldn’t reach any higher, or thought the Cedar was protected by the soffits of the house.

Trying to blend that in after the event is very difficult and always ends up costing more in the long run.

Thinking Twice About DIY?

Anyone can learn how to maintain their Cedar, but it probably looks easier than it is and is fraught with little problems that when added together, become bigger issues.

If you require expert advice, call us on 0800 298 298. Our friendly team is always ready to help.

17 Oct 2023
Many Cedar homes that were built before the 2000s have a distinctive red colour than now looks dated. At the time, the red/brown tint was all that was available, but now we have access to a wide range of tinted oils and stains.

Most Cedar homeowner aren’t aware that they can change the colour of their Cedar. It usually comes about in our initial conversation with new customers who have just bought their home and want a more contemporary look.

Many Cedar homes that were built before the 2000s have a distinctive red colour than now looks dated.

At the time, the red/brown tint was all that was available, but now we have access to a wide range of tinted oils and stains.

What colours we recommend depends on the unique circumstances of each house: the existing colour of the Cedar, levels of UV exposure, whether the Cedar is treated with an oil or a stain, and when the Cedar was last maintained.

Before talking colours, it’s useful to understand how Cedar works in relation to oils and stains.

How Cedar Works

Raw Cedar can be a myriad of colours, anything from light pine to mahogany red.

There is a lot of red Cedar around. If you cut it in half, the inside is a deep red colour. Add oil to that and the red pops out, making it a difficult base colour to compete with. But more on that later.

Once the Cedar has been used in construction, an oil or stain is applied to protect it from the elements and give a cosmetic finish.

A tint is a pigment added to an oil or stain. This is like how pigment is added to paint. To create a pastel colour, you start with a white base, add the pastel pigment and blend it together to get the final colour.

It’s the same principal for stains and oils.

Assessing Your Colour Options

The more drastic the change of colour, the more difficult the process will be.

If you have a natural Cedar colour, which is less red and more of a brownish hue, it can be covered with a dark brown or black quite easily.

If you have deeper colours such as dark red, changing the colour becomes more difficult.

For a lighter or muted finish, you would need to scrub off some of the deep red. If you are going for a brown or black finish, you need to put on more of the next coat to hide the red that is underneath.

Changing from dark to light will also be more expensive, as the initial colour will need to be stripped back and is a much more intensive process.

Changing Colour with Oils

When an oil has already been applied, the tint will often need to be stripped from the surface using a degreaser. Because oils are translucent, they work with the colour underneath, which is generally the red Cedar.

If you don’t use a degreaser, you are working with the already pigmented Cedar and no matter how many coats you put on, it won’t make a difference.

The extent of this process depends on how much UV the treatment has been exposed to.

If the oil has been exposed for 4 or 5 summers, the tint will have oxidised and broken down, and will most likely come off with a heavy wash. If it’s only been on for 1 or 2 summers, chances are the sun hasn’t broken it down and it will need a degreaser.

If there are parts of your house that are protected from the UV, such as under soffits, we treat those areas separately to achieve an even finish.

Changing Colour with Stains

The underlying principle behind changing the colour on an oil or a stain is basically the same: you first need to remove as much of the original finish as possible to create the best results.

If any of the original colour remains, the oil or stain highlights whatever is left on the board.

Stain is opaquer than oil and hides a lot more. If you are going from light brown to dark brown, or red to dark brown, you can probably get away with a standard wash and 2-3 coats of stain. For more drastic colour changes, you will need to use a paint stripper.

Modern paint strippers are less potent than in the past and are made from organic compounds that are brushed on the surface, then scraped off and put in the rubbish bin.

Want a Modern Look for Your Home?

As you can see, there are a lot of different factors that need to be considered when looking to change the colour of your home.

To learn about your options, give us a call on 0800 298 298. One of our Cedar experts will visit your home and assess your timber.

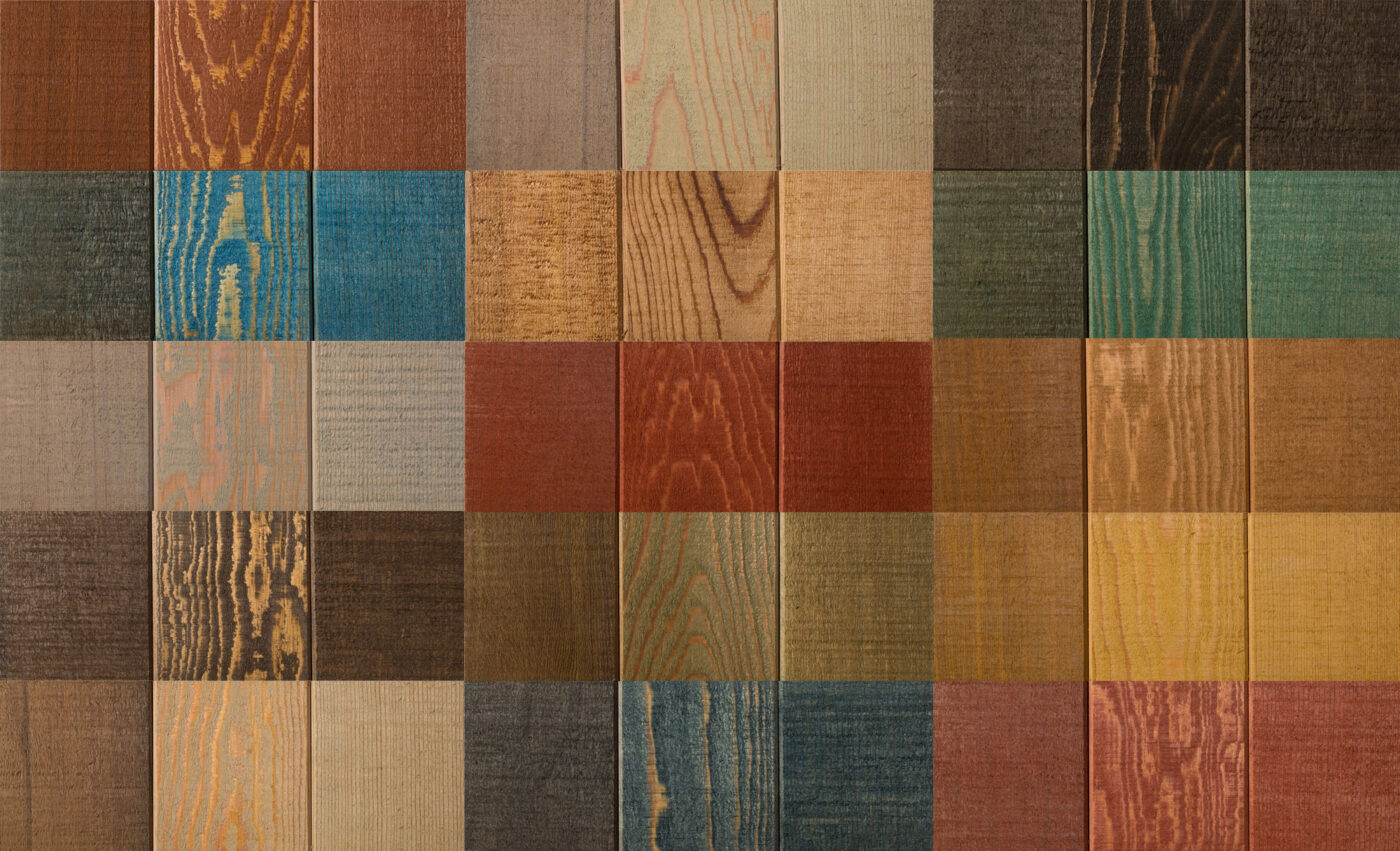
If you want to browse colours, please visit our Colour Range page and look at some swatches.

12 Aug 2023
What debate? Oil is the way to go when it comes to cedar, no contest. While stain only coats the surface of the wood, oil works in partnership with one of cedar’s basic features. You see, cedar is a naturally oil-rich timber itself – it soaks up rejuvenating oil deep into its cells for up to a year after it’s applied.

“Should I use oil or stain on my Cedar?”

This is by far the most common question we get from Cedar homeowners and a source of some debate on the internet.

In our opinion, there is no debate (with a few caveats). For nearly all situations, treat Cedar with a penetrating oil such as Wood-X.

Oil works like moisturiser for Cedar, deeply replenishing the natural oils and keeping the Cedar protected – and looking great – for many years to come.

So, there we have it, debate closed. Oil is the way to go when it comes to Cedar, no contest. But if the answer is so clear cut, where does this debate come from in the first place?

To find out, read the full article, or watch the video below for a quick summary.

With Cedar, Location Is Everything

If we were having this conversation in the northern hemisphere, the answer would be the opposite: use a stain. Stains last longer and you will have a lot less maintenance over the lifetime of the Cedar.

In New Zealand, the situation is very different. We have some of the harshest UV rays in the world which extract the natural oils from the Cedar and dry out the boards. Over time, the boards will cup and eventually crack, leading to a costly replacement of your cladding.

Stains protect the boards from moisture and look great, but unlike penetrating oils, they do not replenish the natural oils extracted by the sun. They are designed to erode over time, often unevenly, and leave the timber unprotected and unsightly.

Caveats For Using Stain on Cedar

While oil is recommended for Cedar in nearly all cases, there are some situations where stain is more suitable.

If the Cedar has considerable shade with little to no UV exposure, using a stain instead of an oil might be appropriate. This is usually when a house is shaded by dense tree cover or has wide soffits, such as villas where the roof extends over the porch.

The soffits stop the weatherboards from being degraded by the sun. These well protected areas can be treated with a stain and will look great forever.

If in doubt, get in touch, we are always happy to give an expert opinion on which treatment is best for any given job.

Comparing Costs Between Cedar Oils and Stains

Over the long term, there isn’t much difference in maintenance cost between oils and stains. The real savings come when looking at the longevity of the Cedar boards over the lifetime of your home.

Stained Cedar will dry out in the sun, causing the boards to cup and warp faster, and increase the likelihood you will need to replace your boards. A costly solution to an avoidable problem!

The difference shows up when we’re preparing Cedar for restoration. Sanding stain may reveal unsuspected insect, sun or moisture damage. With an oil recoat on a well-maintained property, it’s just a gentle clean with a bio-degradable wash, a short drying period and the re-oiling itself.

Have any more oil vs stain questions? Send us a message or use the Live Chat below!

15 Apr 2023
You might be surprised that there’s no ‘best time’ for treating Cedar and maintenance can be done throughout the year, across all seasons, given there is enough time for the oil to penetrate the timber, or the stain to cure. The real question isn’t which season is best for maintaining Cedar, but which conditions are optimal for the Cedar maintenance process.

You might be surprised that there’s no ‘best time’ for treating Cedar and maintenance can be done throughout the year, across all seasons, given there is enough time for the oil to penetrate the timber, or the stain to cure. 

We usually get asked this question during winter, when the weather outside is either rainy, cold, blowing a gale – or sometimes all three at once! 

In fact, winter is an excellent time for Cedar maintenance. Your cladding has been knocked about by the summer sun and needs nourishment, relief and protection. 

The real question isn’t which season is best for maintaining Cedar, but which conditions are optimal for the Cedar maintenance process. 

To find out more, read the full article, or watch the video below for a quick summary.

Optimal Conditions for Cedar Maintenance

To successfully apply oil or stain to Cedar, the boards need to be dry, with no threat of imminent rain. It’s that simple. 

When most homeowners think of maintaining the outside of their house, they think of paint and how long it takes to dry. Oil and stains do not work like paint and are quick drying.  

On a hot summer’s day, we can stain the side of a house and gently waterblast it 20 minutes later and the stain won’t move. 

Oils are similarly robust. On average you want to give oil a couple of hours to soak in. Once absorbed into the timber, the oil is resistant to any incoming rain and is in no danger of getting washed away or having the finish ruined. 

The Best Plan is Planning Ahead

If last summer is any indication, heavy rain can strike at any time, as can long dry stretches.  

Given our changing weather patterns, there really isn’t an ideal time to maintain Cedar and the best course of action is to get your Cedar regularly maintained, following our standard advice. 

“To protect Cedar from the harsh NZ sun and keep it looking beautiful year-round, sun exposed areas should be treated at least once every 2-3 years.” 

So don’t let winter deter you from getting your Cedar maintained. Our Cedar Technicians are experts in their field and know how to work around the seasons, even if there are four of them in one day! 

15 Feb 2023
The quick answer is: not as often as you might think. On a wall that is not in the intense sunshine, Cedar will practically last forever.

The quick answer is: not as often as you might think. On a wall that is not in the intense sunshine, Cedar will practically last forever.

Apart from being stunning to look at, Cedar is extremely durable, a superior insulator and genius at taking up deep-penetrating oil. Cedar’s worst enemy is not rain, or wind, or city grime; it’s the harsh New Zealand sun. 

Left unprotected, UV rays will eventually dry out the timber, leading to fine cracks and roughening of the surface. This creates a toehold for mould, mildew and lichen to get established and make the timber look unsightly.

Regular oiling will prolong the beautiful look and weather resistance of your Cedar by penetrating deeply through the Cedar’s open cellular structure and replacing the natural oils lost over time.

Keep reading to learn how often you need to maintain your Cedar, or watch the video below for a quick summary.

What Does Regular Maintenance Involve?

For most Cedar homes, regular maintenance will consist of a light rinse once per year at the end of winter, then a recoat of exposed areas every 2-3 summers.

Cladding only needs to be maintained on a face that is exposed to the UV rays. The remaining faces will also benefit from recoating, but this might only be 2 or 3 times over a 15-year period. The treatment that is required is very dependent on the level of UV exposure and other environmental factors.

exposed-cedar

Think of it like washing your car. If you don’t wash your car for 12 months, all the dust, debris and contaminants from the road will stick to the body. It’s the same for your house, but not as easy to spot as houses are usually flat colours compared to a shiny paint job.

How Much Will Regular Maintenance Cost?

It’s a misconception that owning a Cedar home means you will be burdened with expensive maintenance bills. Compared to houses that require regular painting, Cedar works out far more economical.

The cost will depend on the unique requirements of each house. The main factors will be the size of the house, how many stories it has and ease of access. A single-story bungalow with good access might cost $2-3k every 2-3 years. For a multi-level property with difficult access, you might be spending $8k on scaffolding before you even start looking at the timber.

Regardless of the cost, regularly maintaining your Cedar will always be cheaper over the long run than painting, or the worst-case scenario, having to reclad due to the timber cupping and splitting.

Having a regular maintenance plan can help to spread out the cost and give you peace of mind that your investment is protected – and will look beautiful for years to come.

New Builds vs Older Houses

Newly installed Cedar has a reservoir of natural oils and tannins, and it will take longer for the cellular structure to start to move. You may not have to do anything for 5 years, but eventually the Cedar will start to dry out and you will need to slow that process down with regular oiling.

New Cedar will most likely be pre-coated, or coated on-site before it gets installed. There will usually be a booklet that comes with the house telling you how the Cedar has been treated and what kind of maintenance it needs.

For a pre-existing Cedar home, the new homeowner will need to ask the previous owners what kind of maintenance plan they had in place, or what products they have used in the past. If the Cedar has been stained and the stain is in good condition, then it requires a light rinse every year and a recoat every 2-3 years, depending on the level of UV exposure.

If you are unsure about the status of your Cedar, one of our team can come around and advise you on what treatment it has received in the past, and what is required to maintain the Cedar over the lifetime of the house.

Make Your Cedar Look New Again

TimberTech are NZ’s #1 choice for Cedar protection, maintenance and restoration. Our unrivalled expertise and craftsmanship have been developed and proven over 20 years throughout New Zealand.

We will diagnose your Cedar and put together a 10-year maintenance plan, customised to your unique situation, with a maintenance schedule and a full breakdown of all the costs. There is no obligation and our goal is always to look after the best interests of our customers over the lifecycle of their homes.

To find out more, call us on 0800 298 298.

Showing 1 - 10 of 14

Subscribe

Sign up to our quarterly newsletter for all the latest Cedar tips and expert advice.

Your Free Cedar Diagnosis

TimberTech comes to you, or we review the supplied photos of your Cedar. Next, we provide you with a professional treatment plan.

Let’s get started…